MPESA
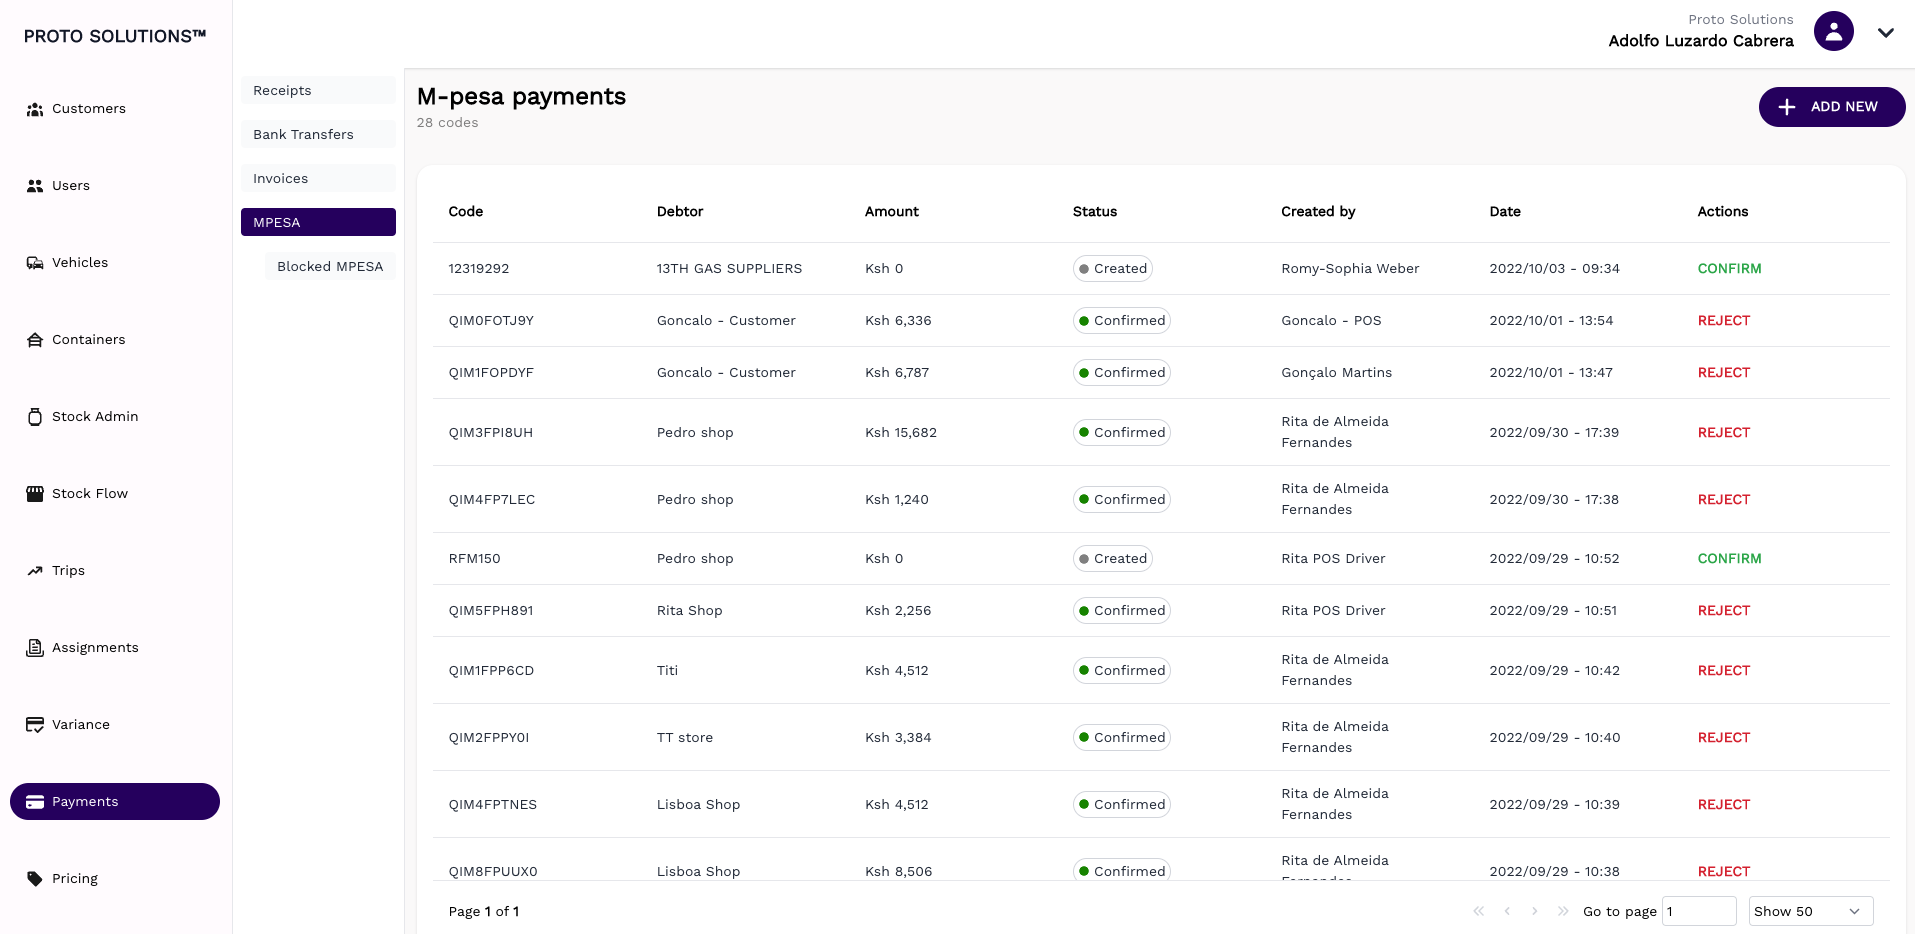
The Mpesa payments list shows all mpesa payments that the system has received (both automatically through the app by a driver and/or manually added via this page).
The mpesa payments have a status and only confirmed mpesa payments can be used to reconcile a sale. From this list you can reject payments, which changes their status to created and does not allow to reconcile a sale against.
The Debtor in this case is the driver or shop manager. Since we are adding the payment to a users Till.
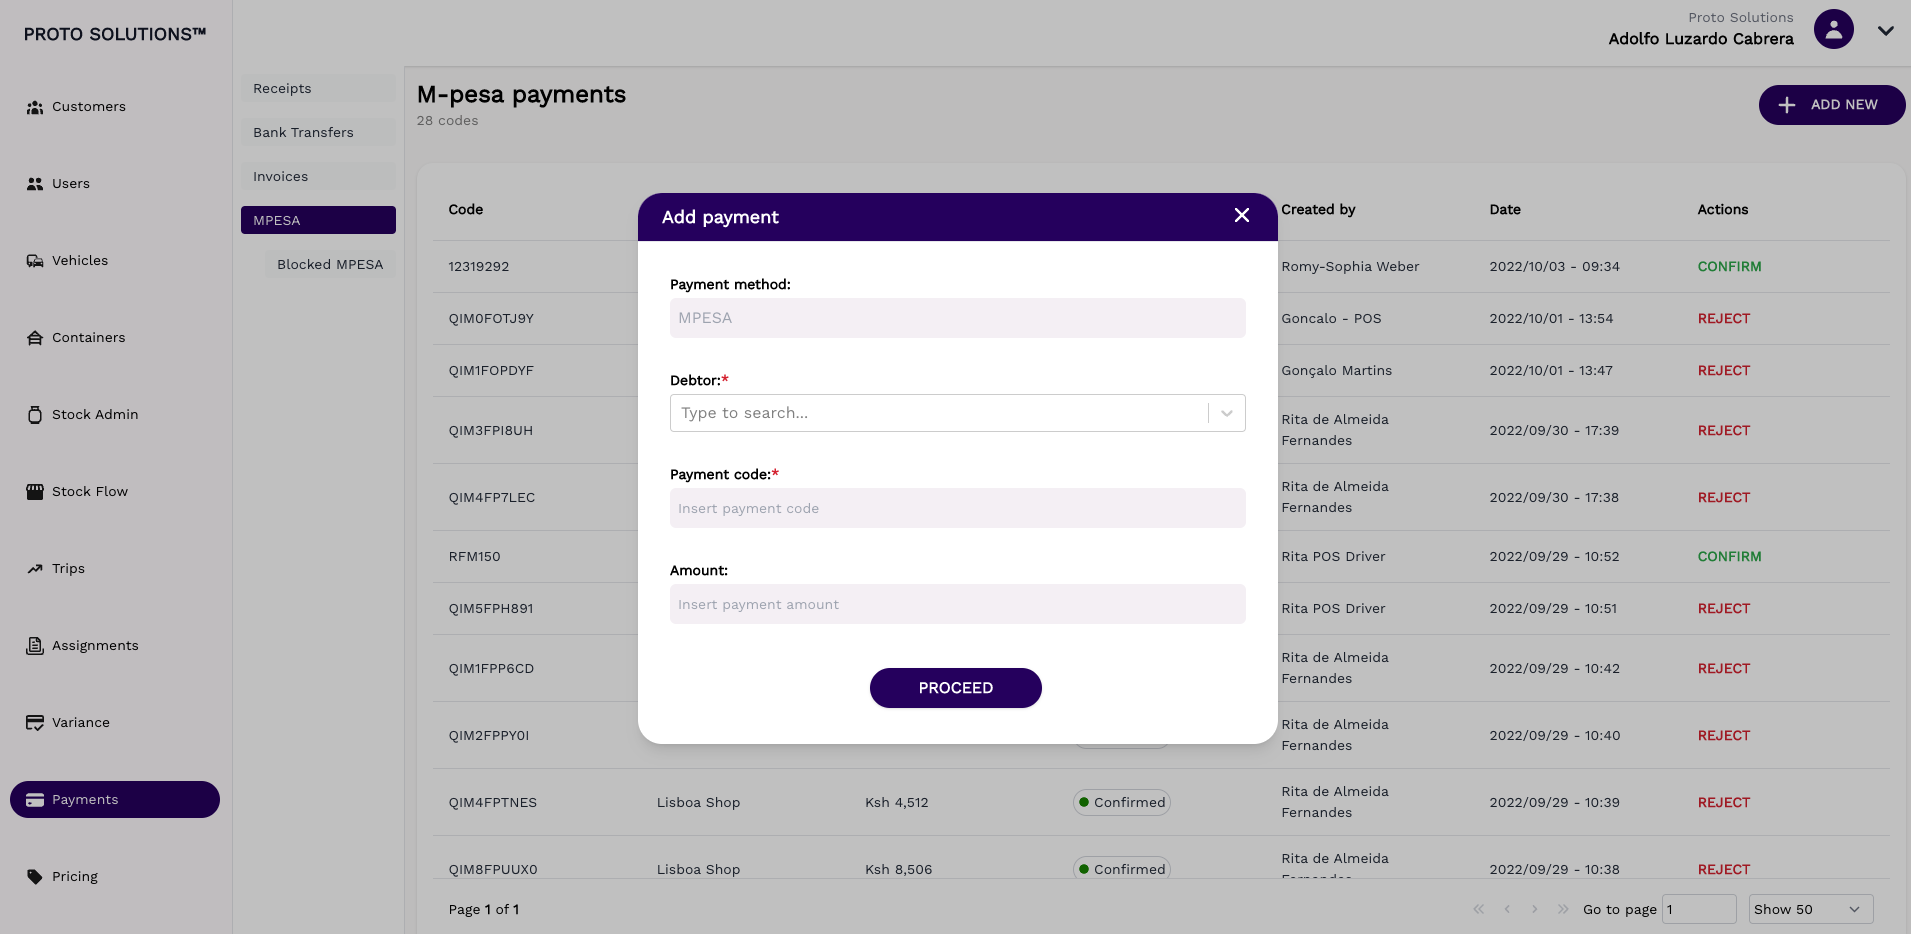
When adding a new Mpesa payment you need to define the Debtor, who is the user that you want to add the mpesa code to. The user needs to have a Till number assigned. And the payment will then be added to the users Till. Once confirmed, the payment can be added to a sale/receipt.
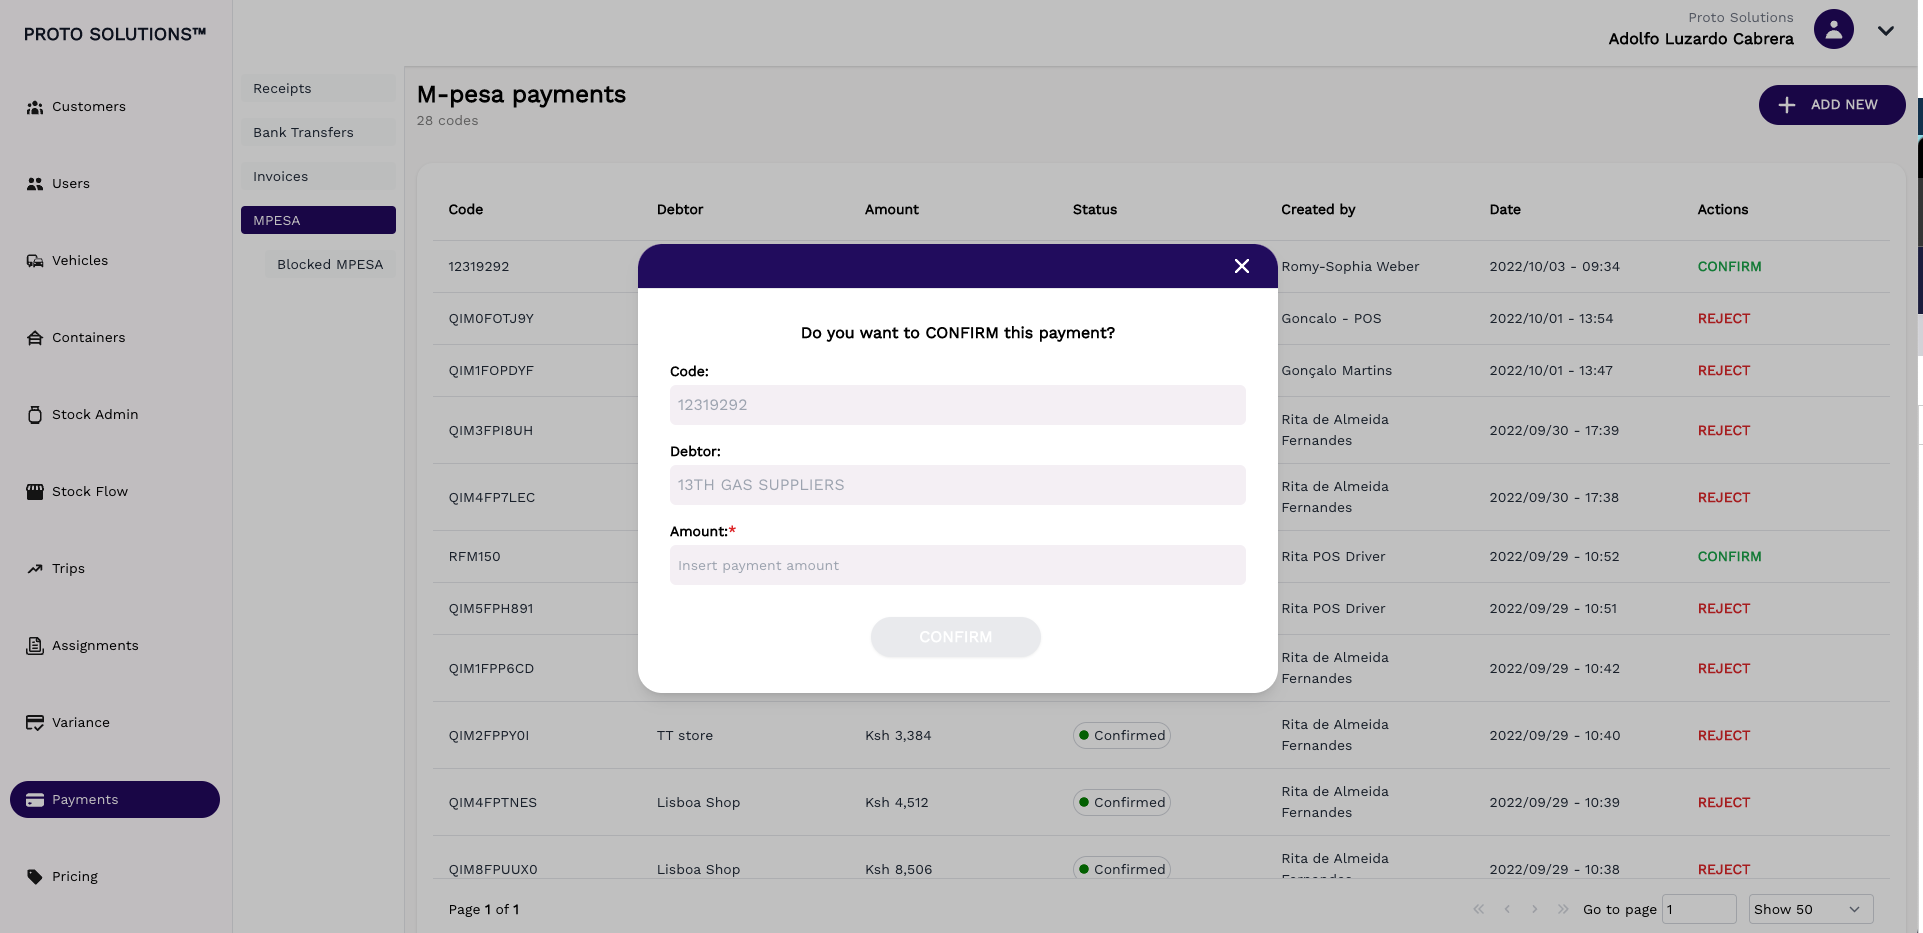
In order to confirm a payment, you will have to click on confirm In the list and then also confirm the action in the popup that you see below. In order to confirm you need to add the amount that the payment total is.
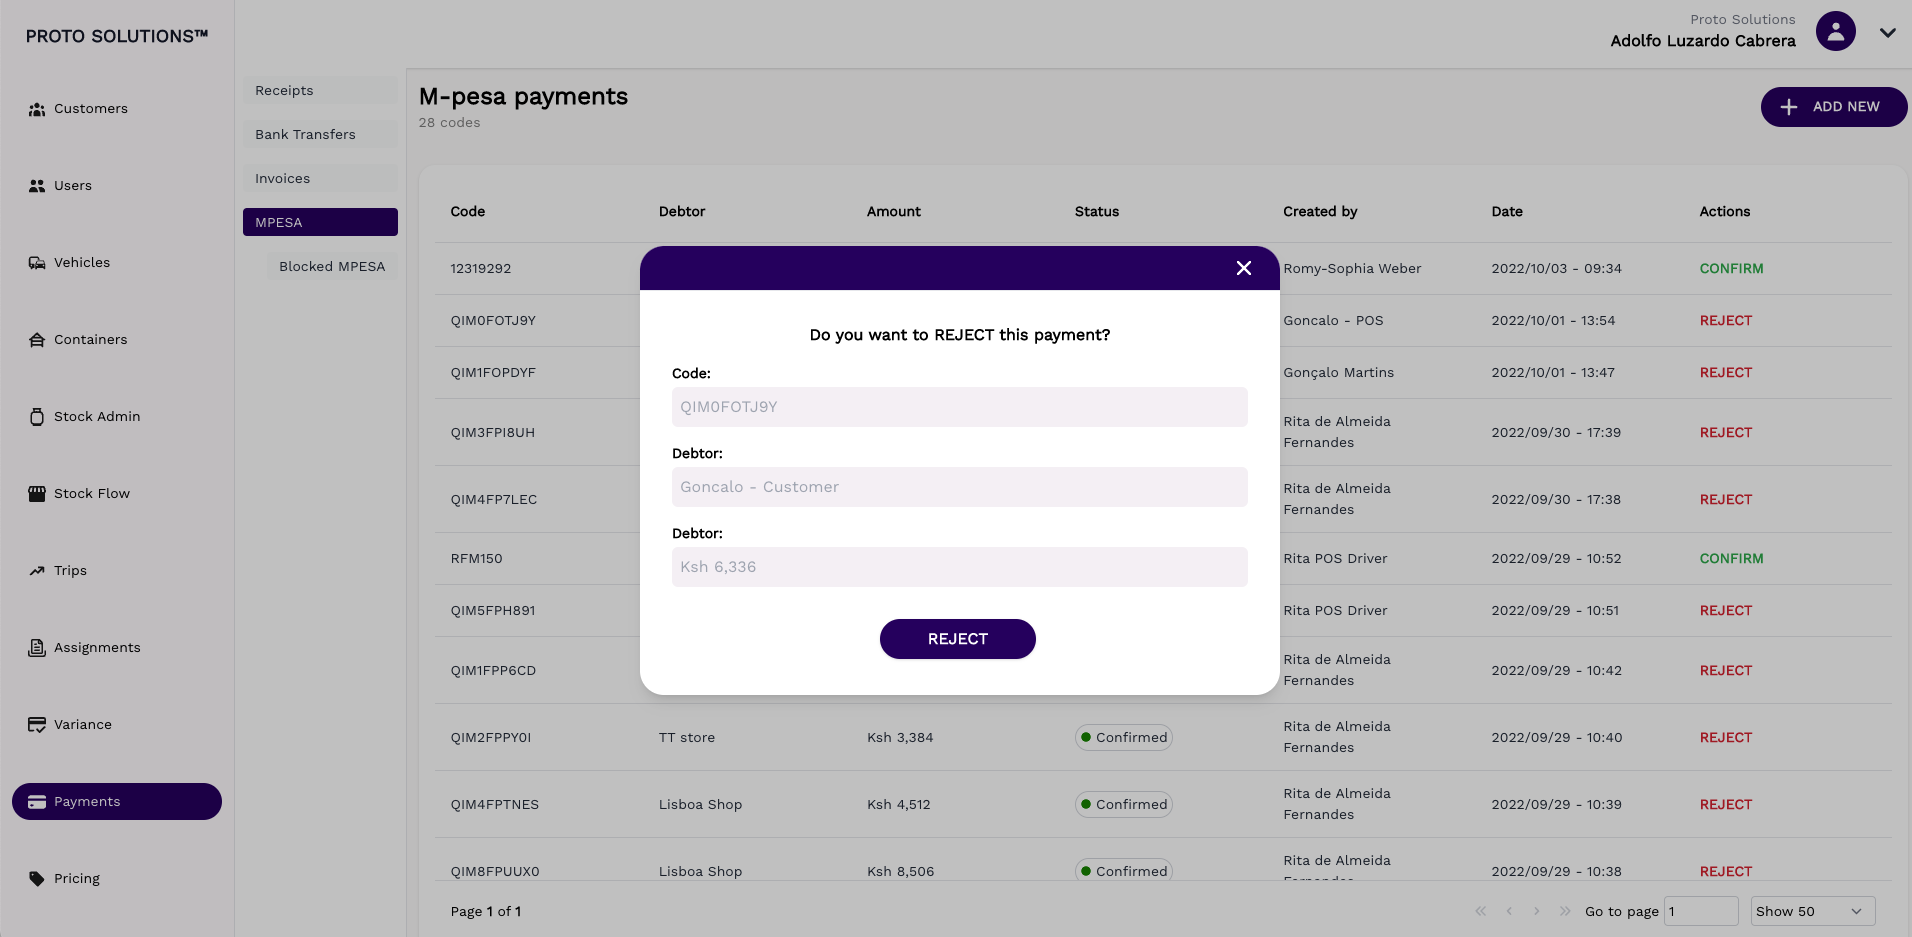
In order to reject a payment you need to click on reject from the list view, and then also click on reject in the popup. You can see the screen below:
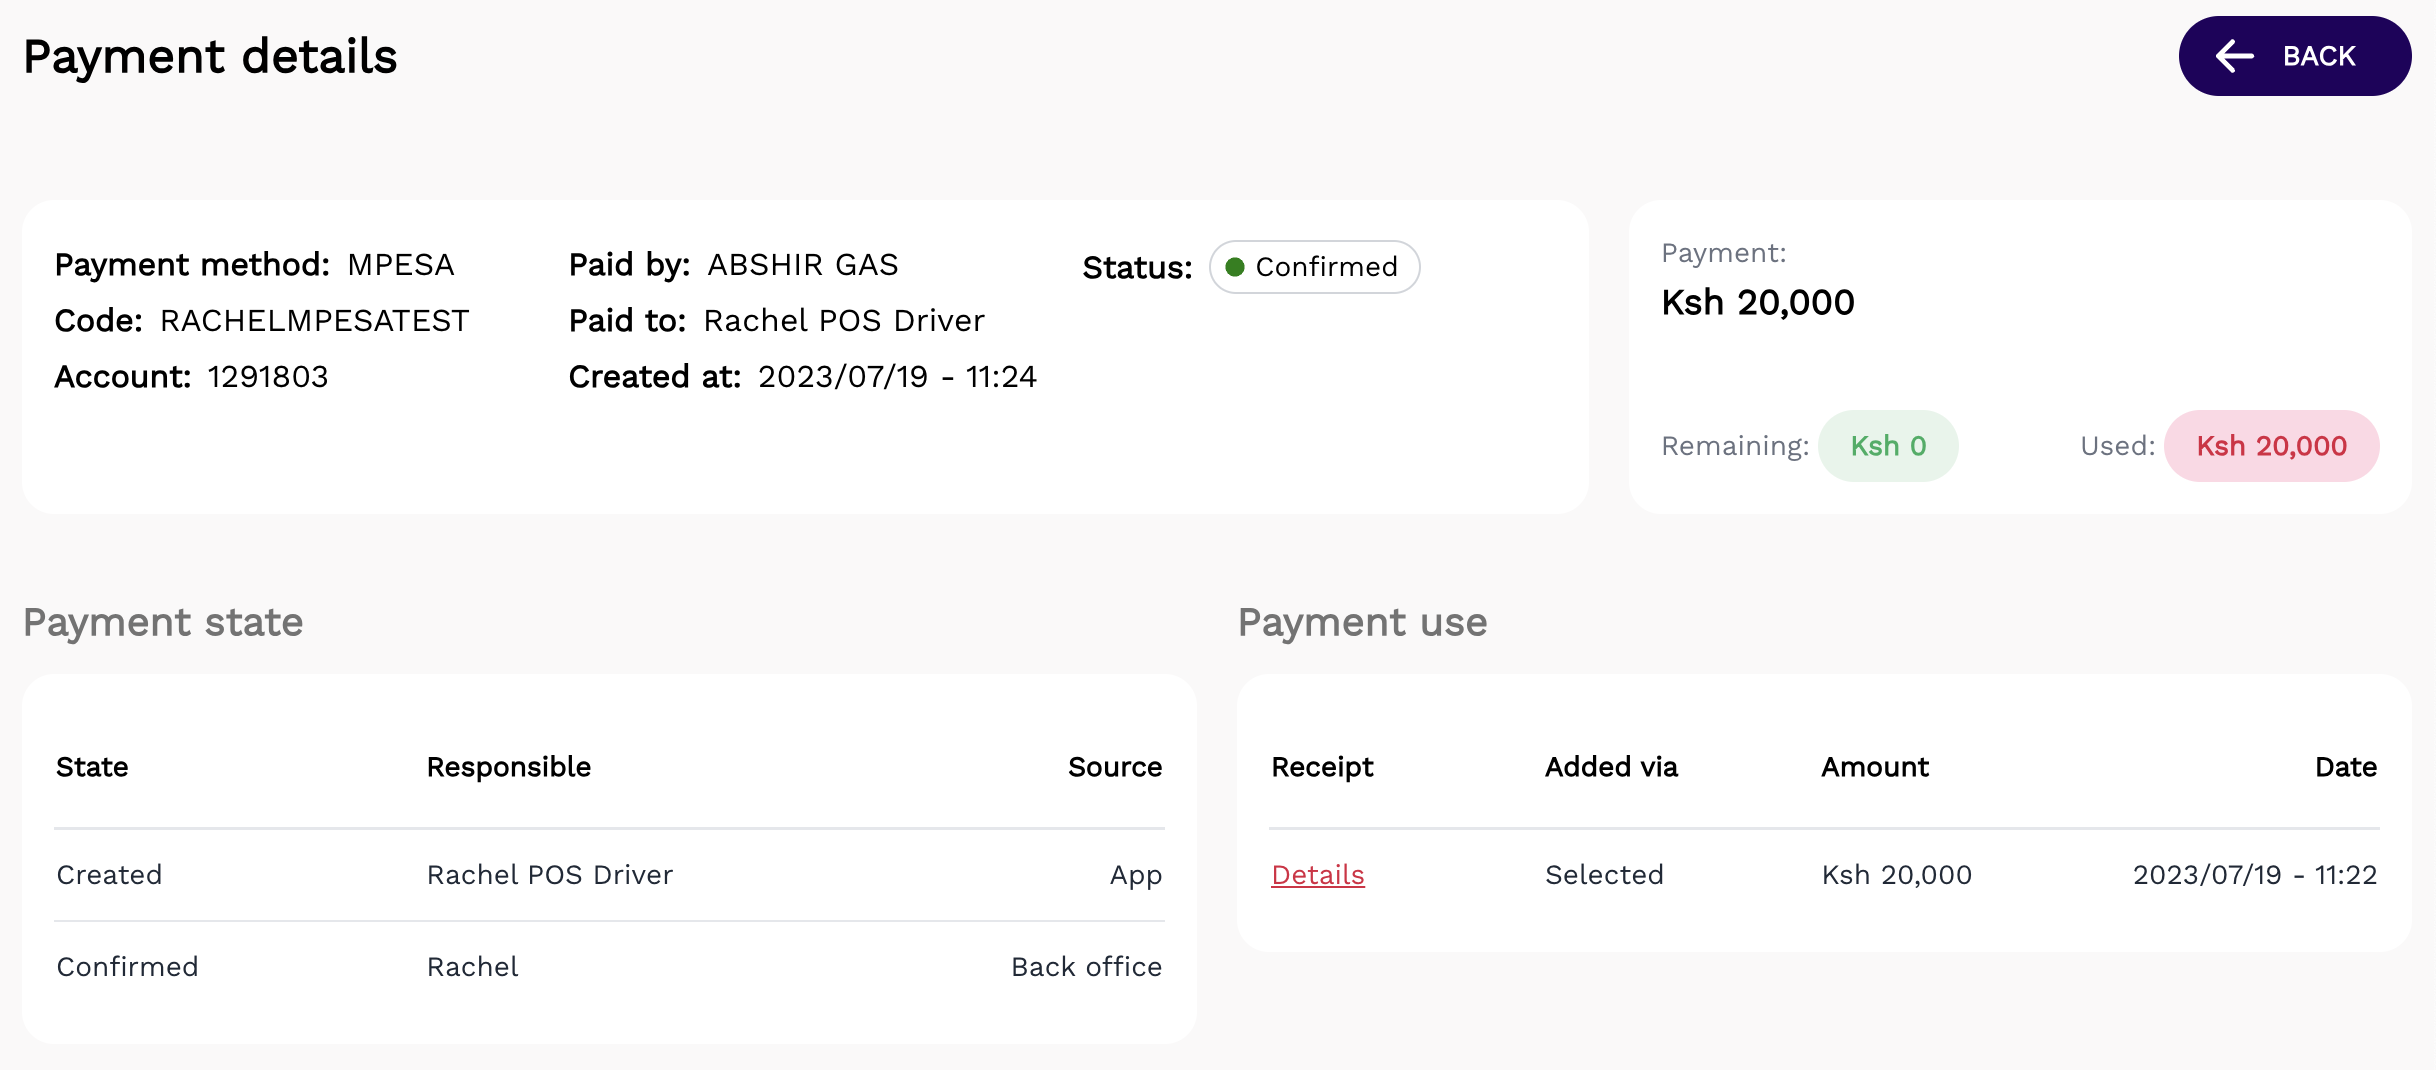
Payment details are now accessible on the MPESA page. To view more specific information about a particular payment, one needs to click on the 'eye' symbol, which will redirect them to a new page.
The provided details encompass the following:
- Payment method
- Payment Code
- The account number
- The customer who is paying (paid by)
- The employee who taking the payment (paid to)
- The date and time when the payment was created (created at)
- The status of the payment
- The payment amount as well as how much was used and how much the driver has remaining
On this page, a user can also view the payment state which indicates who the payment was created by and who it was confirmed by as well as the source where this action took place (APP or backoffice).

No Comments