# Users
# Overview/New User
#### Overview
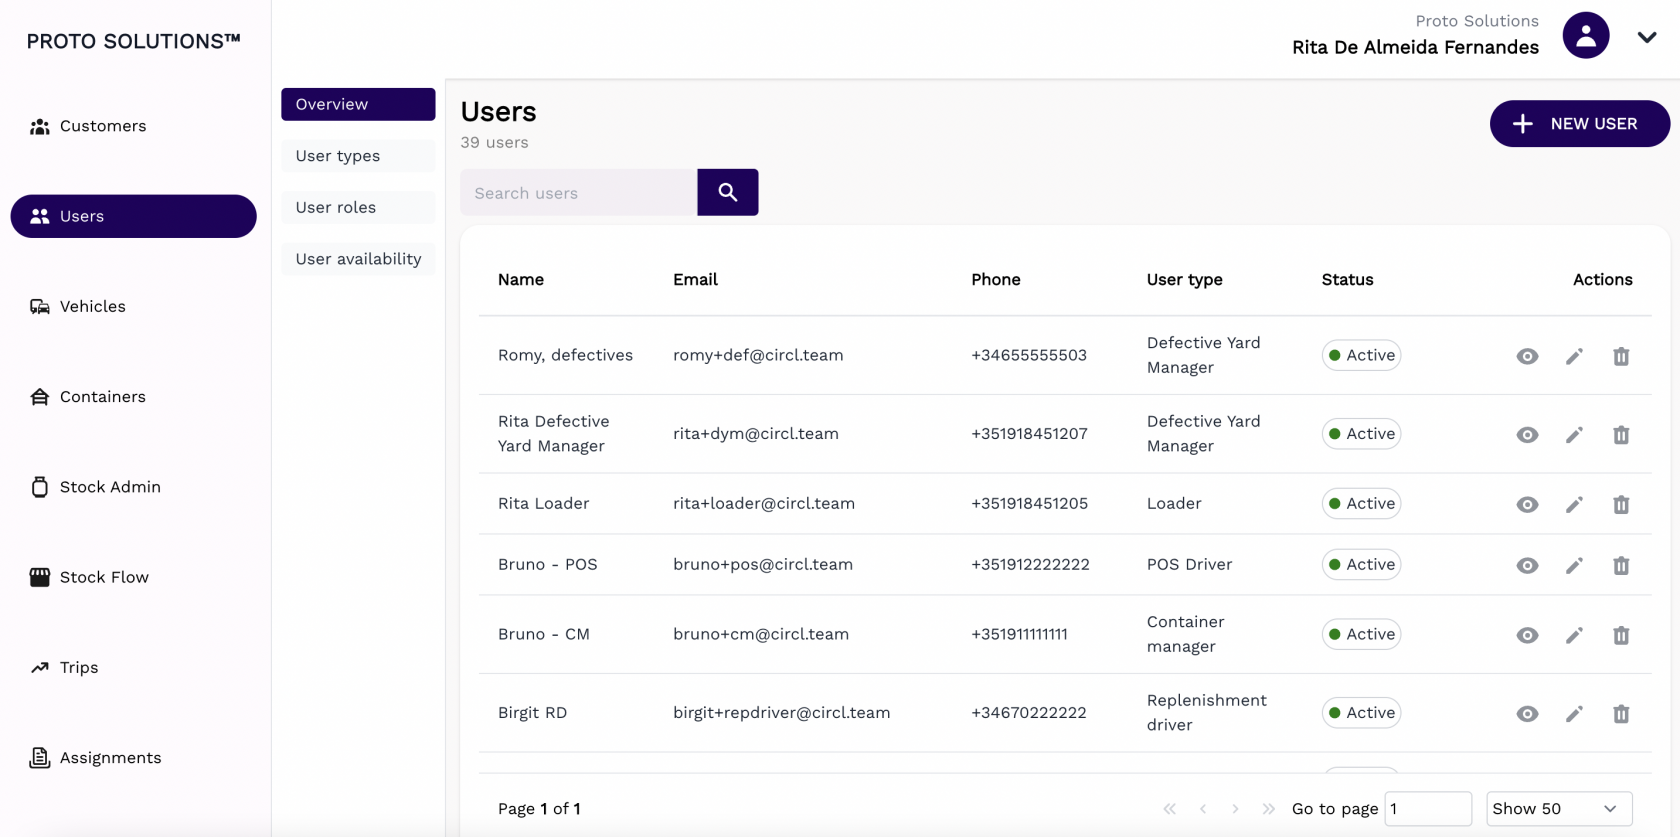
In order to see all users registered in the system or create a new user click on the **Overview** tab.
[](https://wiki.circl.services/uploads/images/gallery/2022-09/FZYimage.png)
You can click on the **Actions** buttons to display, update and delete a registered user. All users have the Name, Email, Phone, User Type, and Status information displayed.
#####
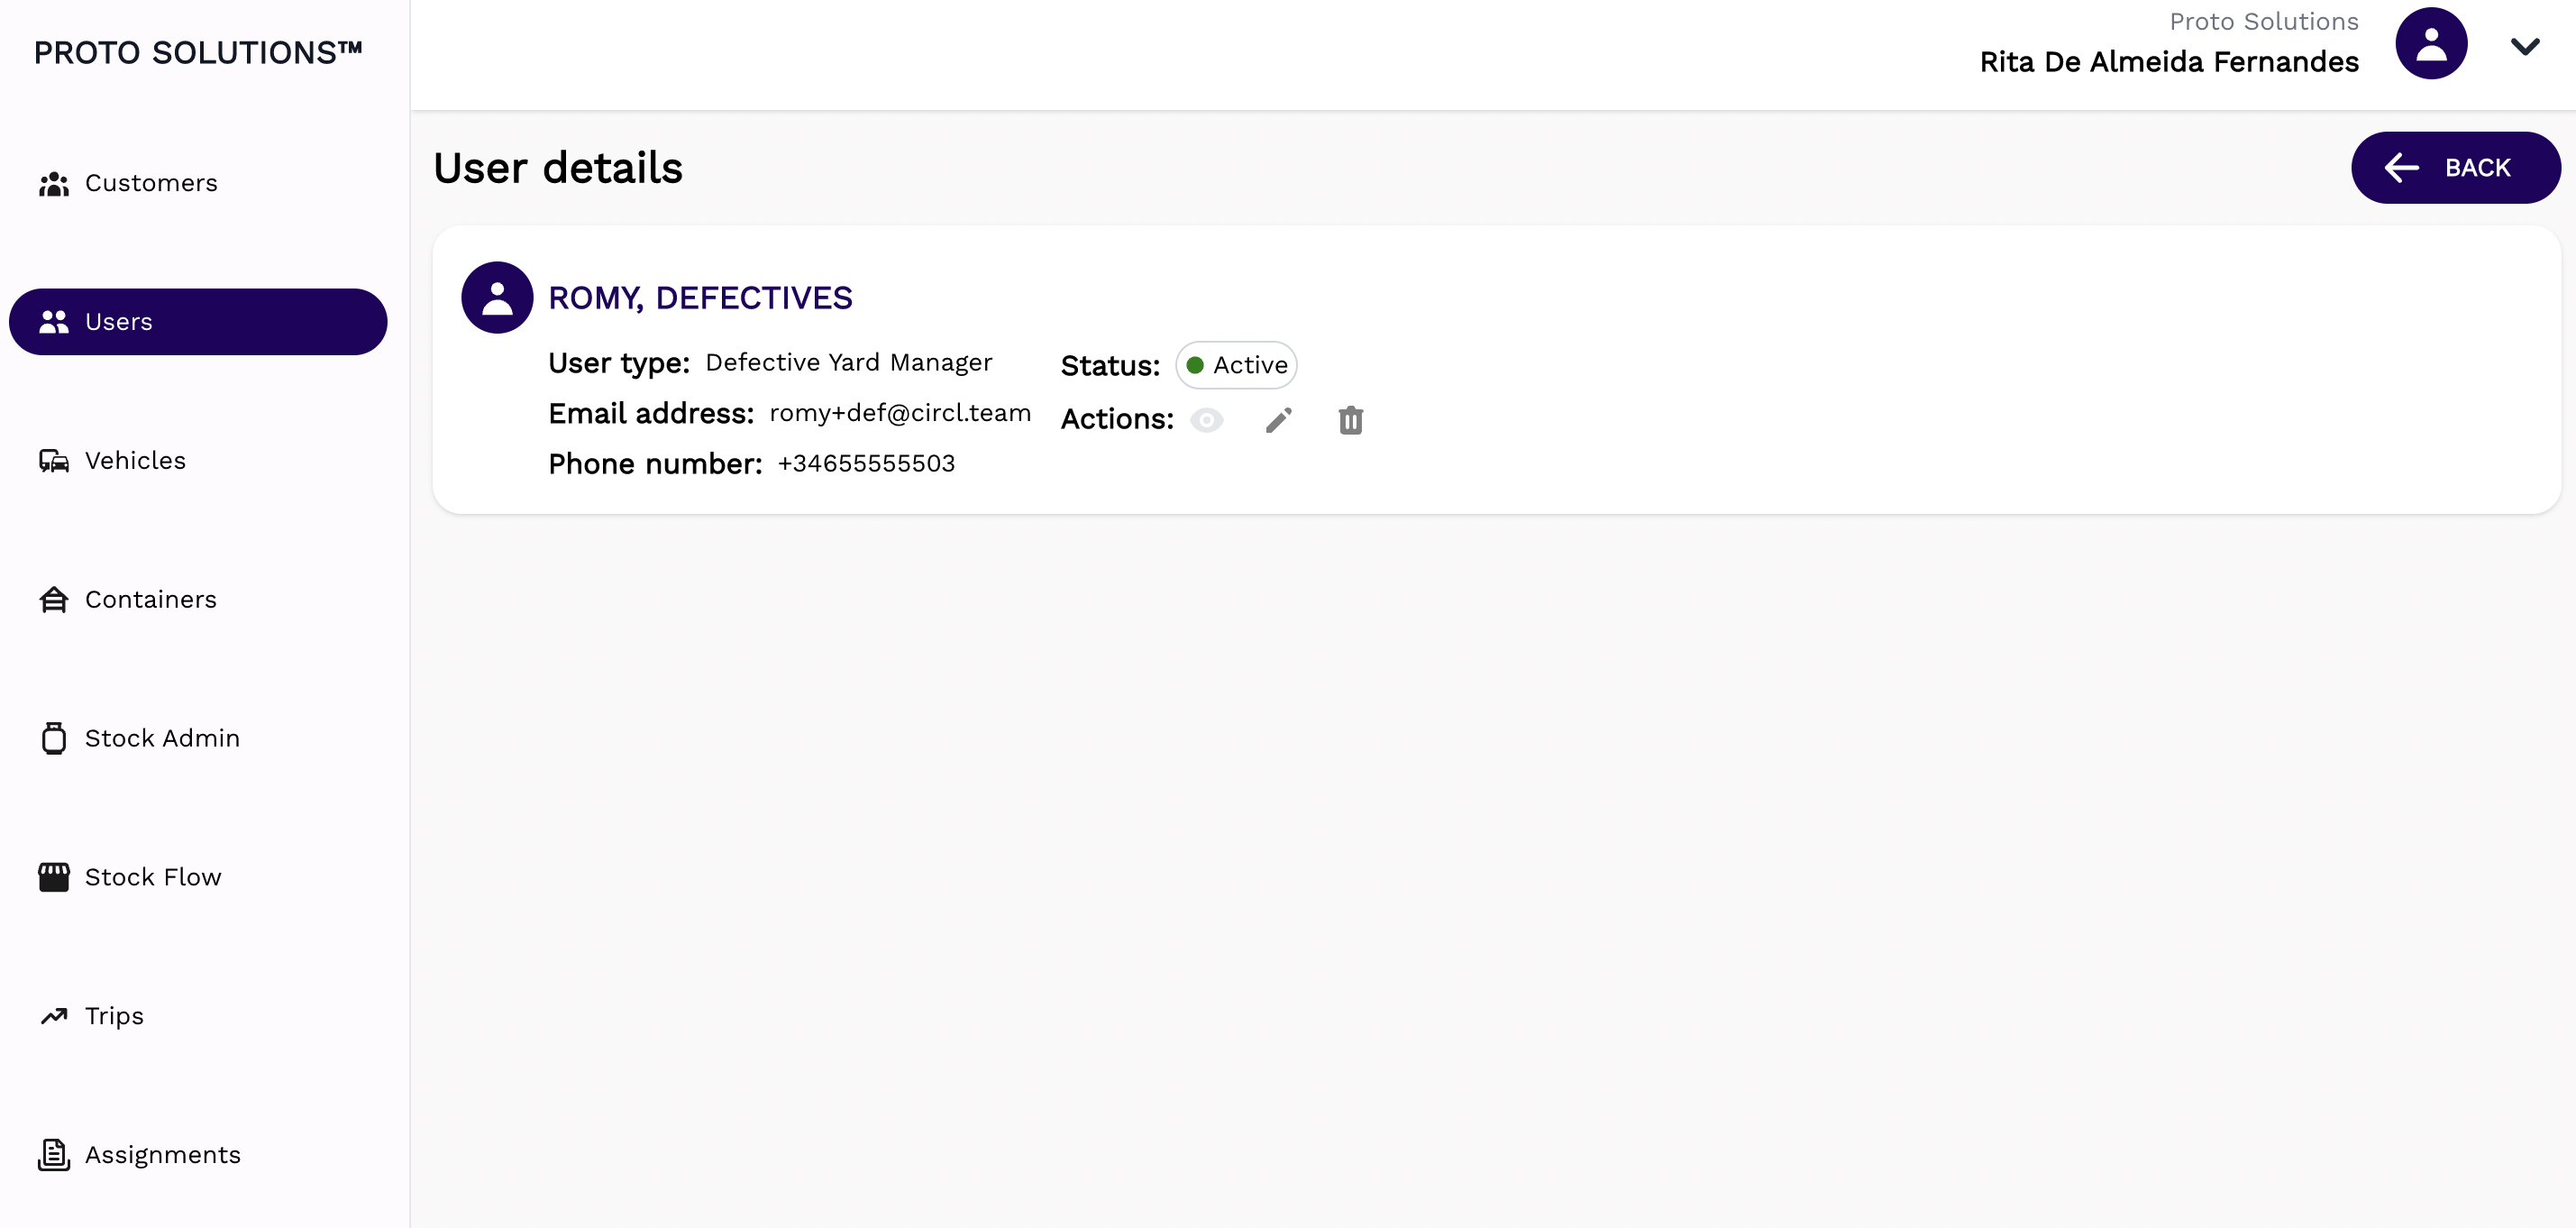
##### Display
[](https://wiki.circl.services/uploads/images/gallery/2022-09/O25image.png)
#####
##### Update
[](https://wiki.circl.services/uploads/images/gallery/2022-09/5mwimage.png)
To disable one user you need to go to user update and untick the **active** checkbox before pressing **submit**.
You can change the **user type** of the user, in the above example this **user** is of **user type** Defective Yard Manager. Every **User Type** can have a number of **roles** assigned depending on the level of **permissions** enabled.
##### Delete
[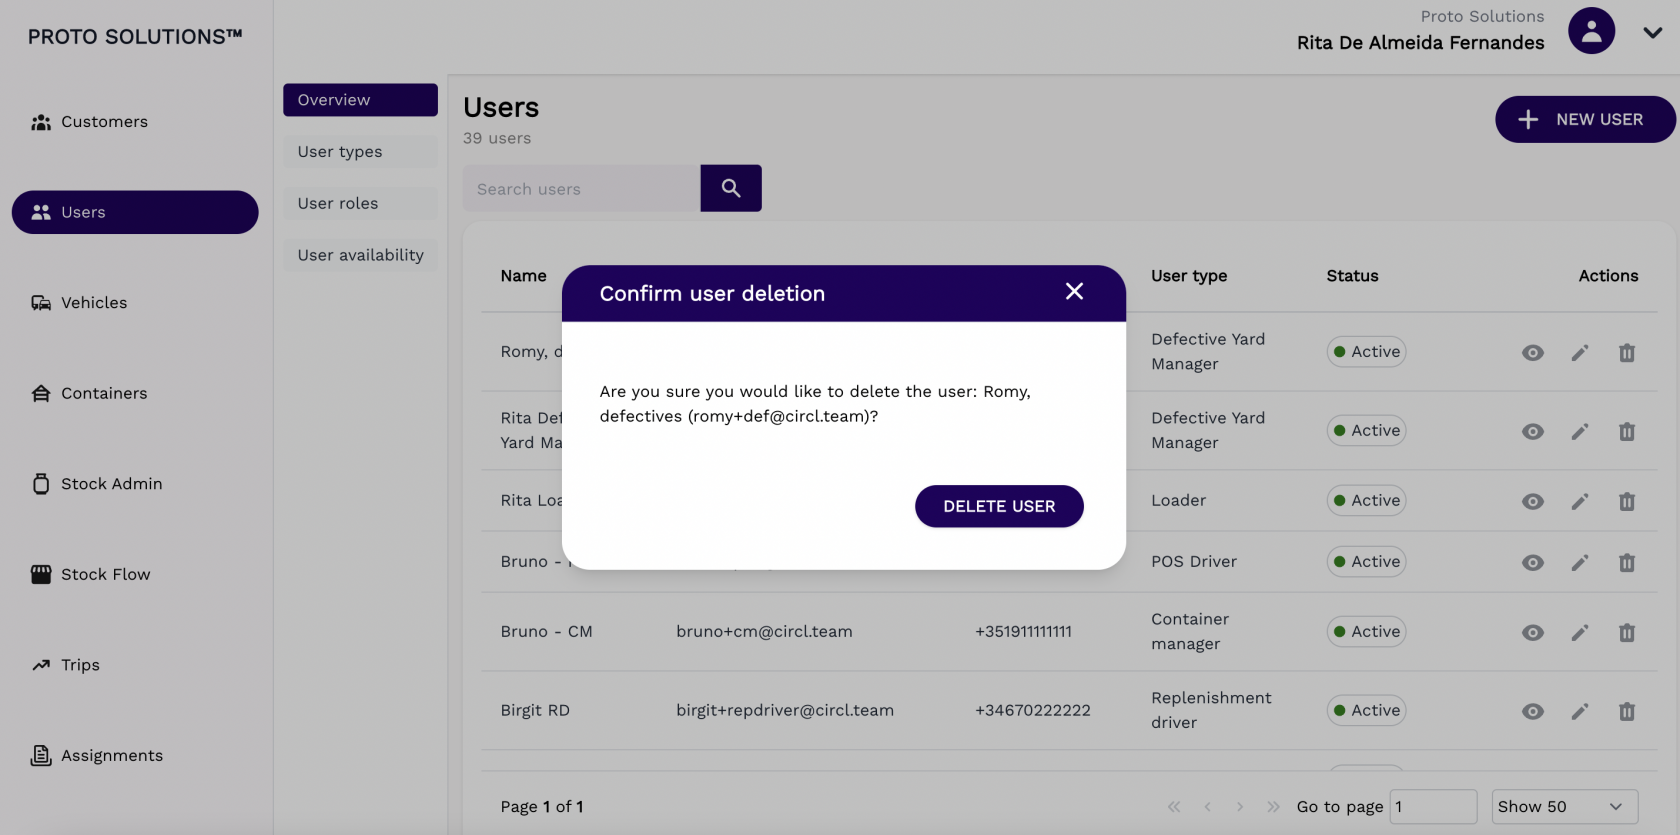](https://wiki.circl.services/uploads/images/gallery/2022-09/wEaimage.png)
#### New user
To create and register a new user in the system you can click on the **New User** button. A new page will open with the user's required information in order to complete a successful registration. The mandatory fields for the user creation are the Full name, Email address, Phone Number, and User type. The active field comes automatically filled out by default.
After filling out all the mandatory fields you can click on the button **Submit** in order to finish the user creation.
[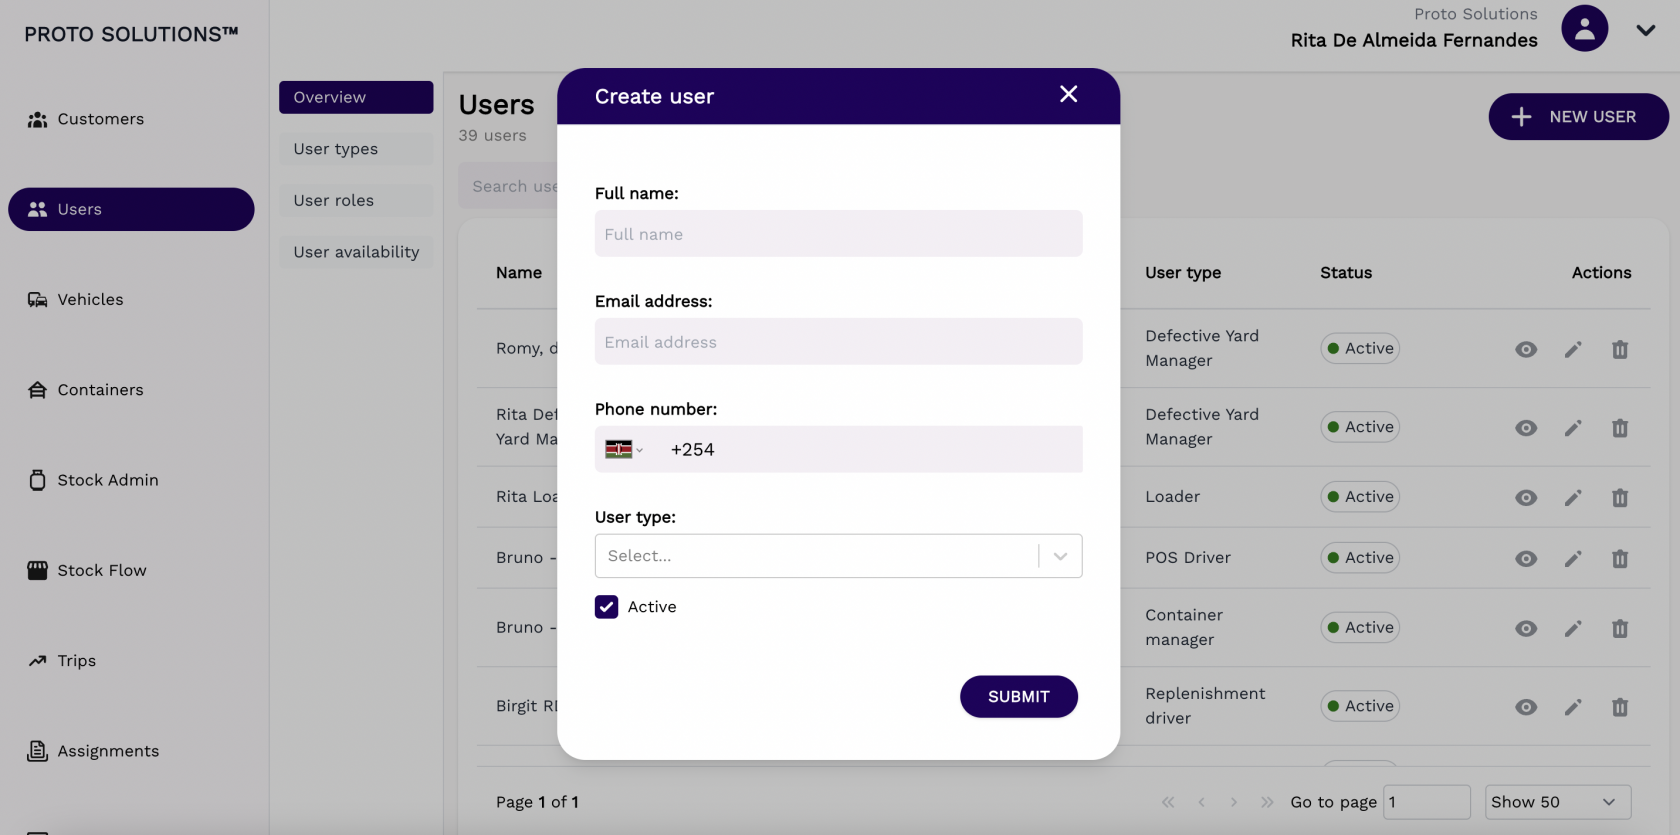](https://wiki.circl.services/uploads/images/gallery/2022-09/26Zimage.png)
# User Types/New User Type
#### User Types
In order to see all user types available in the system, you can click on the **User types** tab.
[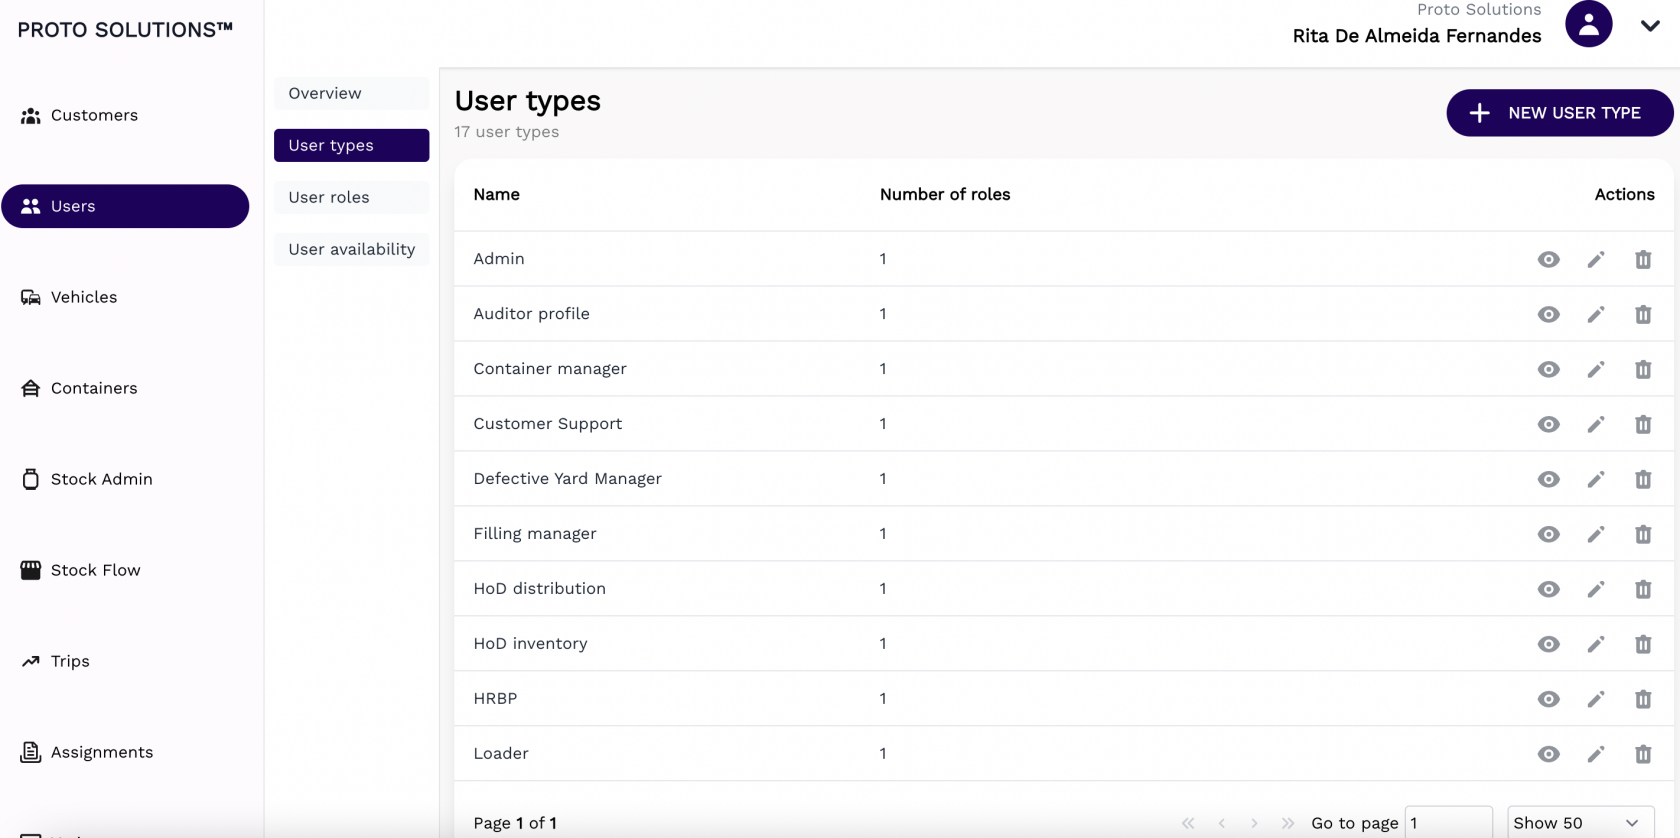](https://wiki.circl.services/uploads/images/gallery/2022-09/g9simage.png)
You can click on the **Actions** buttons to display, update and delete a user type.
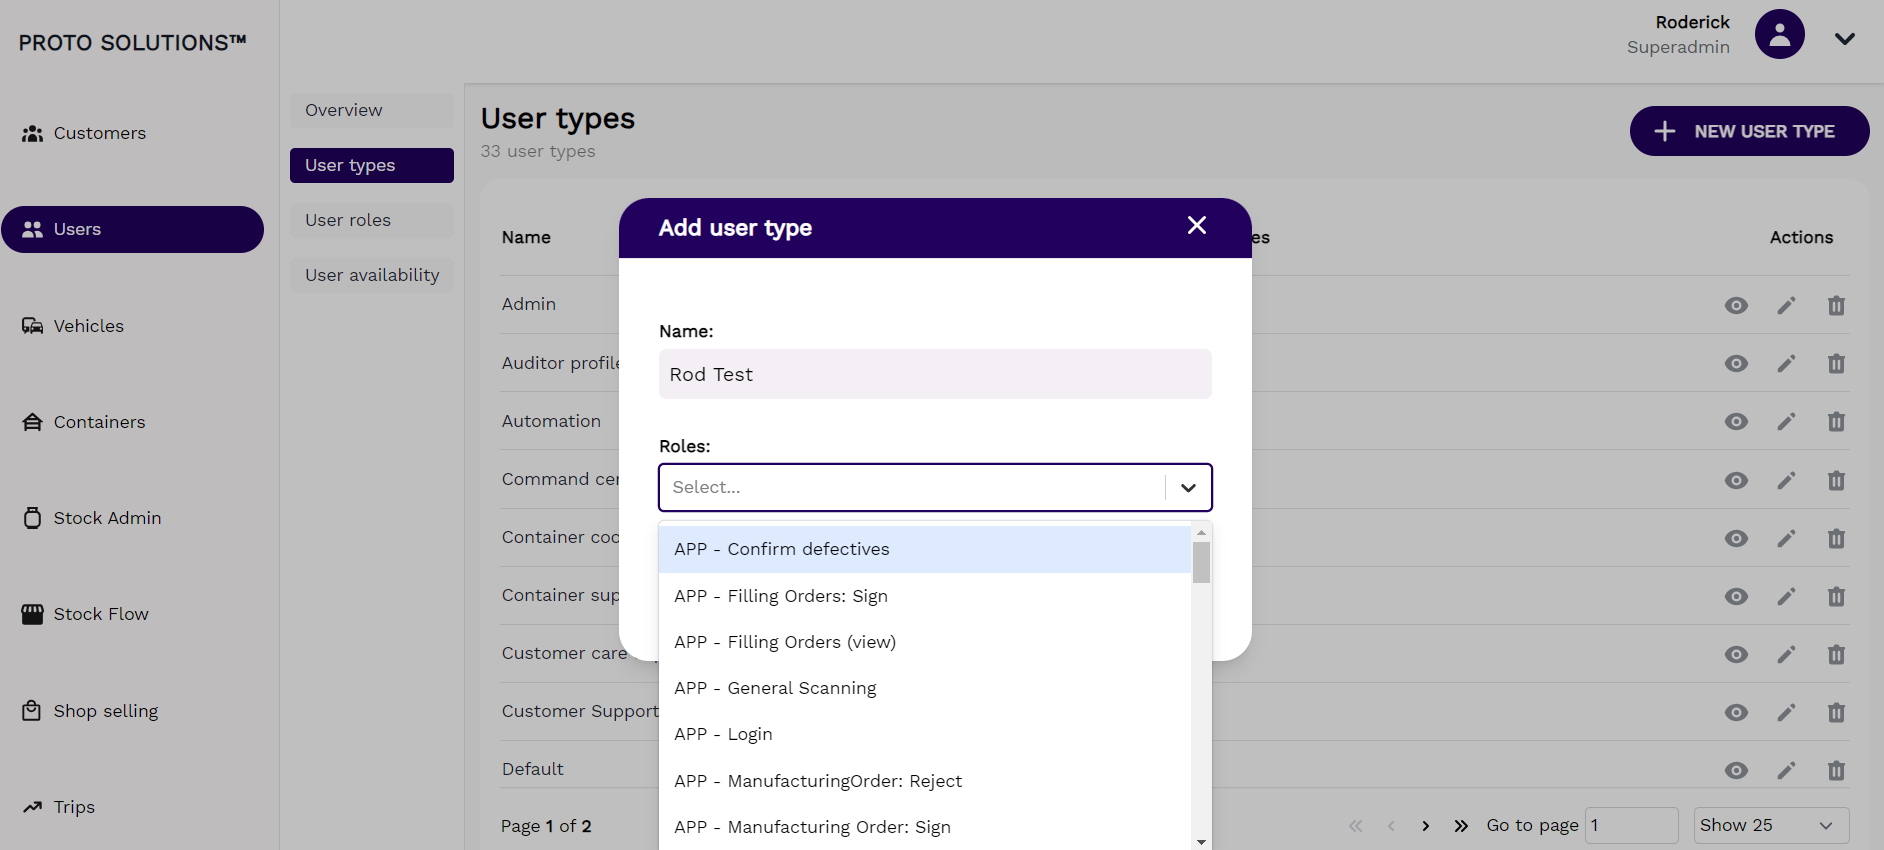
Click on the **+ New User Type** to create a new user type. All **users types** must have a **name** & **Roles** (1 or more) assigned.
[](https://wiki.circl.services/uploads/images/gallery/2024-02/xpXimage.png)
#####
##### Display
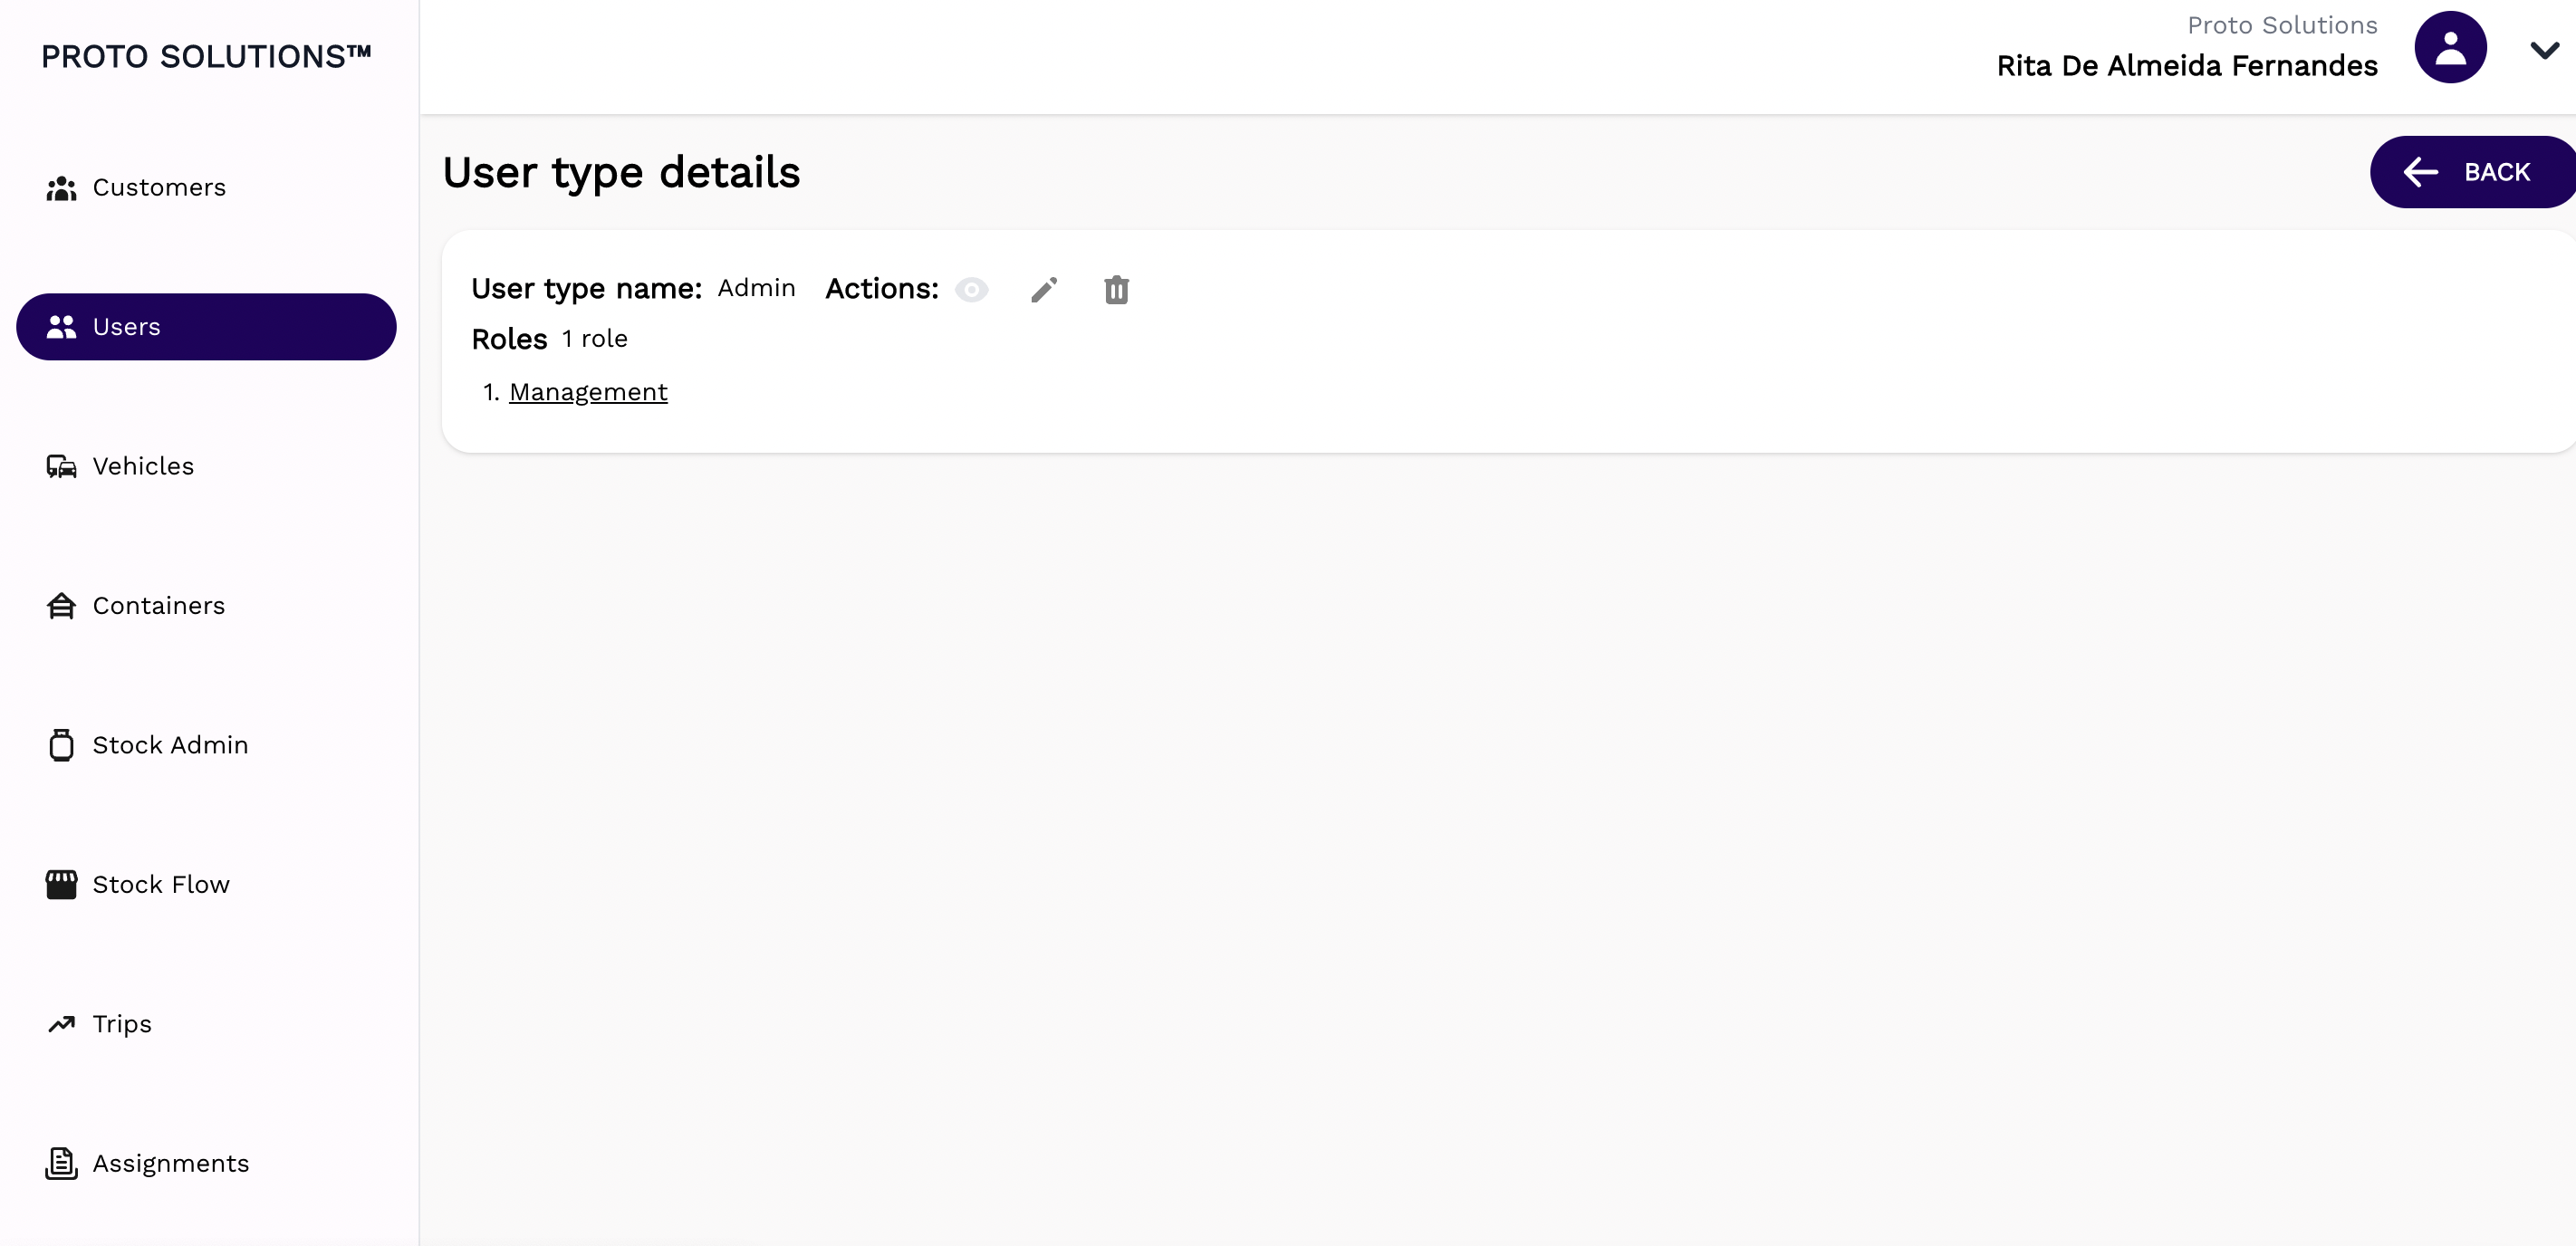
After clicking on the display action button you can see the information related to that user type and also a list of Roles. Each Role has a subset of permissions assigned to it. You can click on the individual roles to see & change the permissions assigned to that particular role in this example the **Role: Management** is assigned to the **user type: Admin**
[](https://wiki.circl.services/uploads/images/gallery/2022-09/Q3vimage.png)
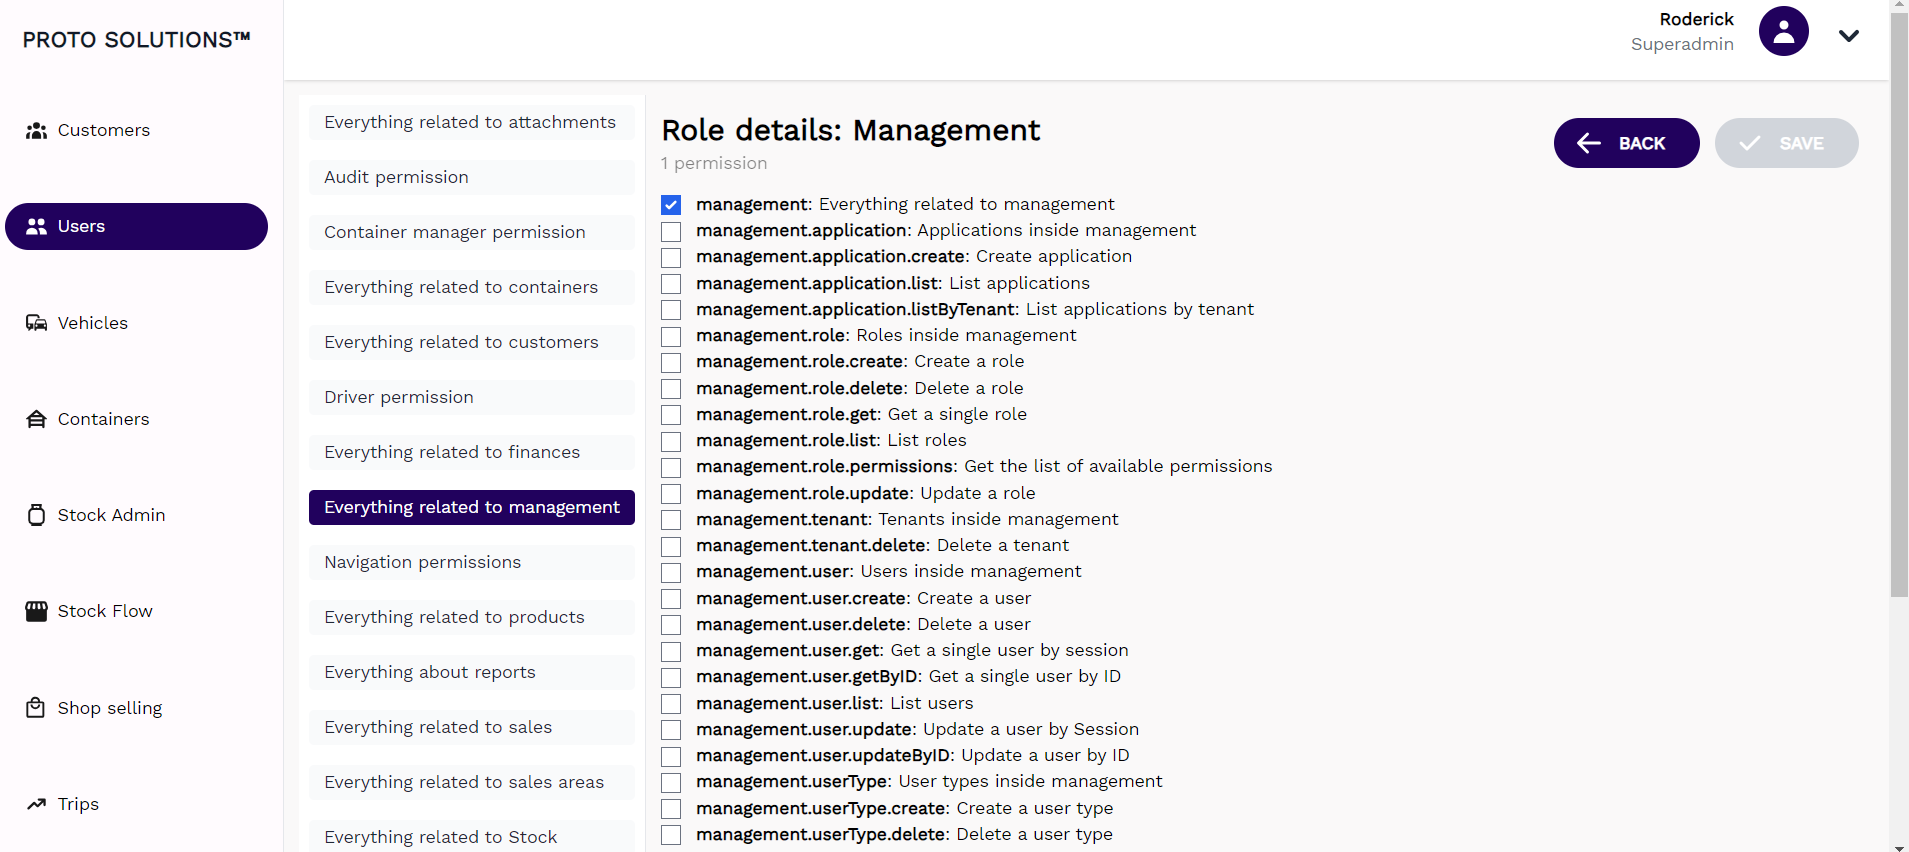
When we click on **Role: Management** & select **Everything related to Management** in the permissions list, we see one parent permission enabled **management**: Everything related to management
[](https://wiki.circl.services/uploads/images/gallery/2024-02/Ixsimage.png)
#####
##### Update
[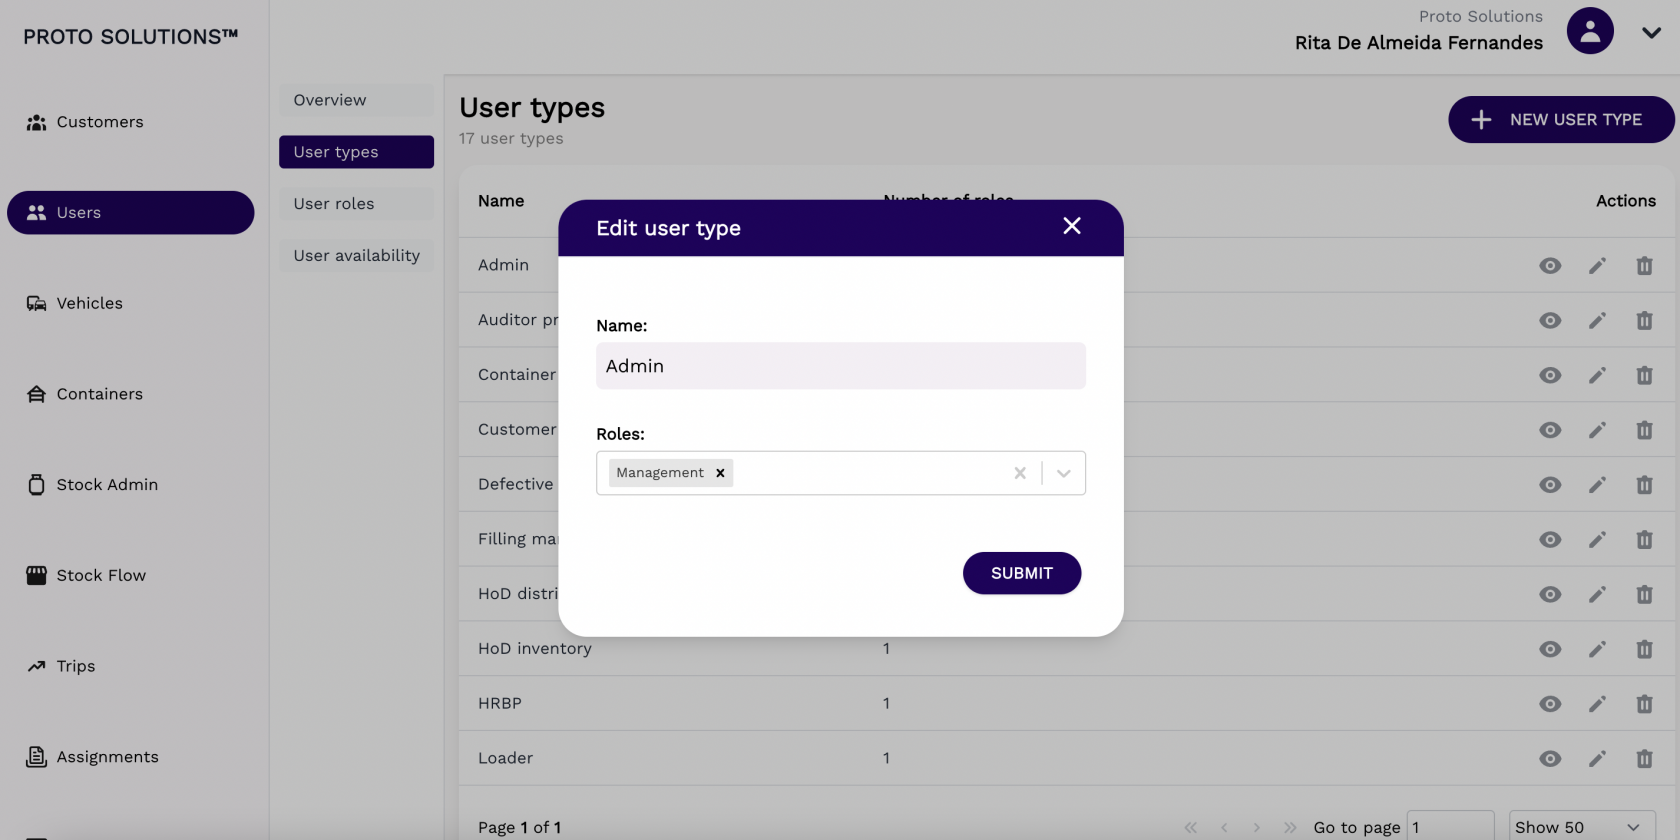](https://wiki.circl.services/uploads/images/gallery/2022-09/Qslimage.png)
#####
##### Delete
[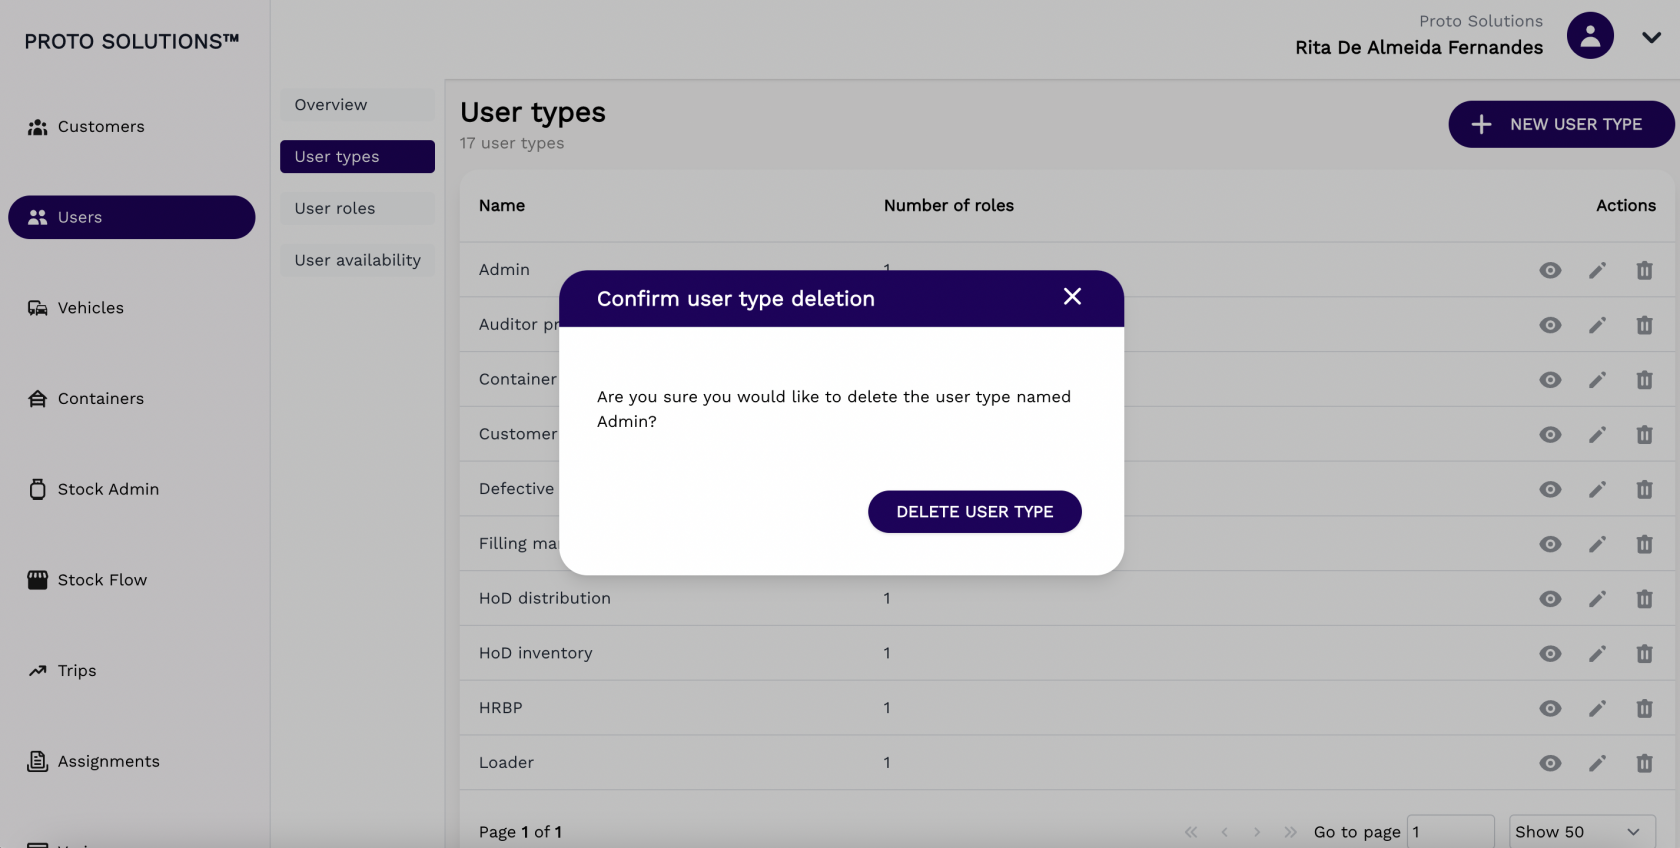](https://wiki.circl.services/uploads/images/gallery/2022-09/UKHimage.png)
####
#### New user type
To create and register a new user type in the system you can click on the **New User Type** button. A new page will open with the new user type required information in order to complete a successful registration. The mandatory fields for the user type creation are the Name and the Role (which determines which permissions that user can have in the system).
After filling out all the mandatory fields you can click on the button **Submit** in order to finish the user type creation.
[](https://wiki.circl.services/uploads/images/gallery/2022-09/a5Qimage.png)
Each user type can contain a number of roles & every set of roles has a number of permissions assigned. Therefore a single user type, for example Container Coordinator has 11 different roles as per screen shot below. Each role has a number of permissions related to it.
[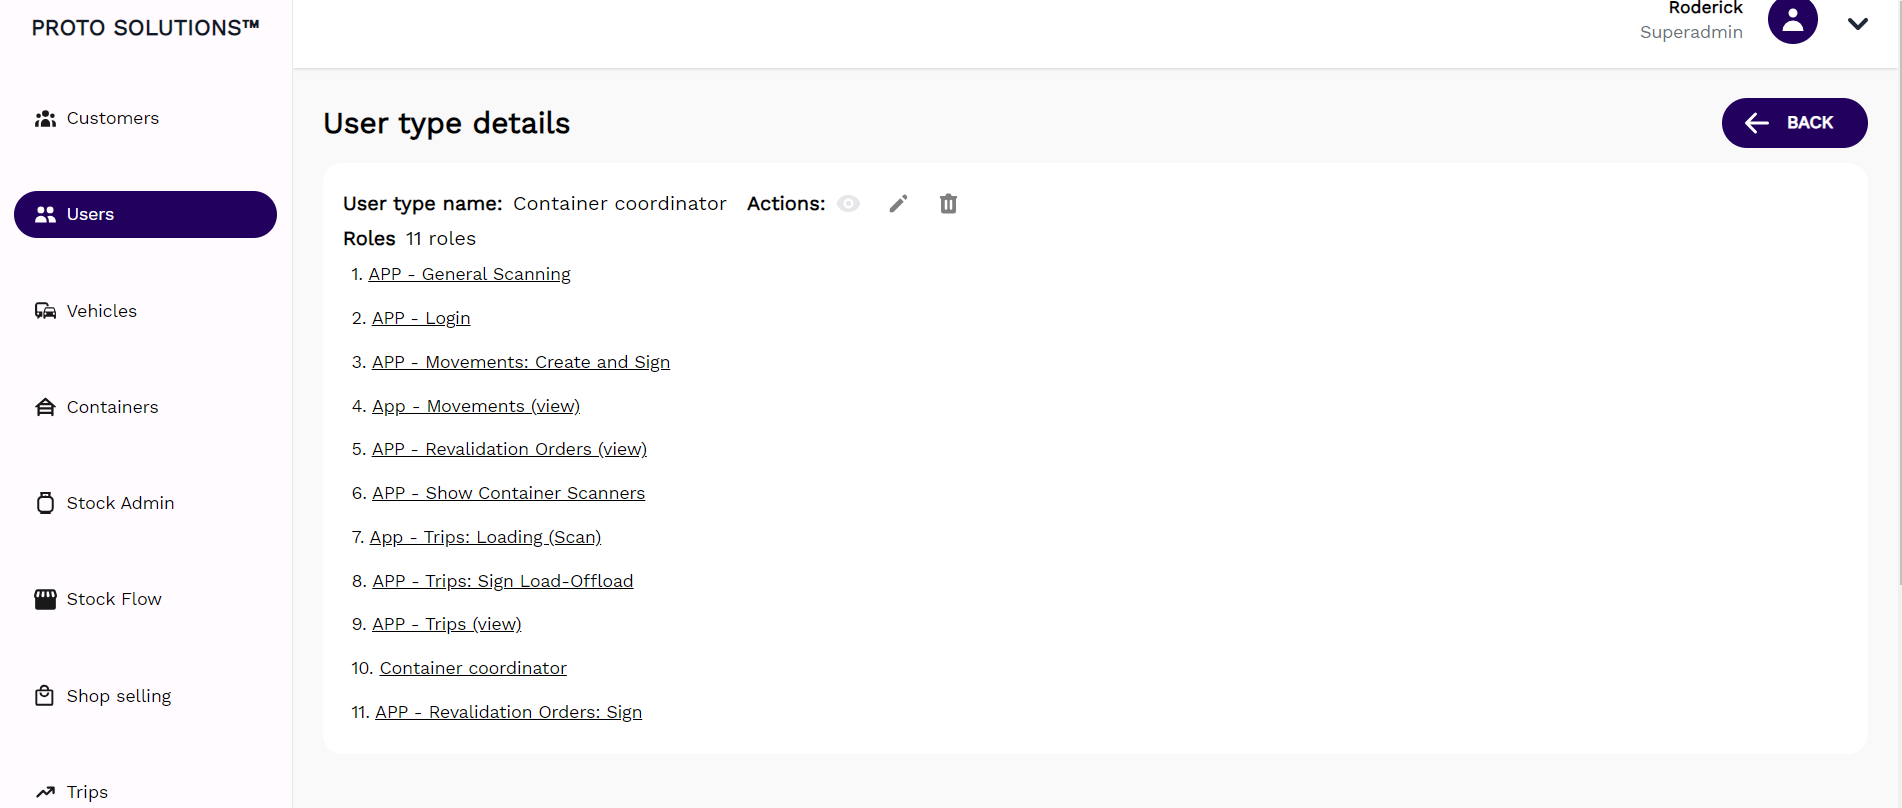](https://wiki.circl.services/uploads/images/gallery/2024-02/LLXimage.png)
# User Roles/New Role
#### User Roles
In order to see all user roles available in the system, you can click on the **User roles** tab.
[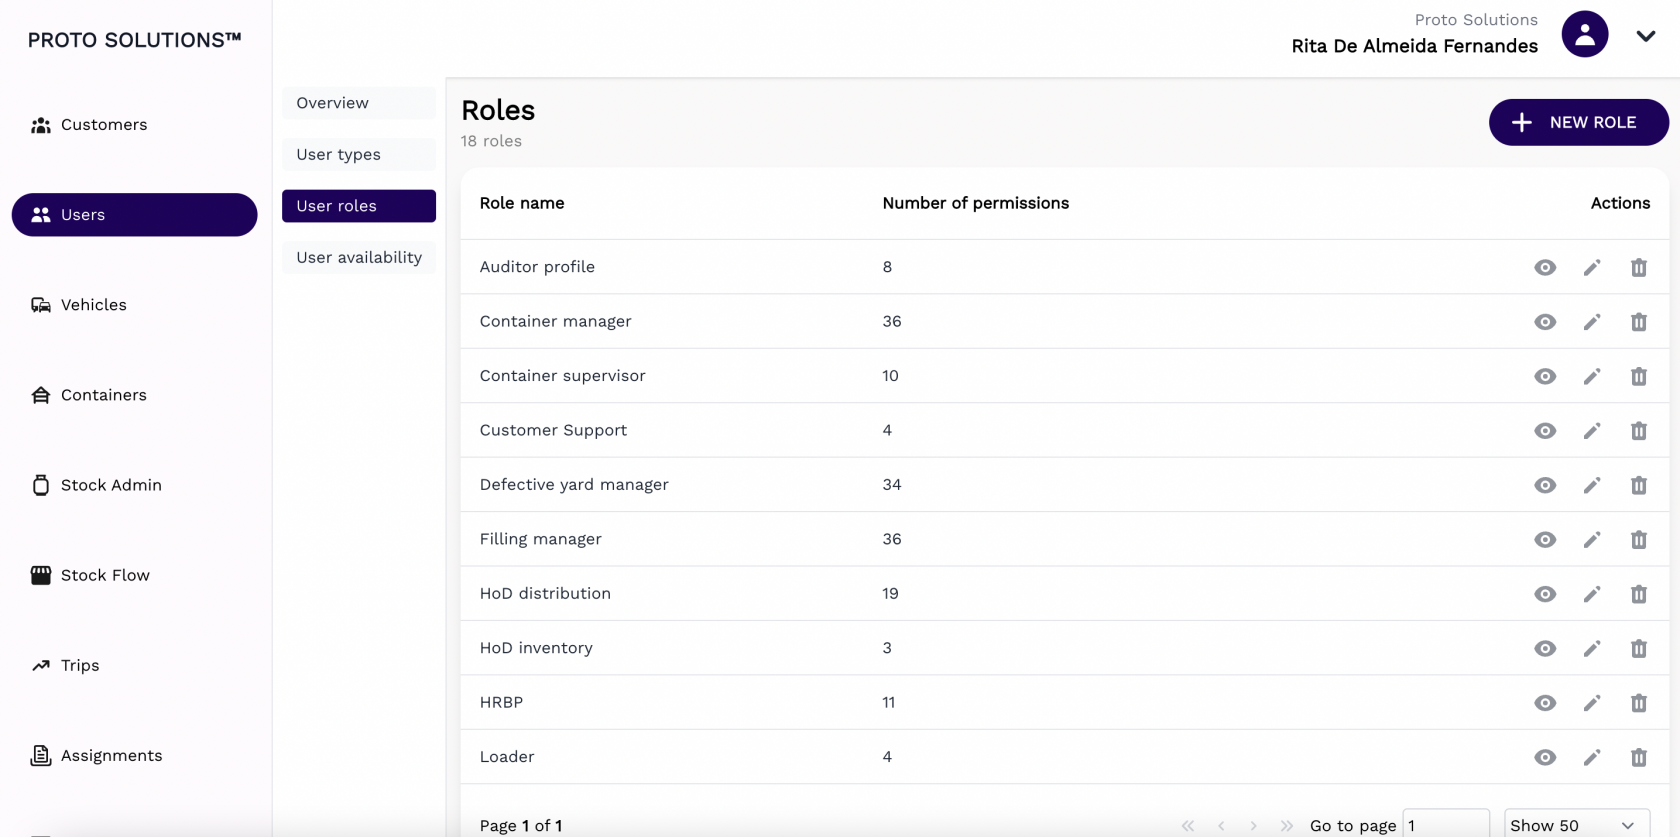](https://wiki.circl.services/uploads/images/gallery/2022-09/LYuimage.png)
You can click on the **Actions** buttons to display, update and delete a user role.
You can also create a New Role by clicking on the + New Role button.
A Role name must be assigned to all Roles and each role can contain a subset of permissions.
##### Display
After clicking on the display action button you can see the information related to user role permissions.
[](https://wiki.circl.services/uploads/images/gallery/2022-09/IPFimage.png)
#####
##### Update
[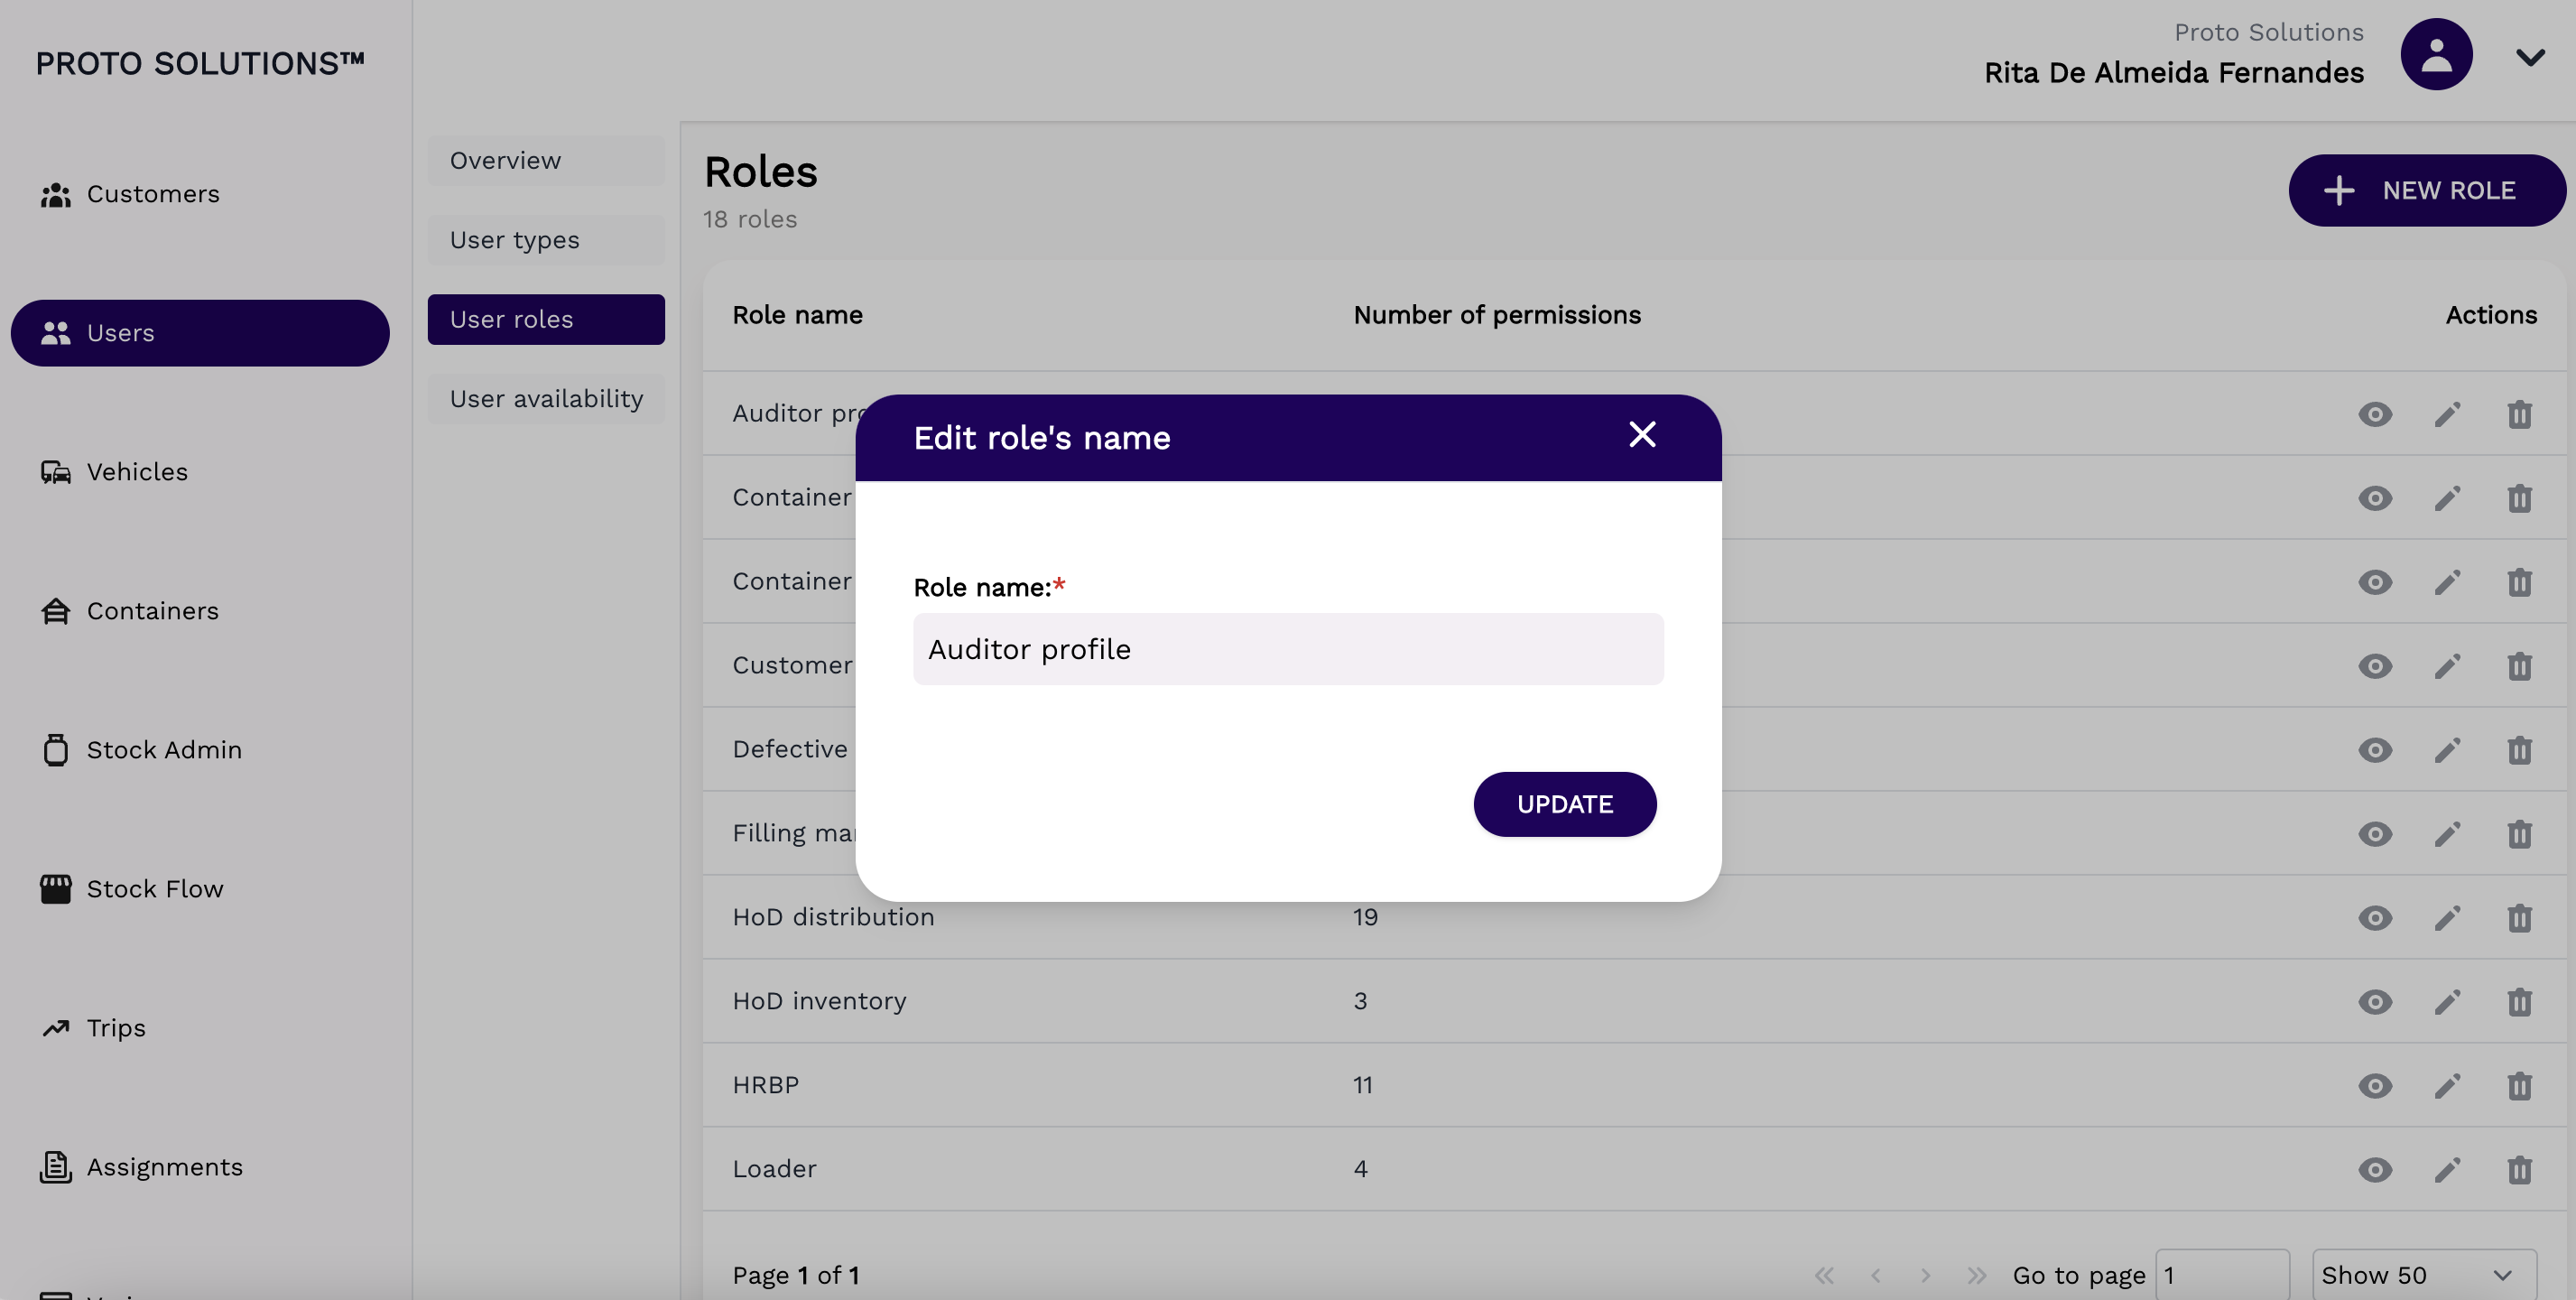](https://wiki.circl.services/uploads/images/gallery/2022-09/4D7image.png)
#####
##### Delete
[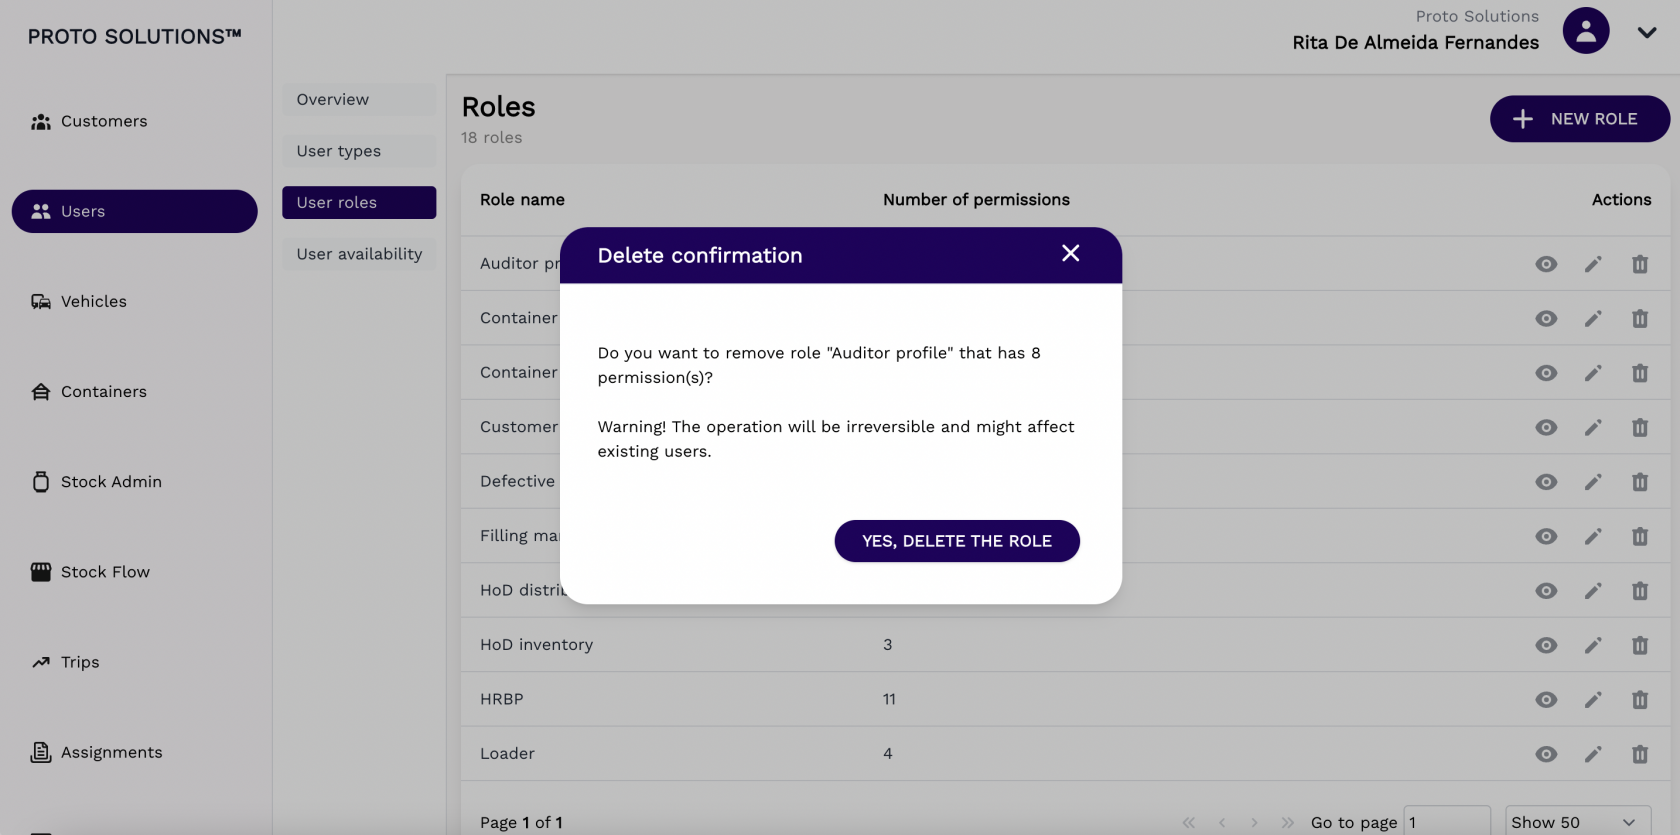](https://wiki.circl.services/uploads/images/gallery/2022-09/Qv4image.png)
---
####
#### New role
To create and register a new user role in the system you can click on the **New Role** button. A new page will open with the new role required information in order to complete a successful registration. The mandatory field for the user role creation is the Name.
After filling out all the mandatory fields you can click on the button Add in order to finish the user role creation.
[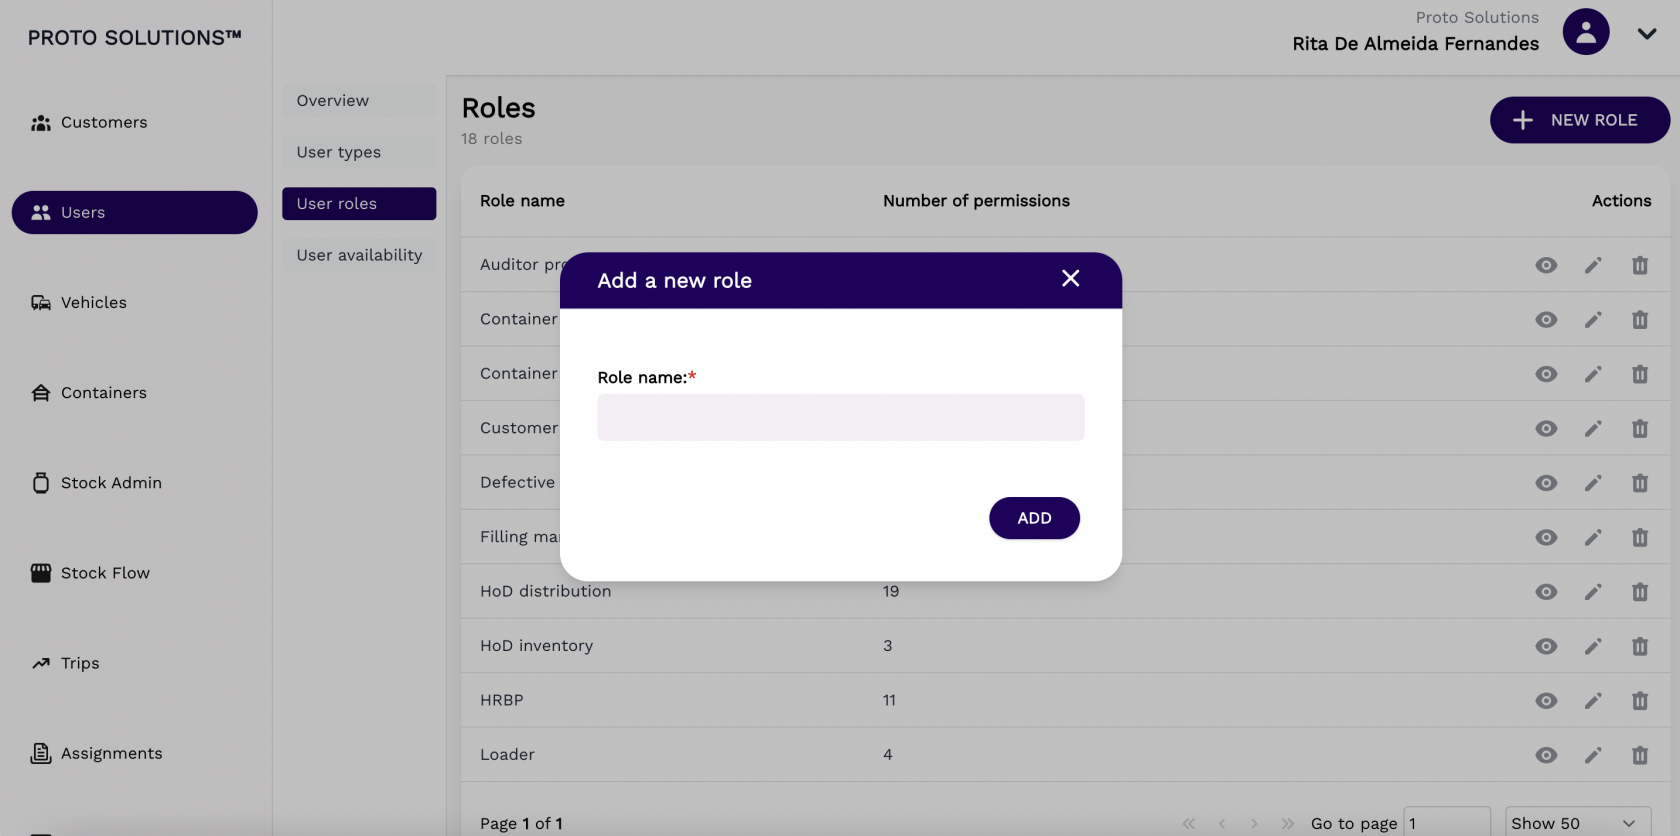](https://wiki.circl.services/uploads/images/gallery/2022-09/jIZimage.png)
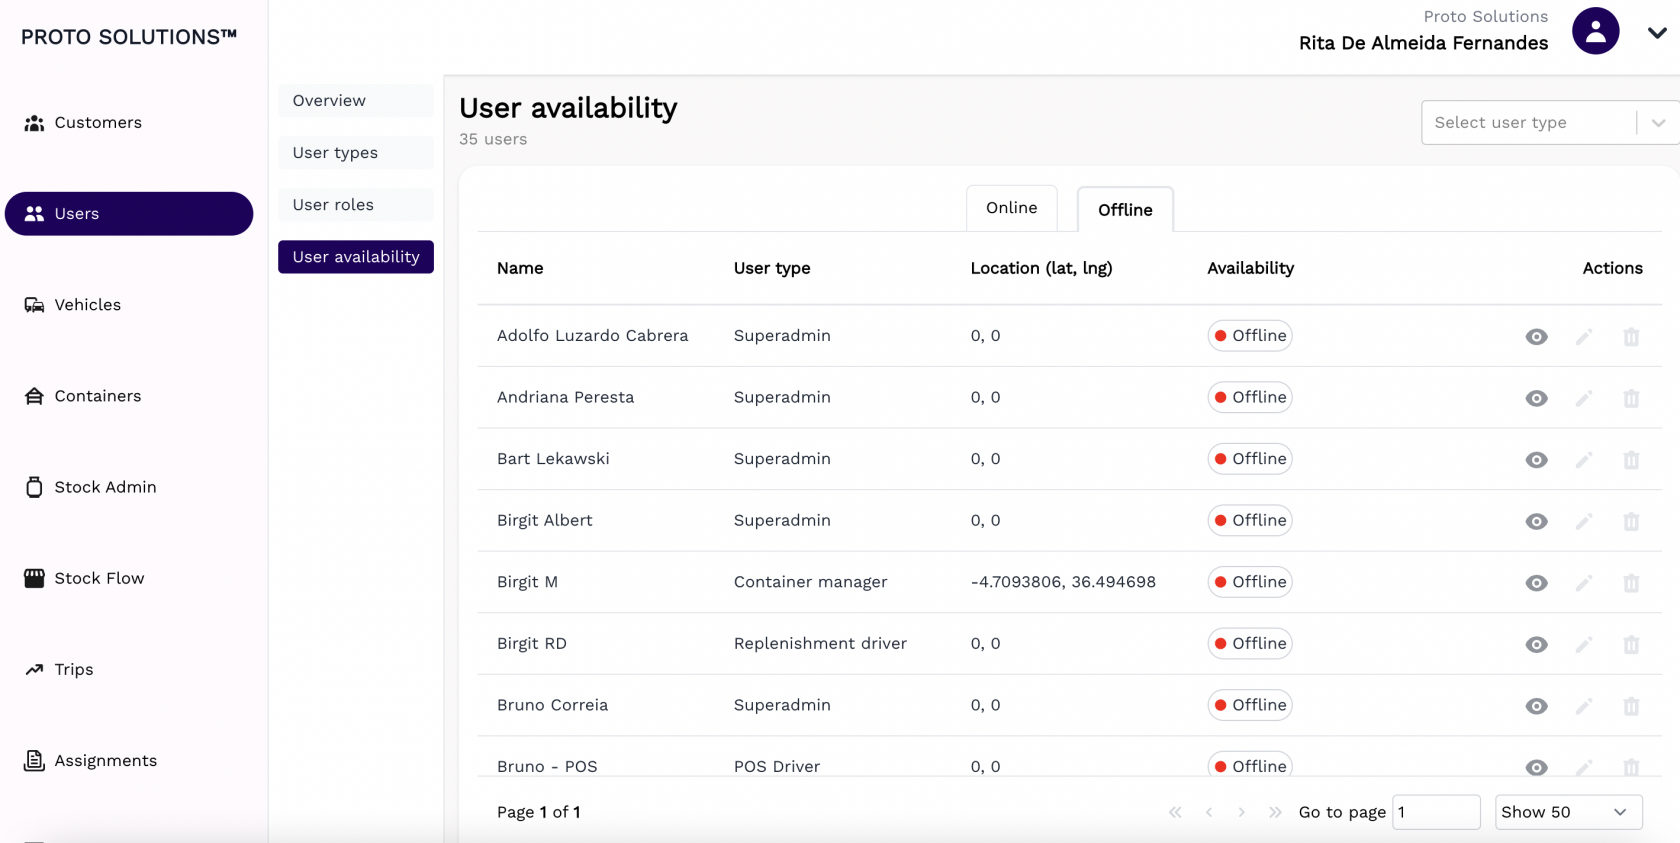
# User Availability
#### User availability
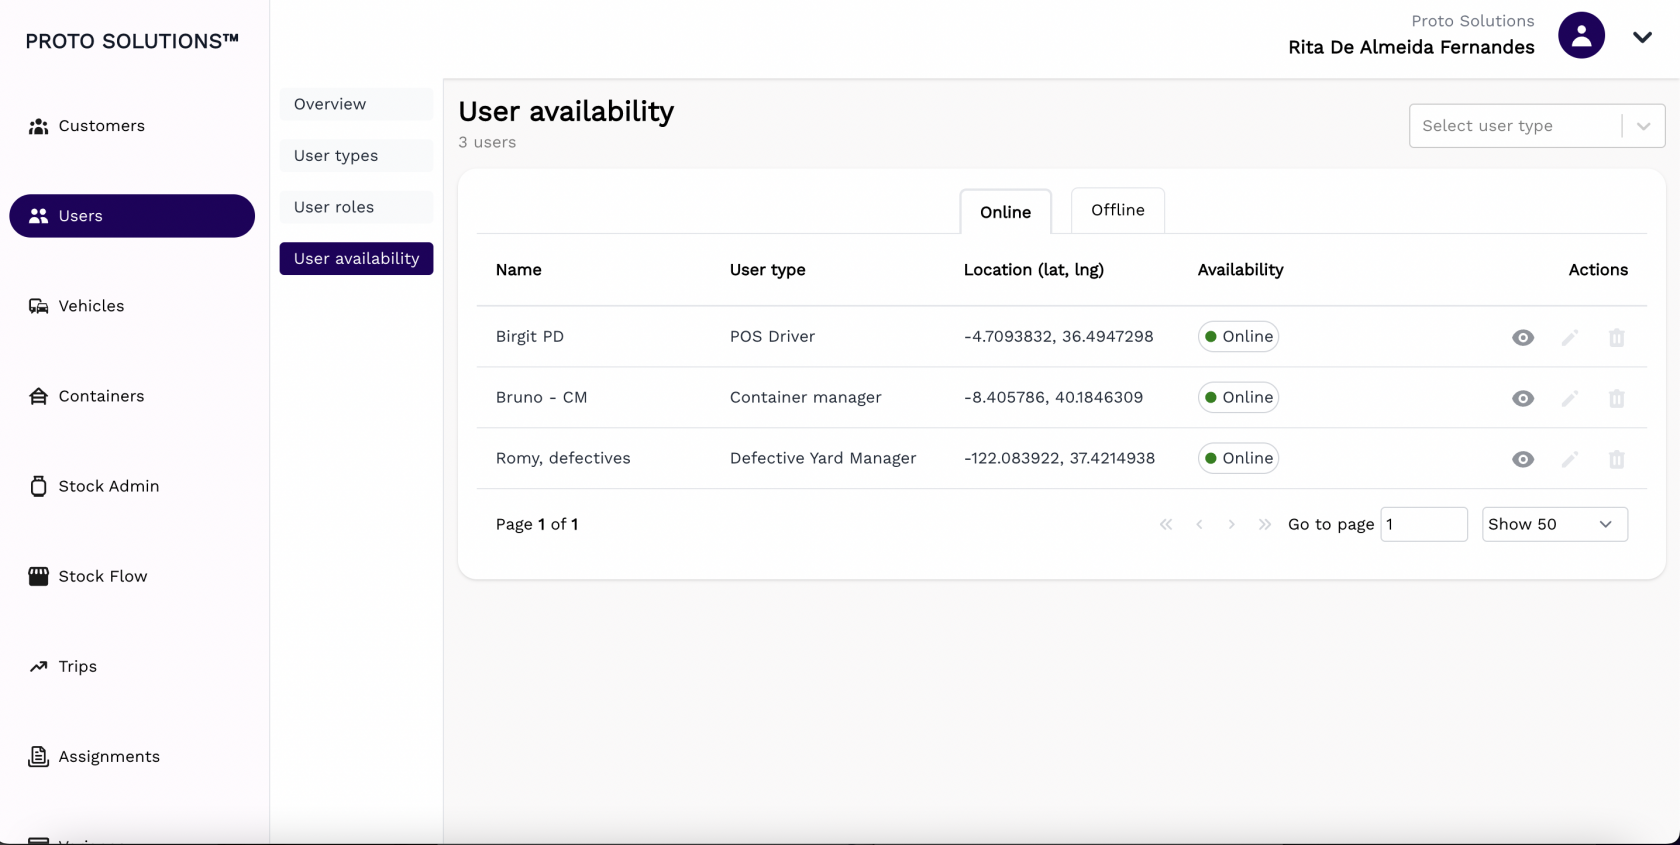
In order to see all users' availability in the system, you can click on the **User availability** tab. There, you can switch between the **online** and the **offline** tab to see the users that are online, which means they are using the system and are clocked in and the ones offline and are clocked out. Besides the basic information about the user, you can also see the user's location through the coordinates at that moment.
[](https://wiki.circl.services/uploads/images/gallery/2022-09/h1Gimage.png)
[](https://wiki.circl.services/uploads/images/gallery/2022-09/8Xiimage.png)