Payments
Payments Module
Receipts
Receipts are generated for each order or variance resolution, which requires a payment. A receipt shows who is the debtor, what are the products purchased, what is the payment status and amount & when and how it was generated.
The receipts are shown in the receipts overview section in a list view. They are ordered by newest -> oldest.
Within this list you will see the following information in an overview:
- Reference type (POS or variance)
- Debtor (who needs to pay for it)
- Total amount
- Status (paid, not paid, partially paid)
- Date
- Action (view details)
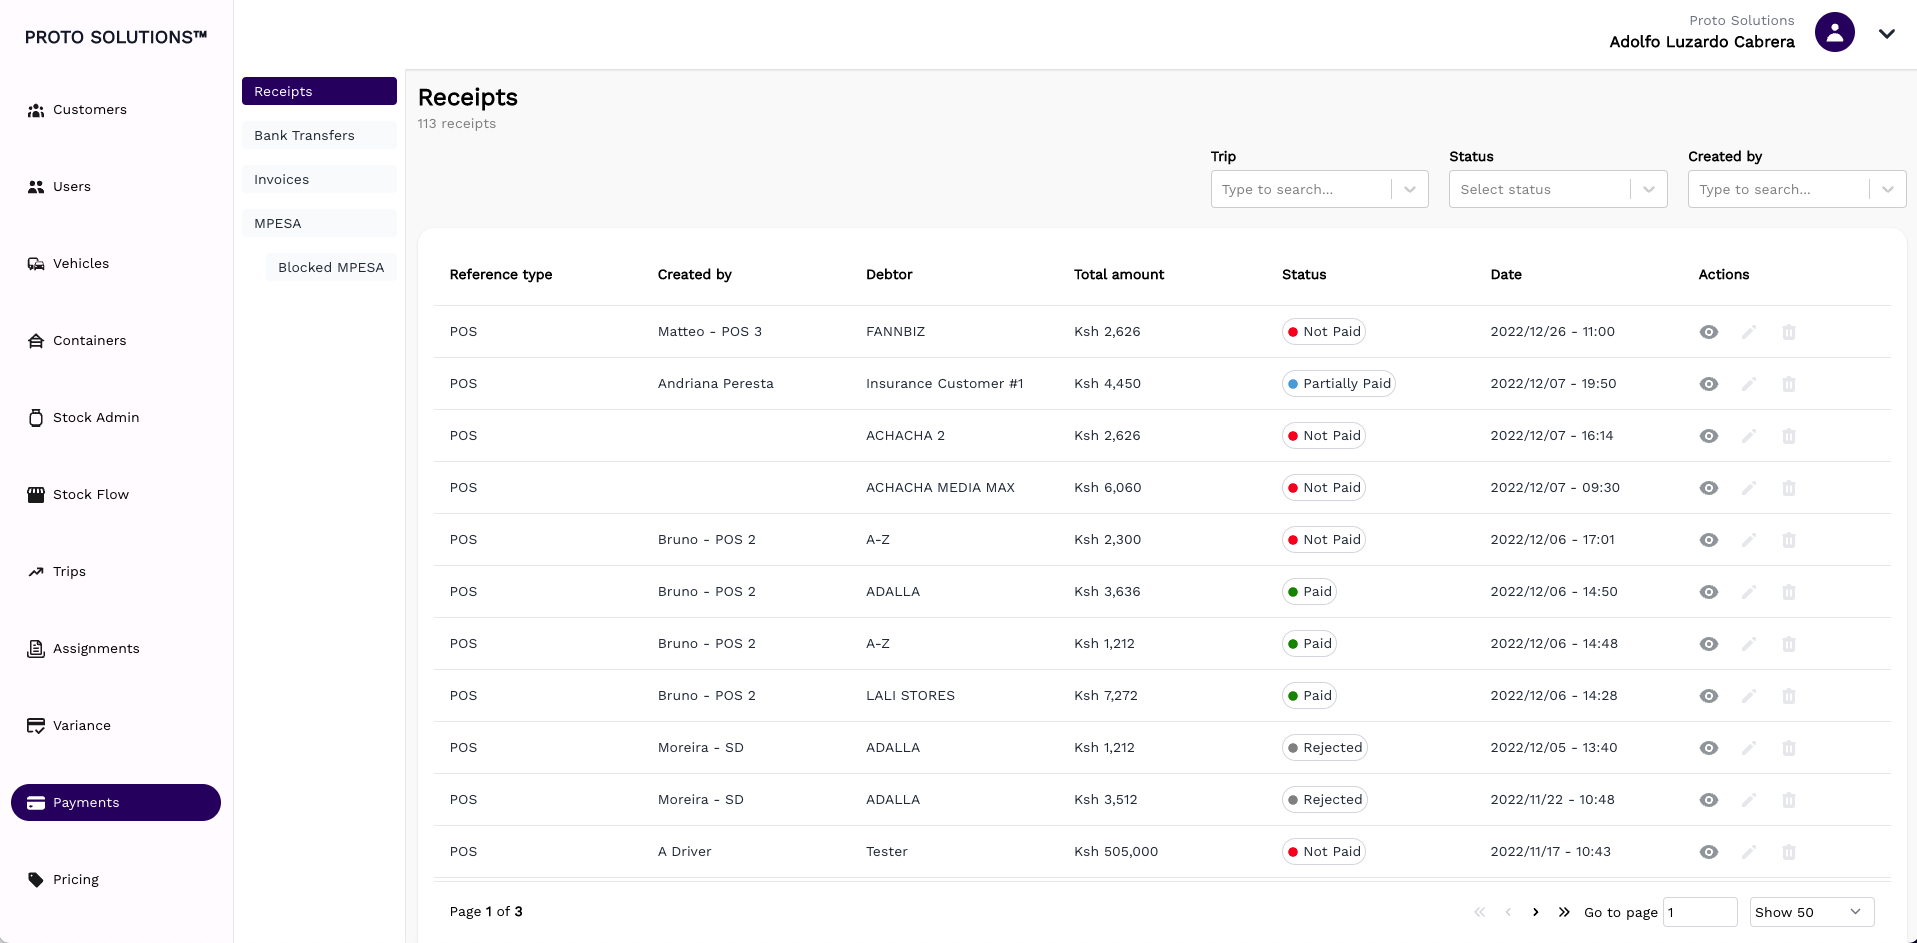
The list is paginated. You can select how many list entries you want to see on one page and/or you can skip to the next page(s).
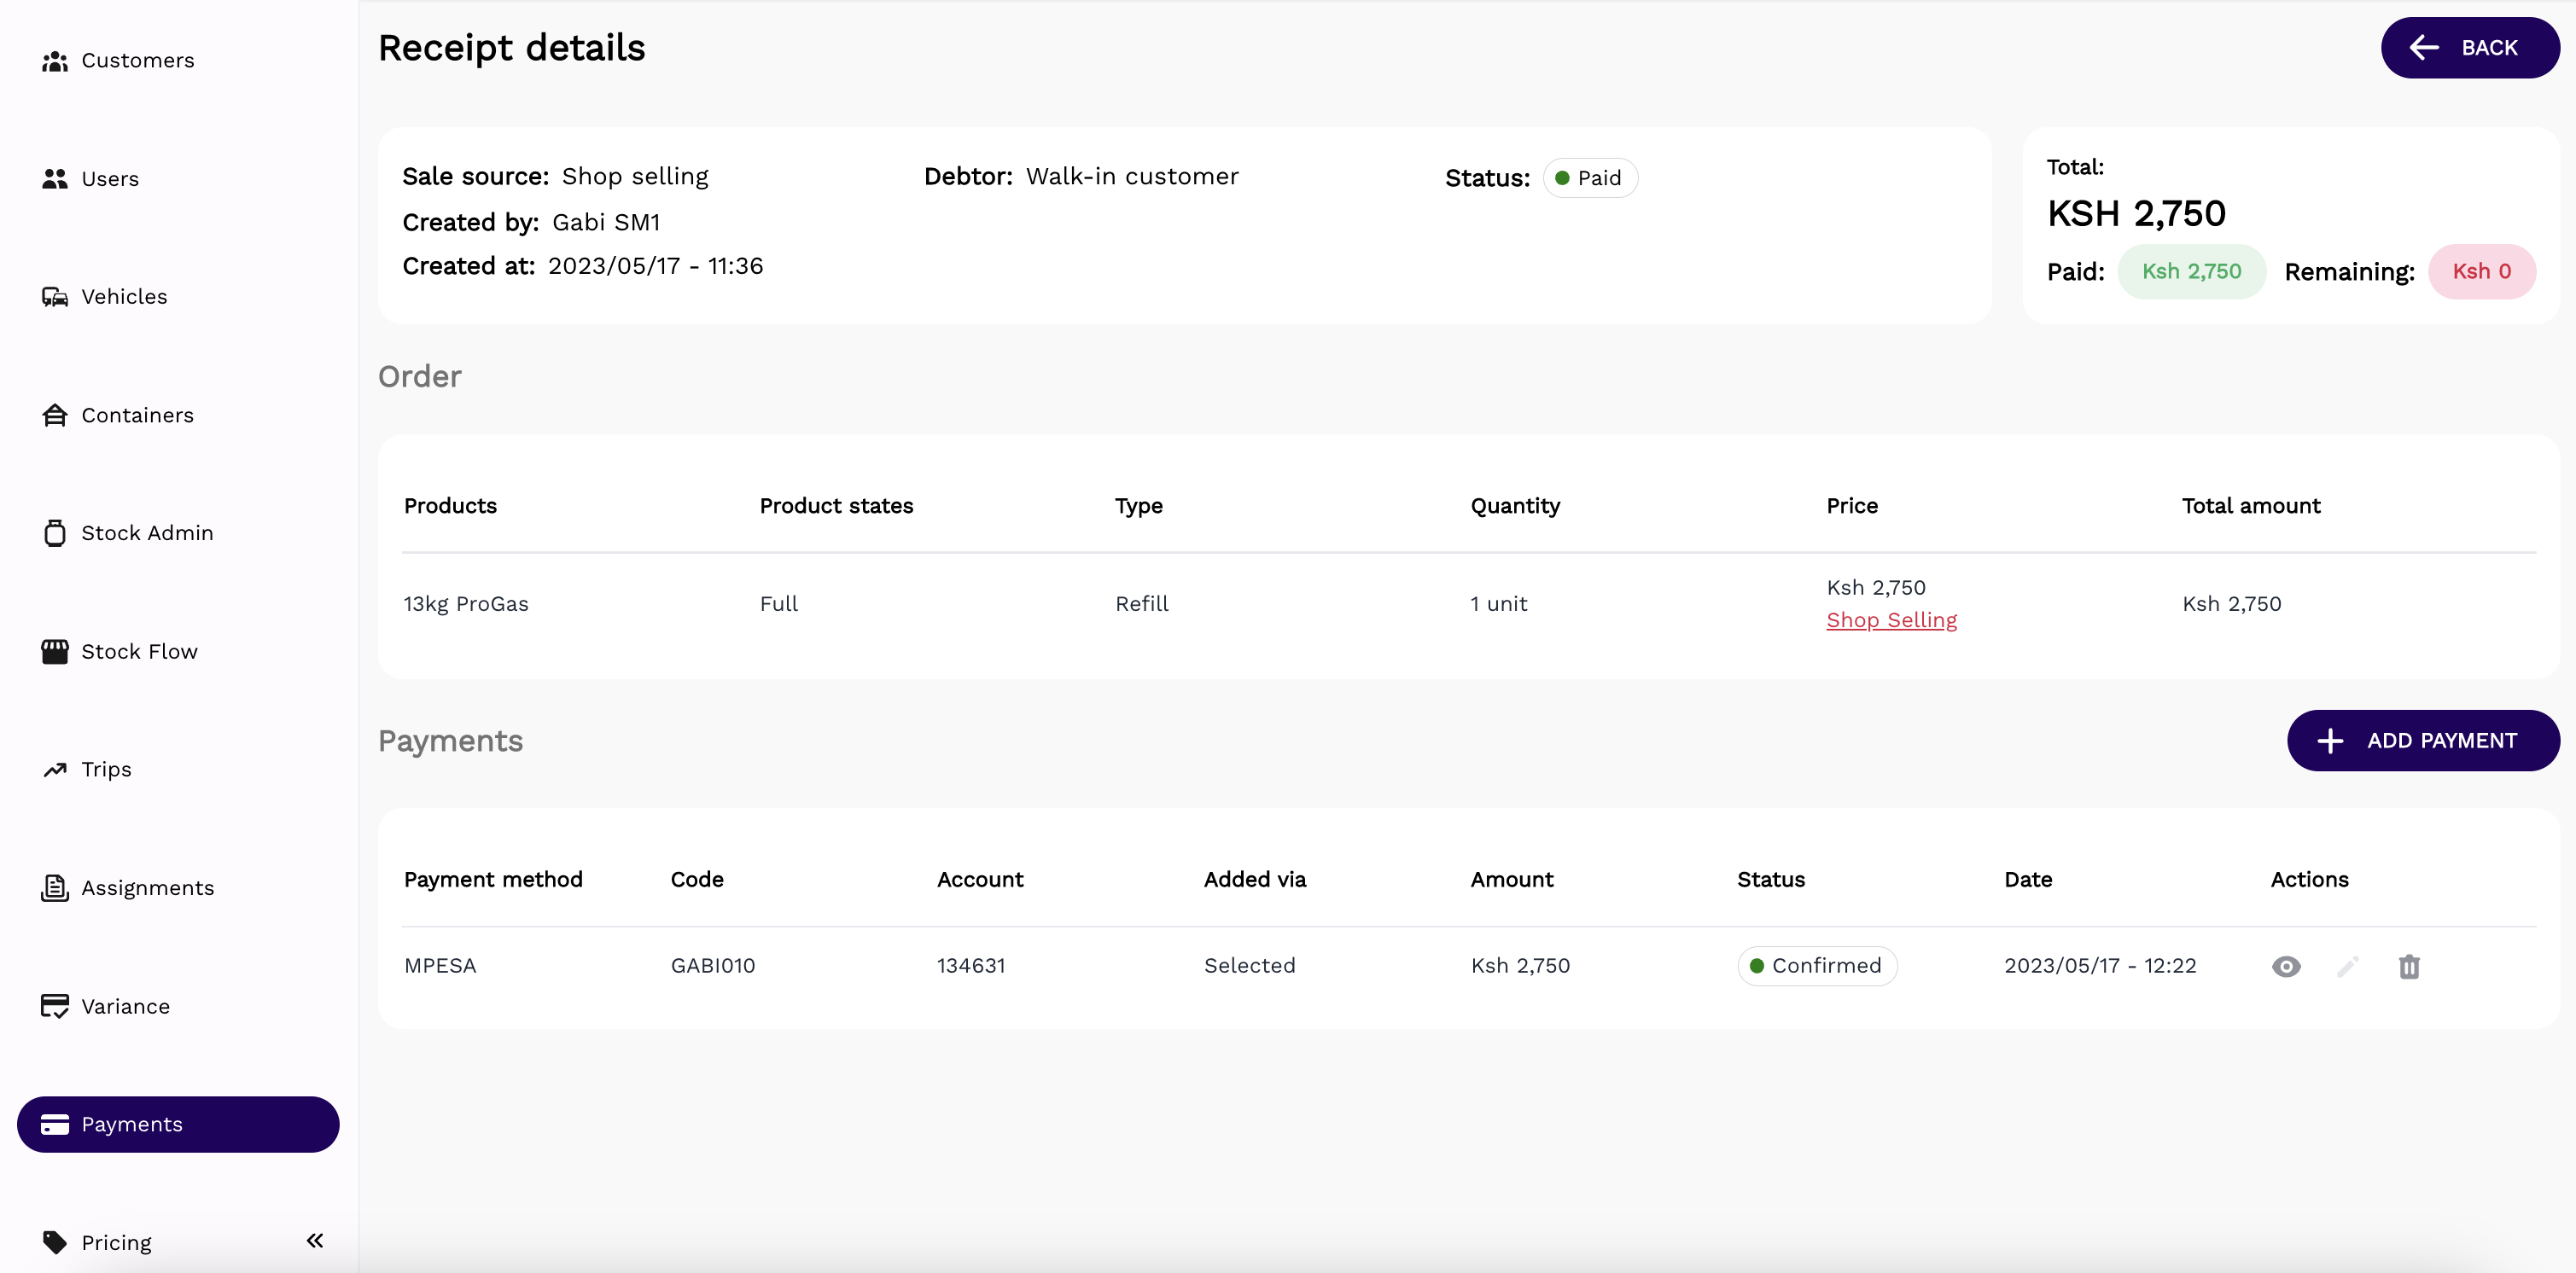
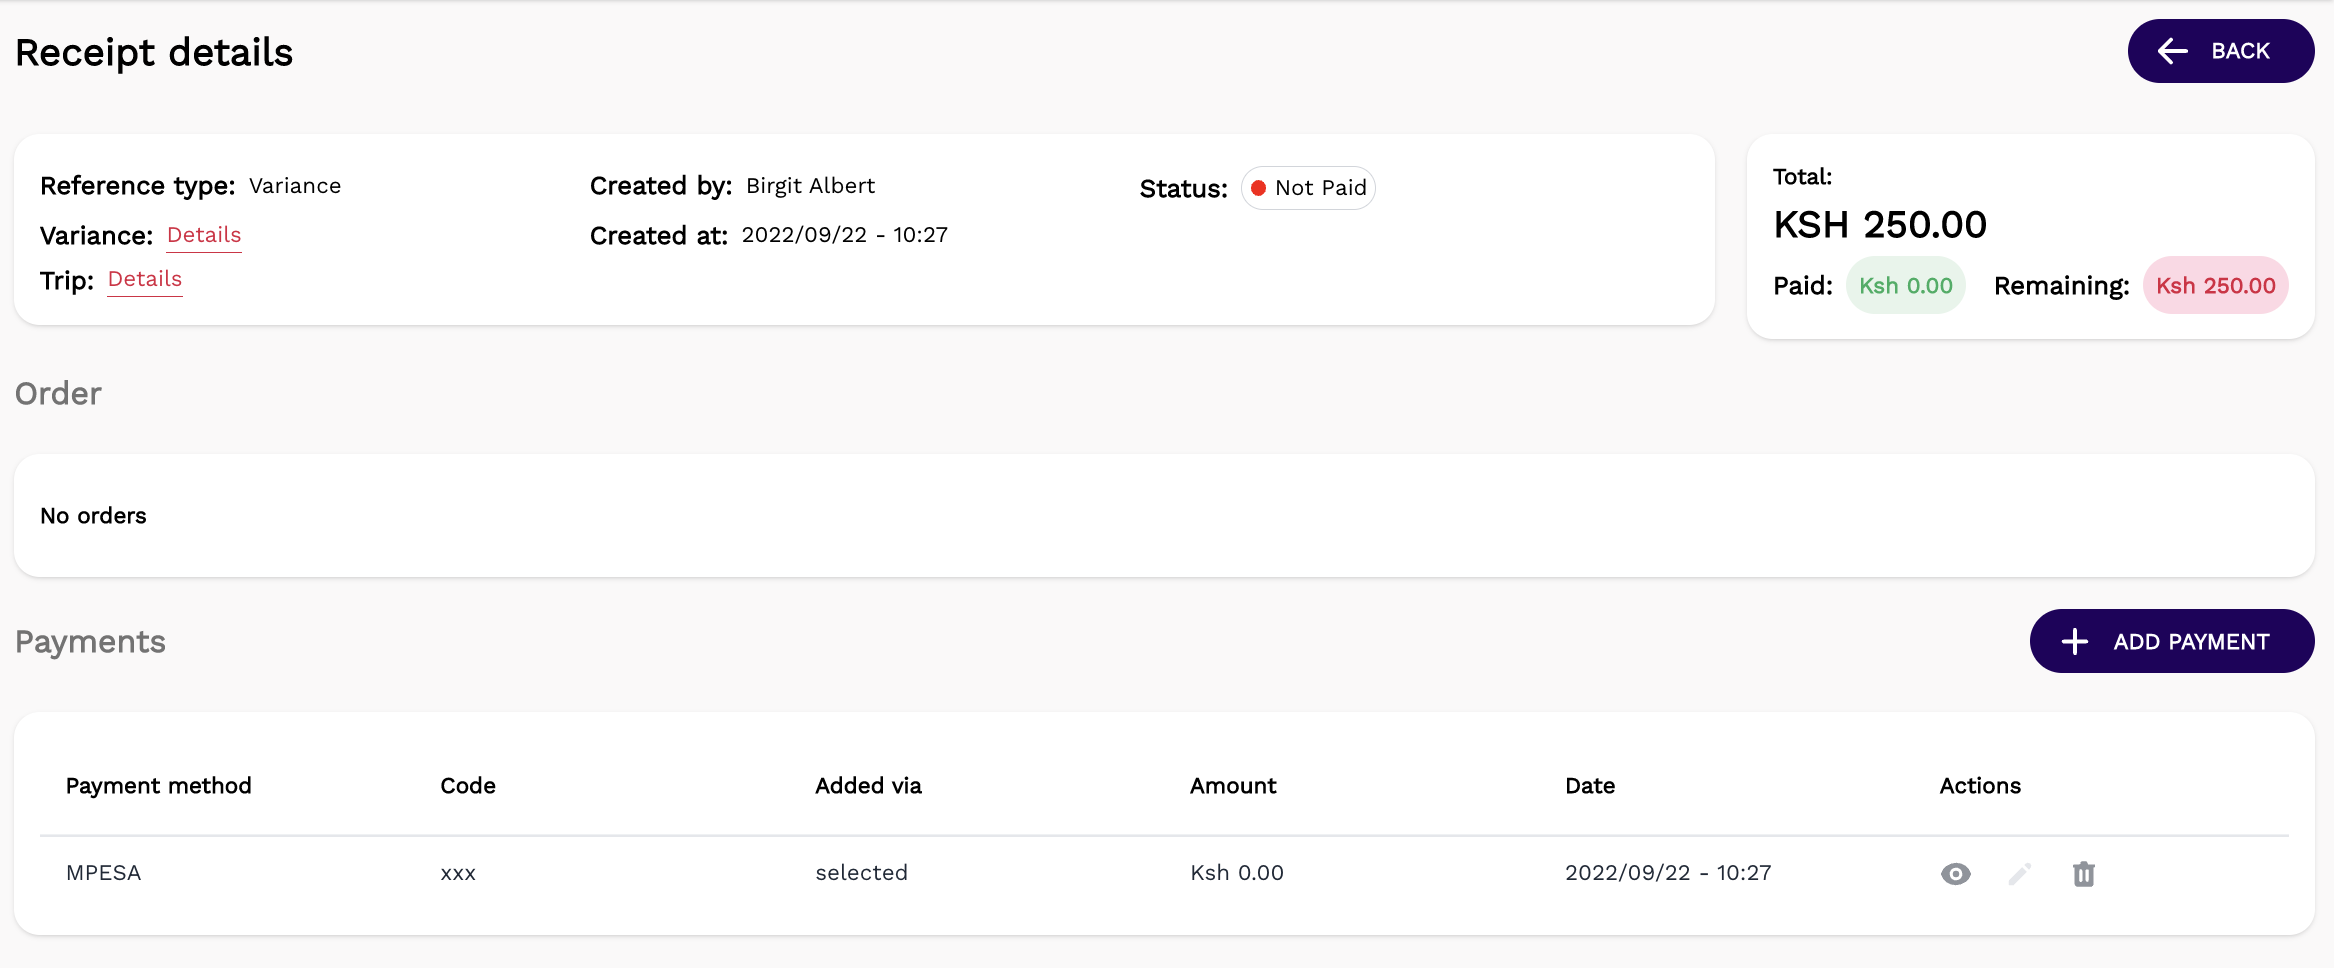
Receipt details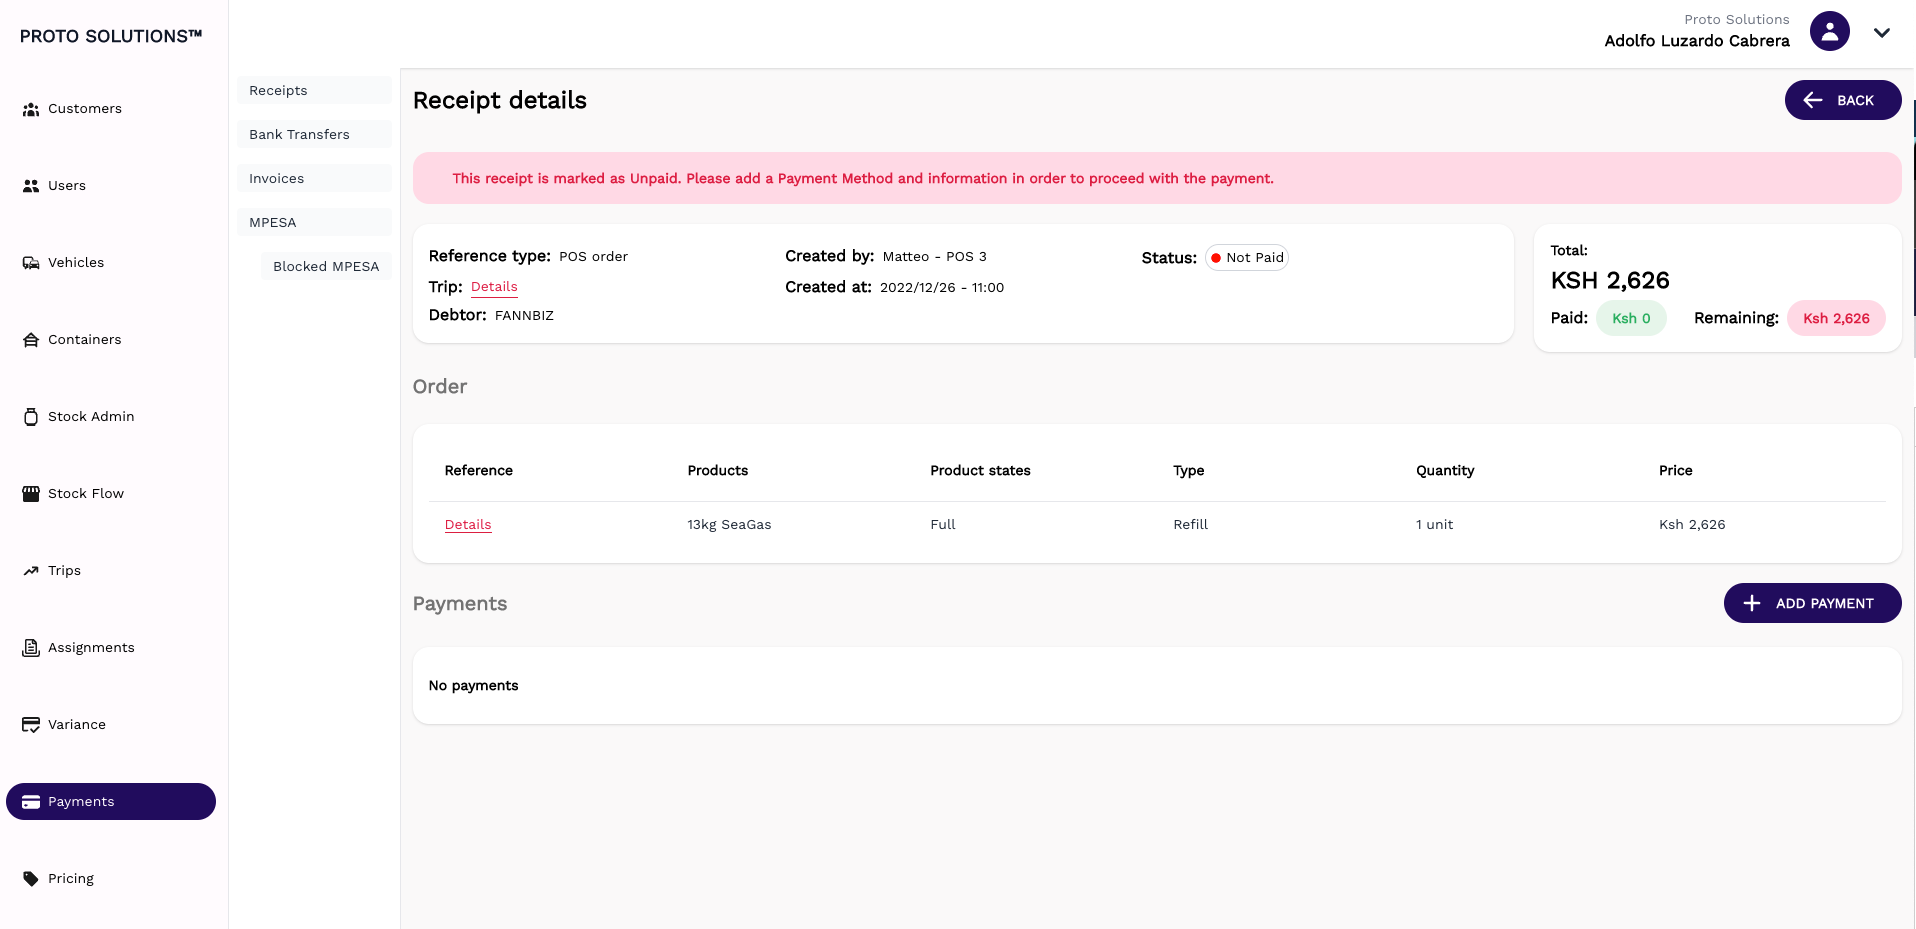
Within the receipt details you will observe the receipt details general information including the reference for what the receipt has been generated (POS order or Variance), and with an order type you can view more details on the trip, you can see who the debtor of receipt is, who the receipt was generated from, when the receipt was created and the receipt status (paid, not paid or partially paid).
On the right side of the information box, you can get the details of the payment. You will get the total receipt amount, the amount paid and the amount remaining.
For a POS order receipt you will also get the order details, which make up the receipt
Variance receipt
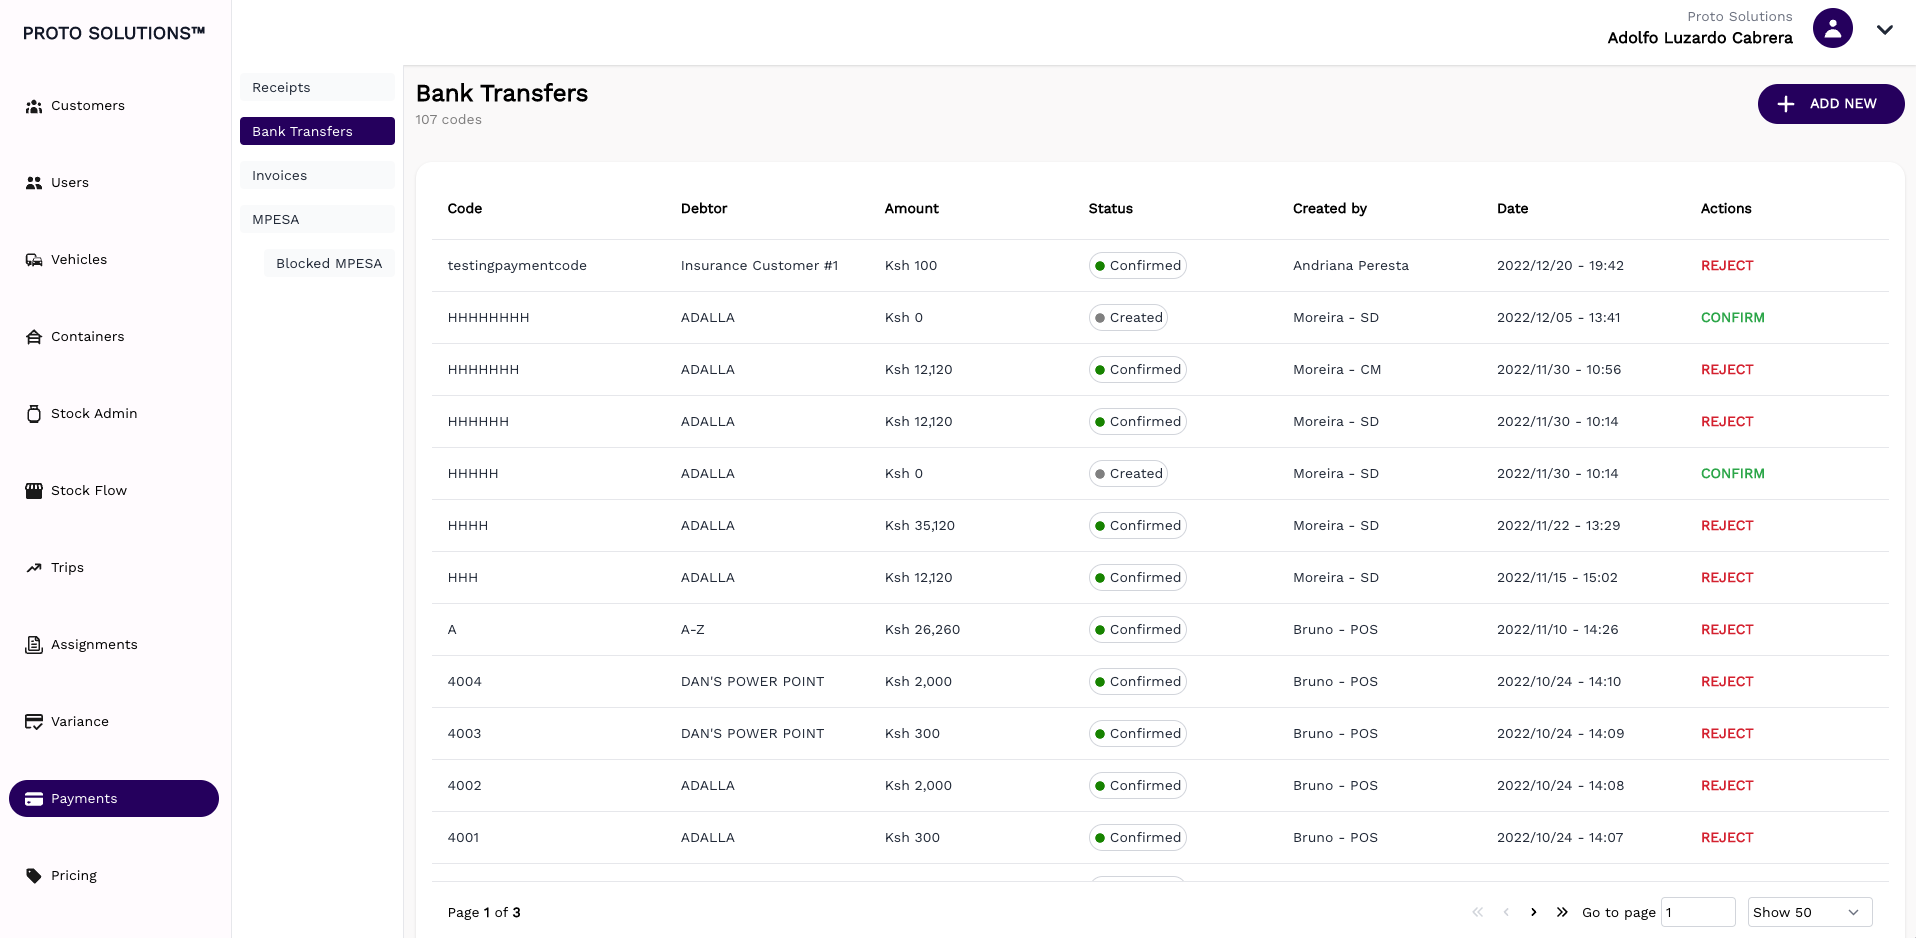
Bank Transfers
The bank transfer page shows a list of all available bank transfer payments. The payment can be confirmed/rejected if needed. A new payment is always added in confirmed state.
Once a bank transfer has been added, a sales transaction can be paid for with the amount stated on the amount field.
For example bank transfer of 12,120 KSH on customer Adalla, can now be added to a sales order within the app by the driver. The driver must know the exact payment code for this.
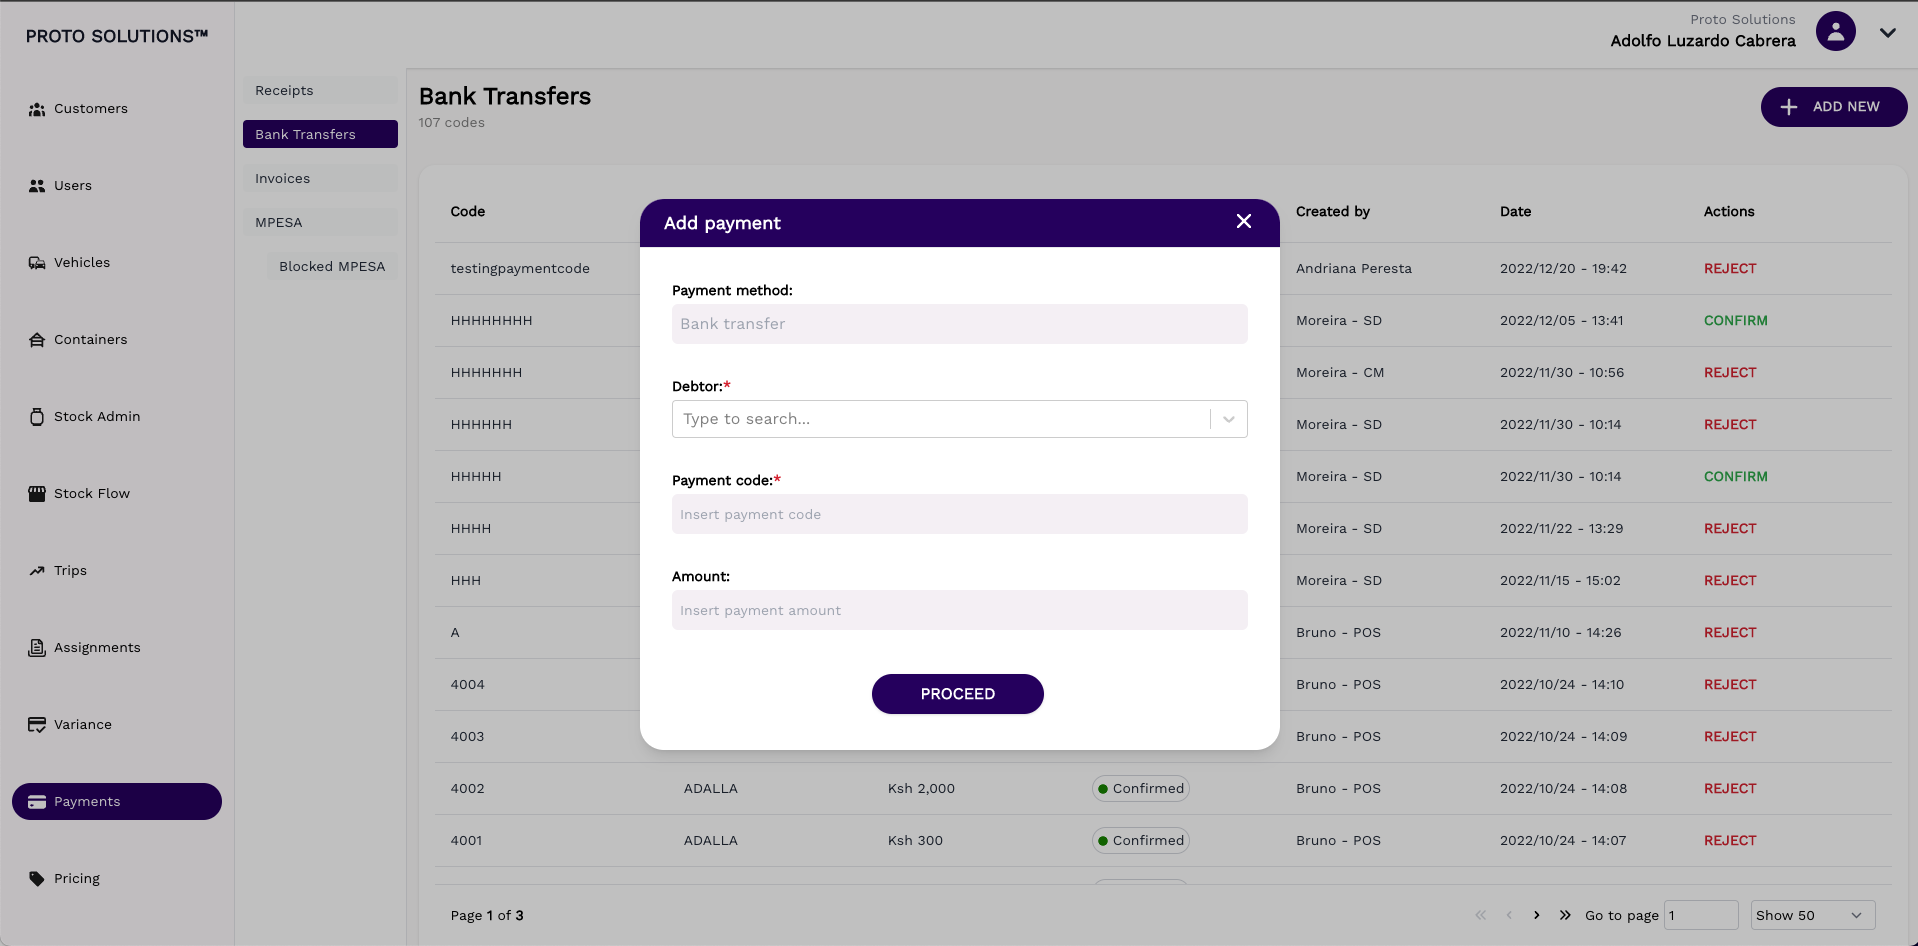
This screen shows how to add a bank transfer payment.
You need to choose the "debtor" who is the customer that has sent the bank transfer. The payment code is the one that links a payment with a receipt/sales order. The amount needs to be the exact amount that the payment has been made for.
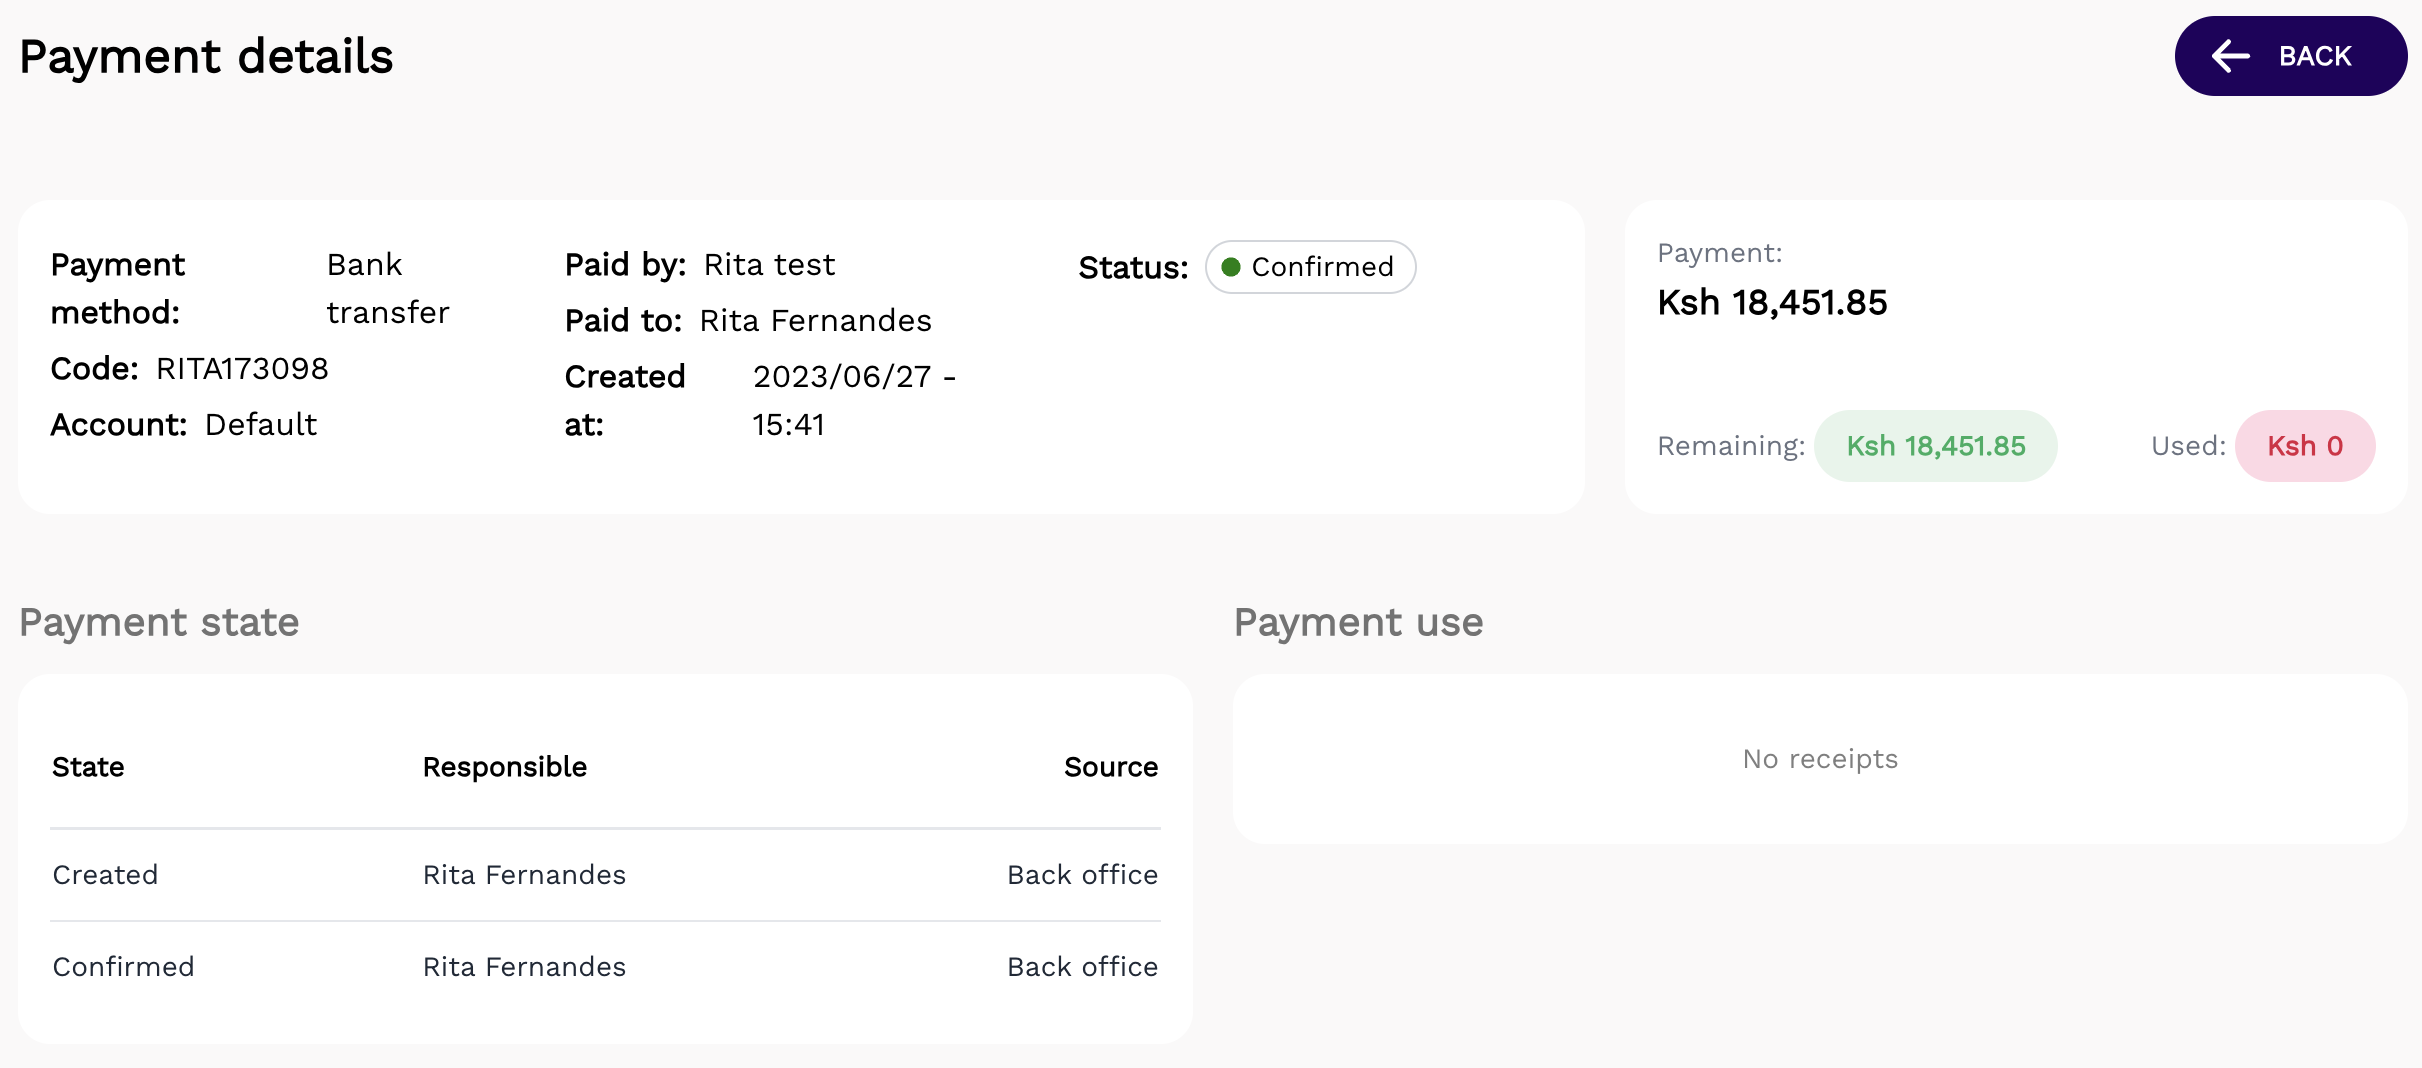
Payment details are now accessible on the Bank Transfers page. To view more specific information about a particular payment, one needs to click on the 'eye' symbol, which will redirect them to a new page.
The provided details encompass the following:
- Payment method
- Payment Code
- The account number
- The customer who is paying (paid by)
- The employee who taking the payment (paid to)
- The date and time when the payment was created (created at)
- The status of the payment
- The payment amount as well as how much was used and how much the driver has remaining
On this page, a user can also view the payment state which indicates who the payment was created by and who it was confirmed by as well as the source where this action took place (APP or backoffice).
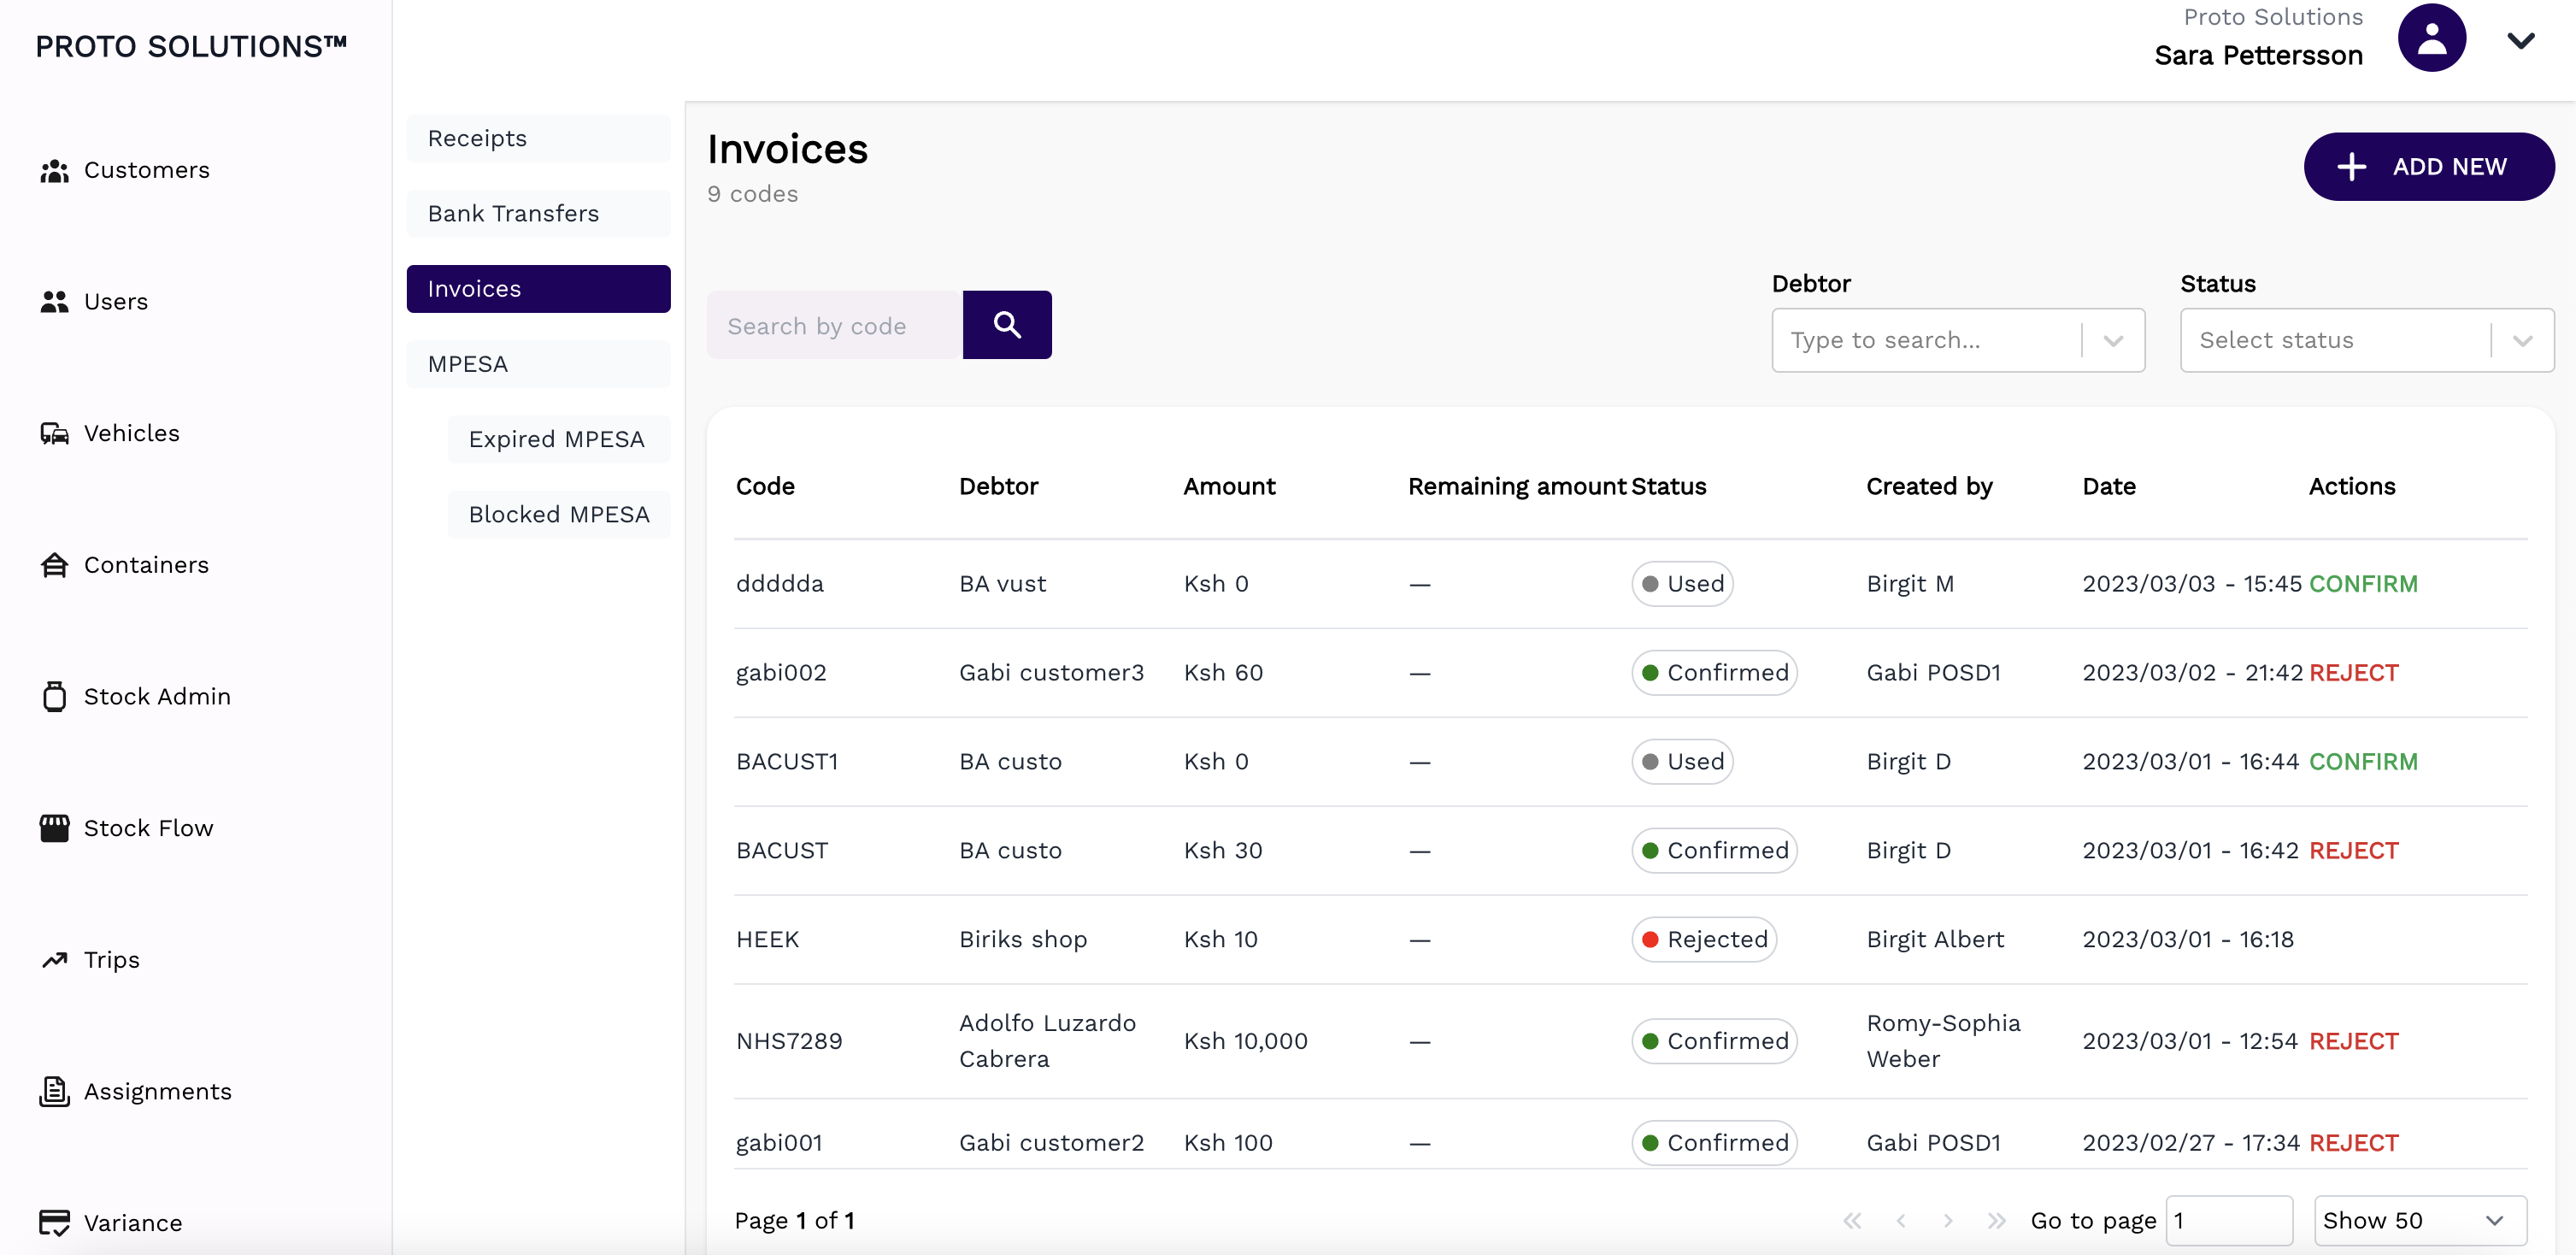
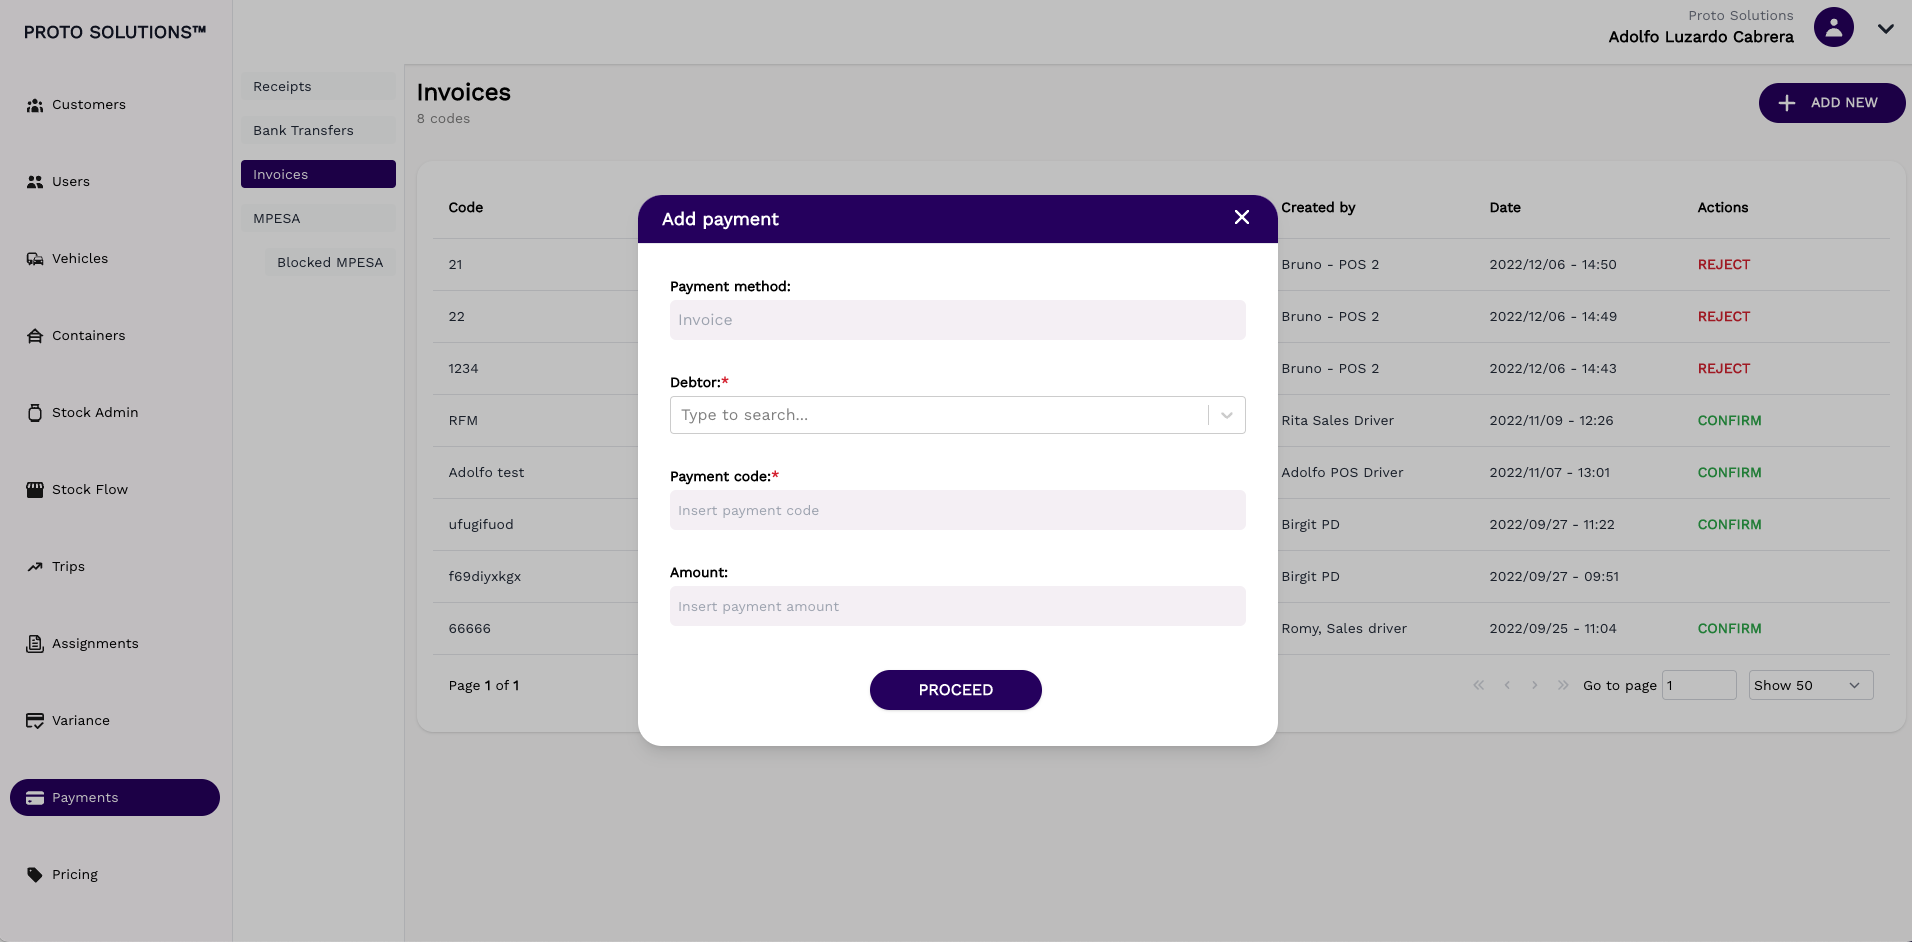
Invoices
The invoices page shows a list of all available invoices. The payment can be confirmed/rejected if needed. A new payment is always added in confirmed state.
Once an invoice has been added, a sales transaction can be paid for with the amount stated on the amount field.
For example invoice of 12,120 KSH on customer A-Z, can now be added to a sales order within the app by the driver. The driver must know the exact payment code for this.
This screen shows how to add an invoice payment.
You need to choose the "debtor" who is the customer that has paid an invoice. The payment code is the one that links a payment with a receipt/sales order. The amount needs to be the exact amount that the payment has been made for.
Payment details are now accessible on the Invoices page. To view more specific information about a particular payment, one needs to click on the 'eye' symbol, which will redirect them to a new page.
The provided details encompass the following:
- Payment method
- Payment Code
- The account number
- The customer who is paying (paid by)
- The employee who taking the payment (paid to)
- The date and time when the payment was created (created at)
- The status of the payment
- The payment amount as well as how much was used and how much the driver has remaining
On this page, a user can also view the payment state which indicates who the payment was created by and who it was confirmed by as well as the source where this action took place (APP or backoffice).

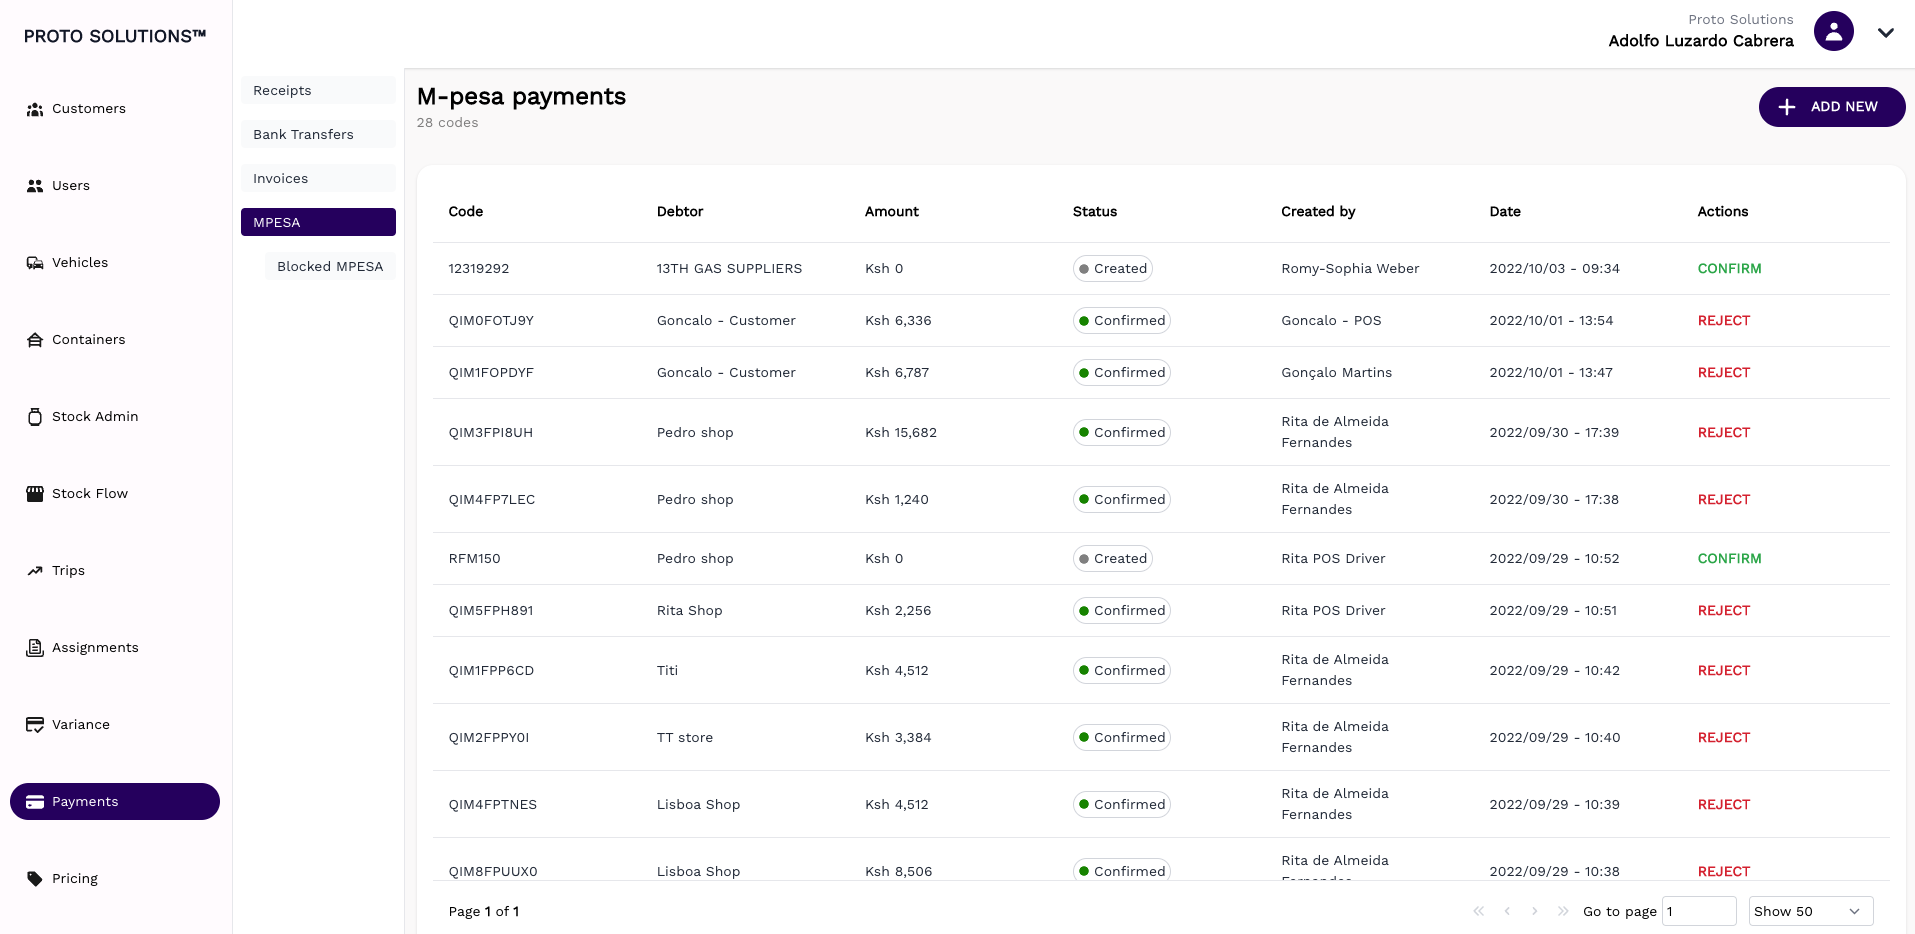
MPESA
The Mpesa payments list shows all mpesa payments that the system has received (both automatically through the app by a driver and/or manually added via this page).
The mpesa payments have a status and only confirmed mpesa payments can be used to reconcile a sale. From this list you can reject payments, which changes their status to created and does not allow to reconcile a sale against.
The Debtor in this case is the driver or shop manager. Since we are adding the payment to a users Till.
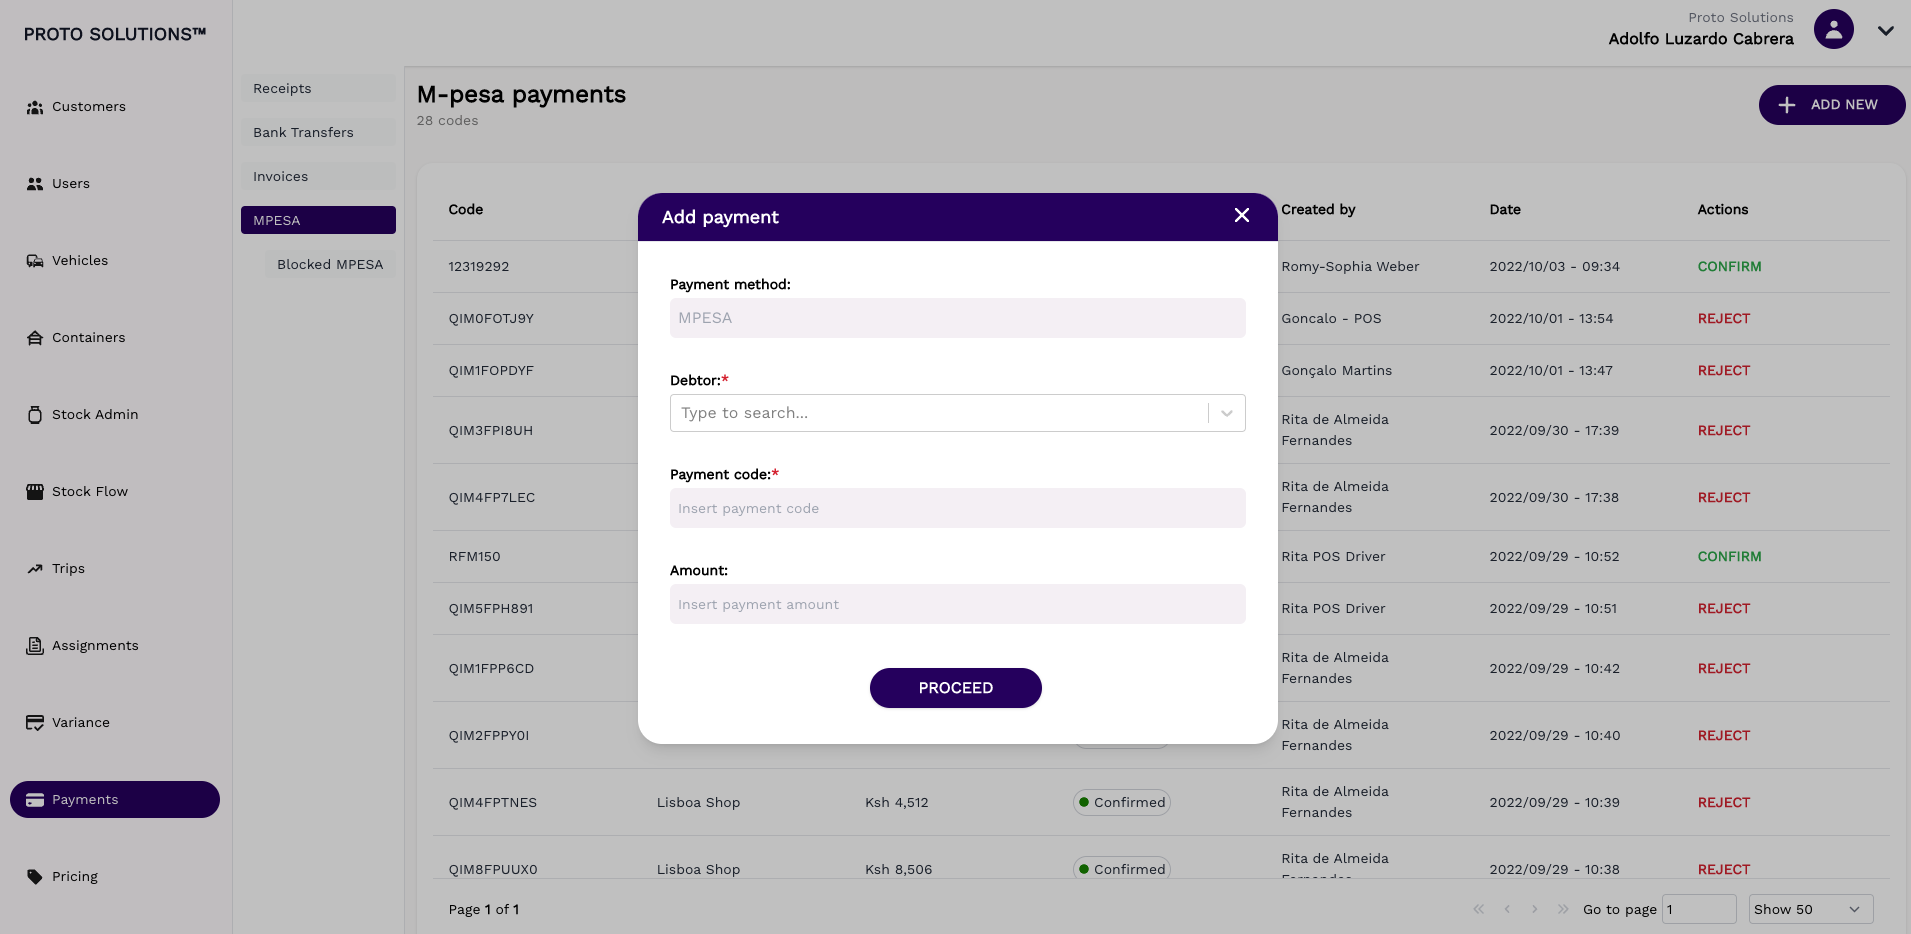
When adding a new Mpesa payment you need to define the Debtor, who is the user that you want to add the mpesa code to. The user needs to have a Till number assigned. And the payment will then be added to the users Till. Once confirmed, the payment can be added to a sale/receipt.
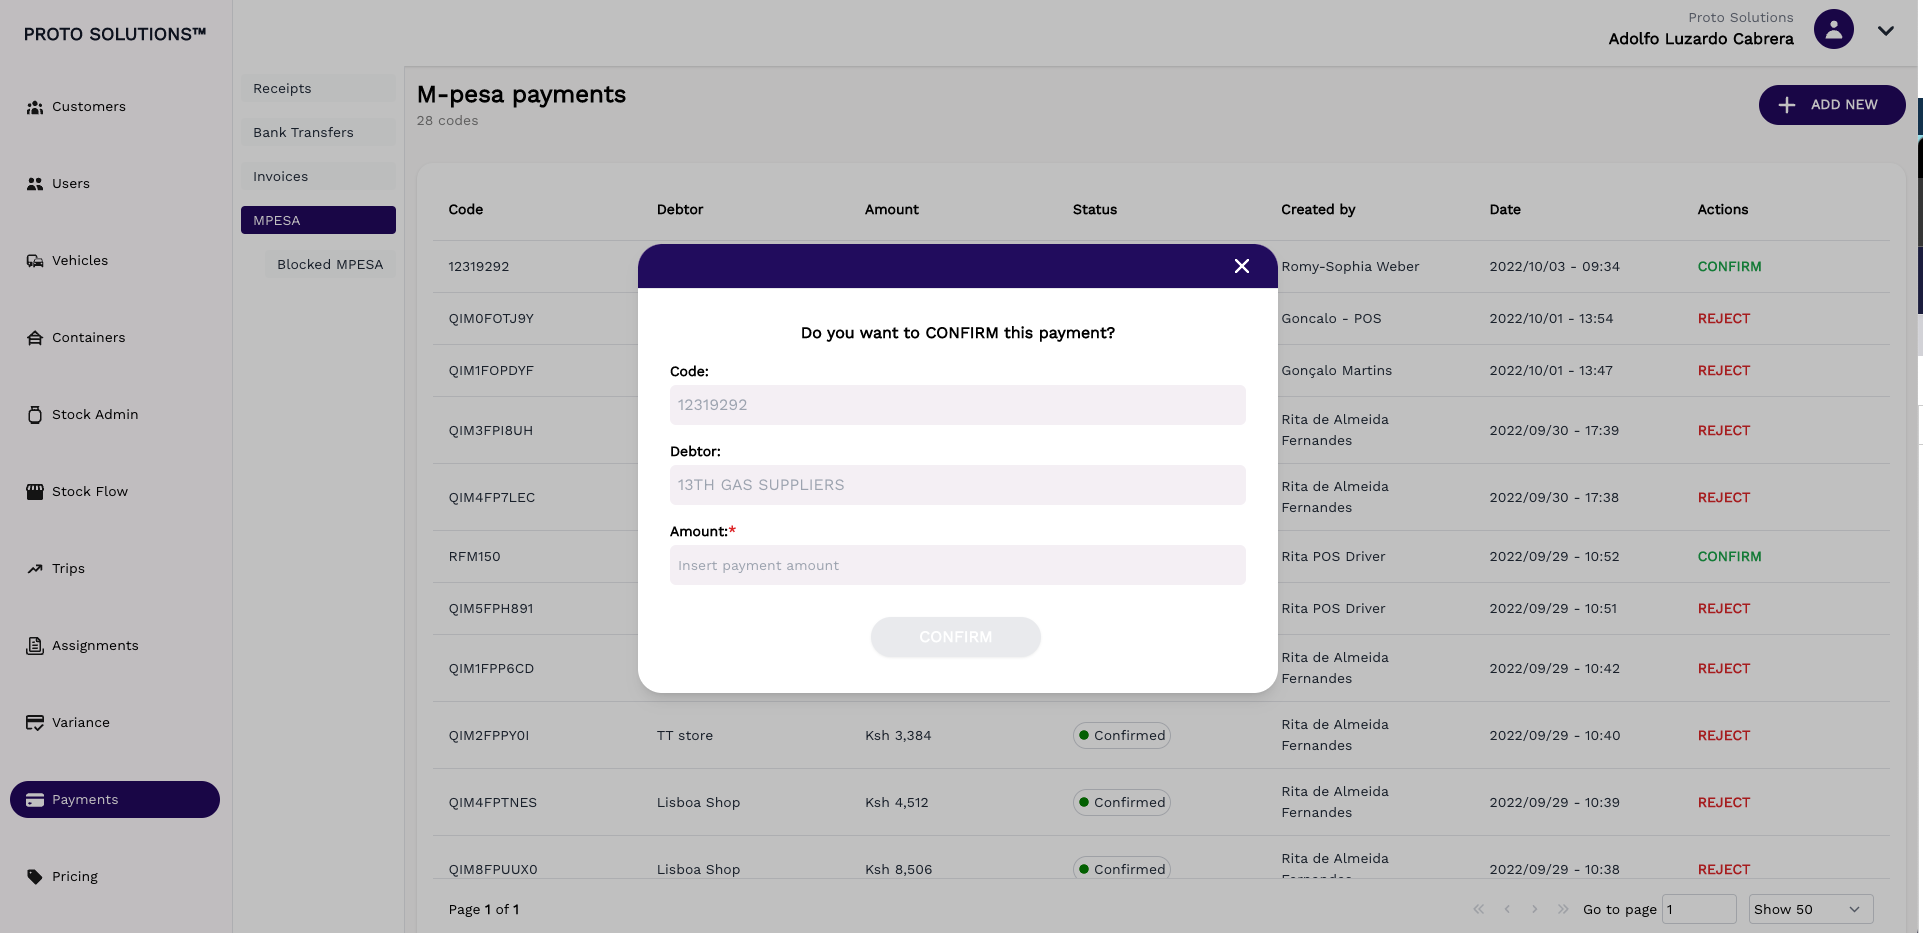
In order to confirm a payment, you will have to click on confirm In the list and then also confirm the action in the popup that you see below. In order to confirm you need to add the amount that the payment total is.
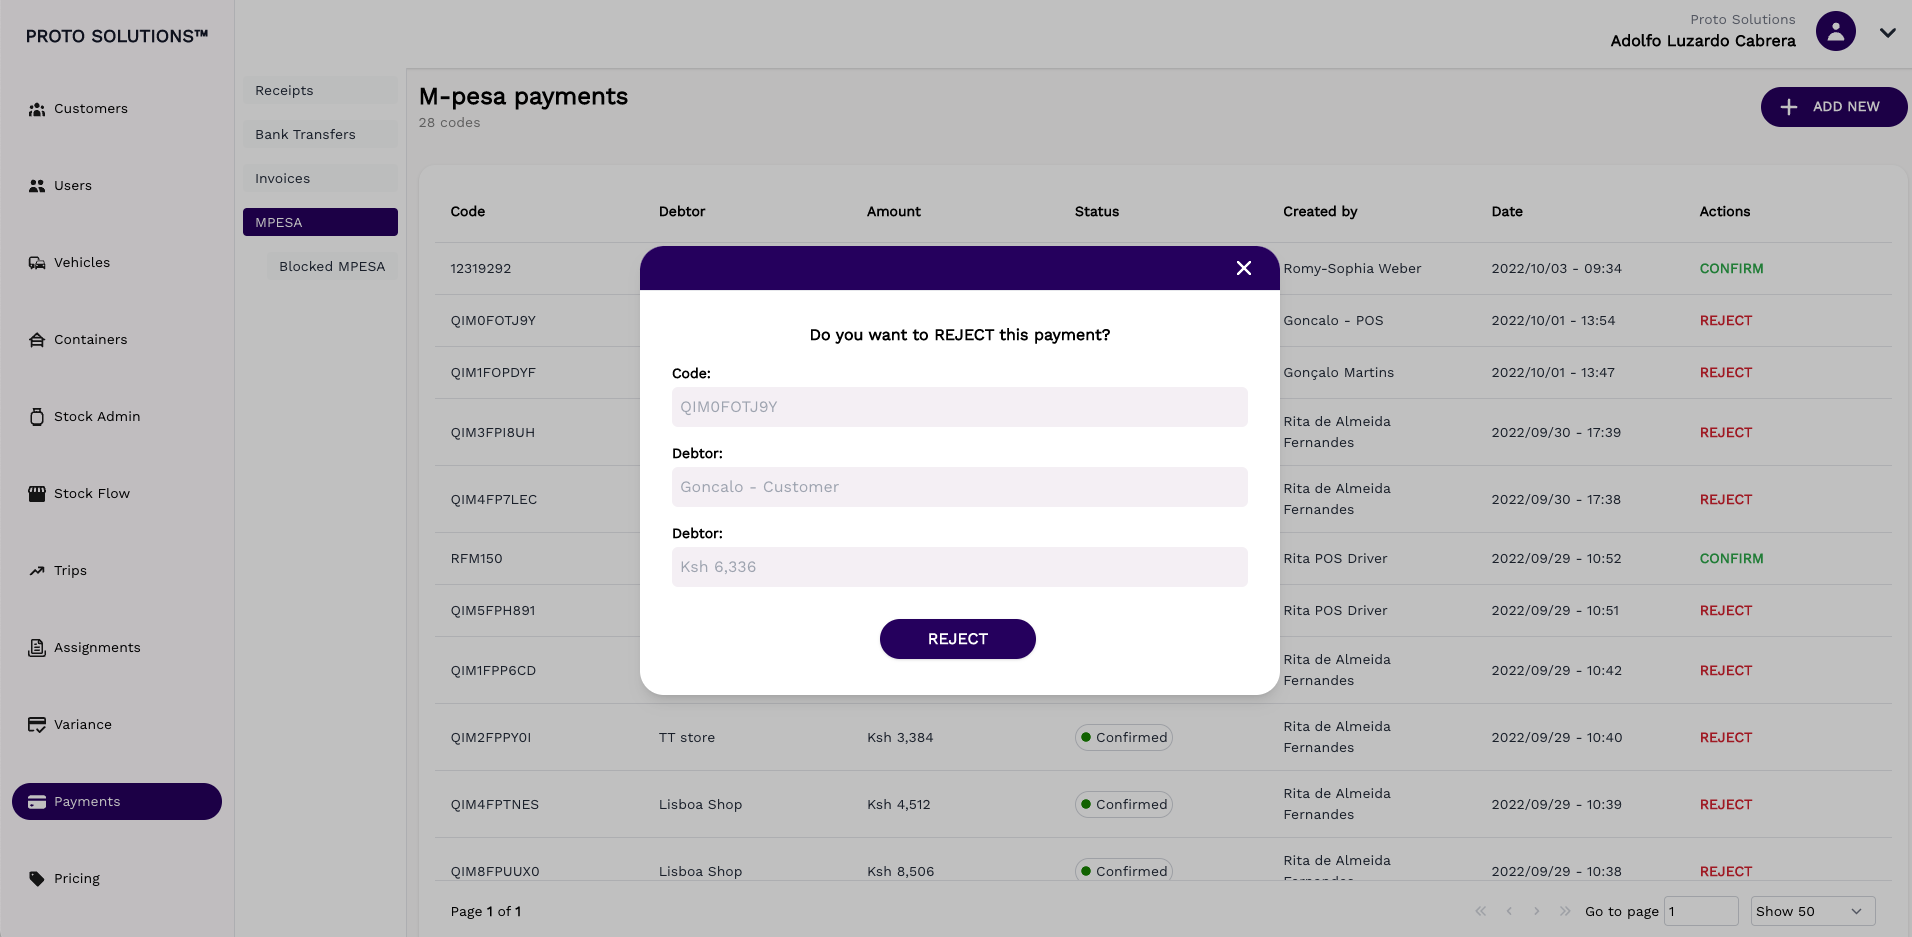
In order to reject a payment you need to click on reject from the list view, and then also click on reject in the popup. You can see the screen below:
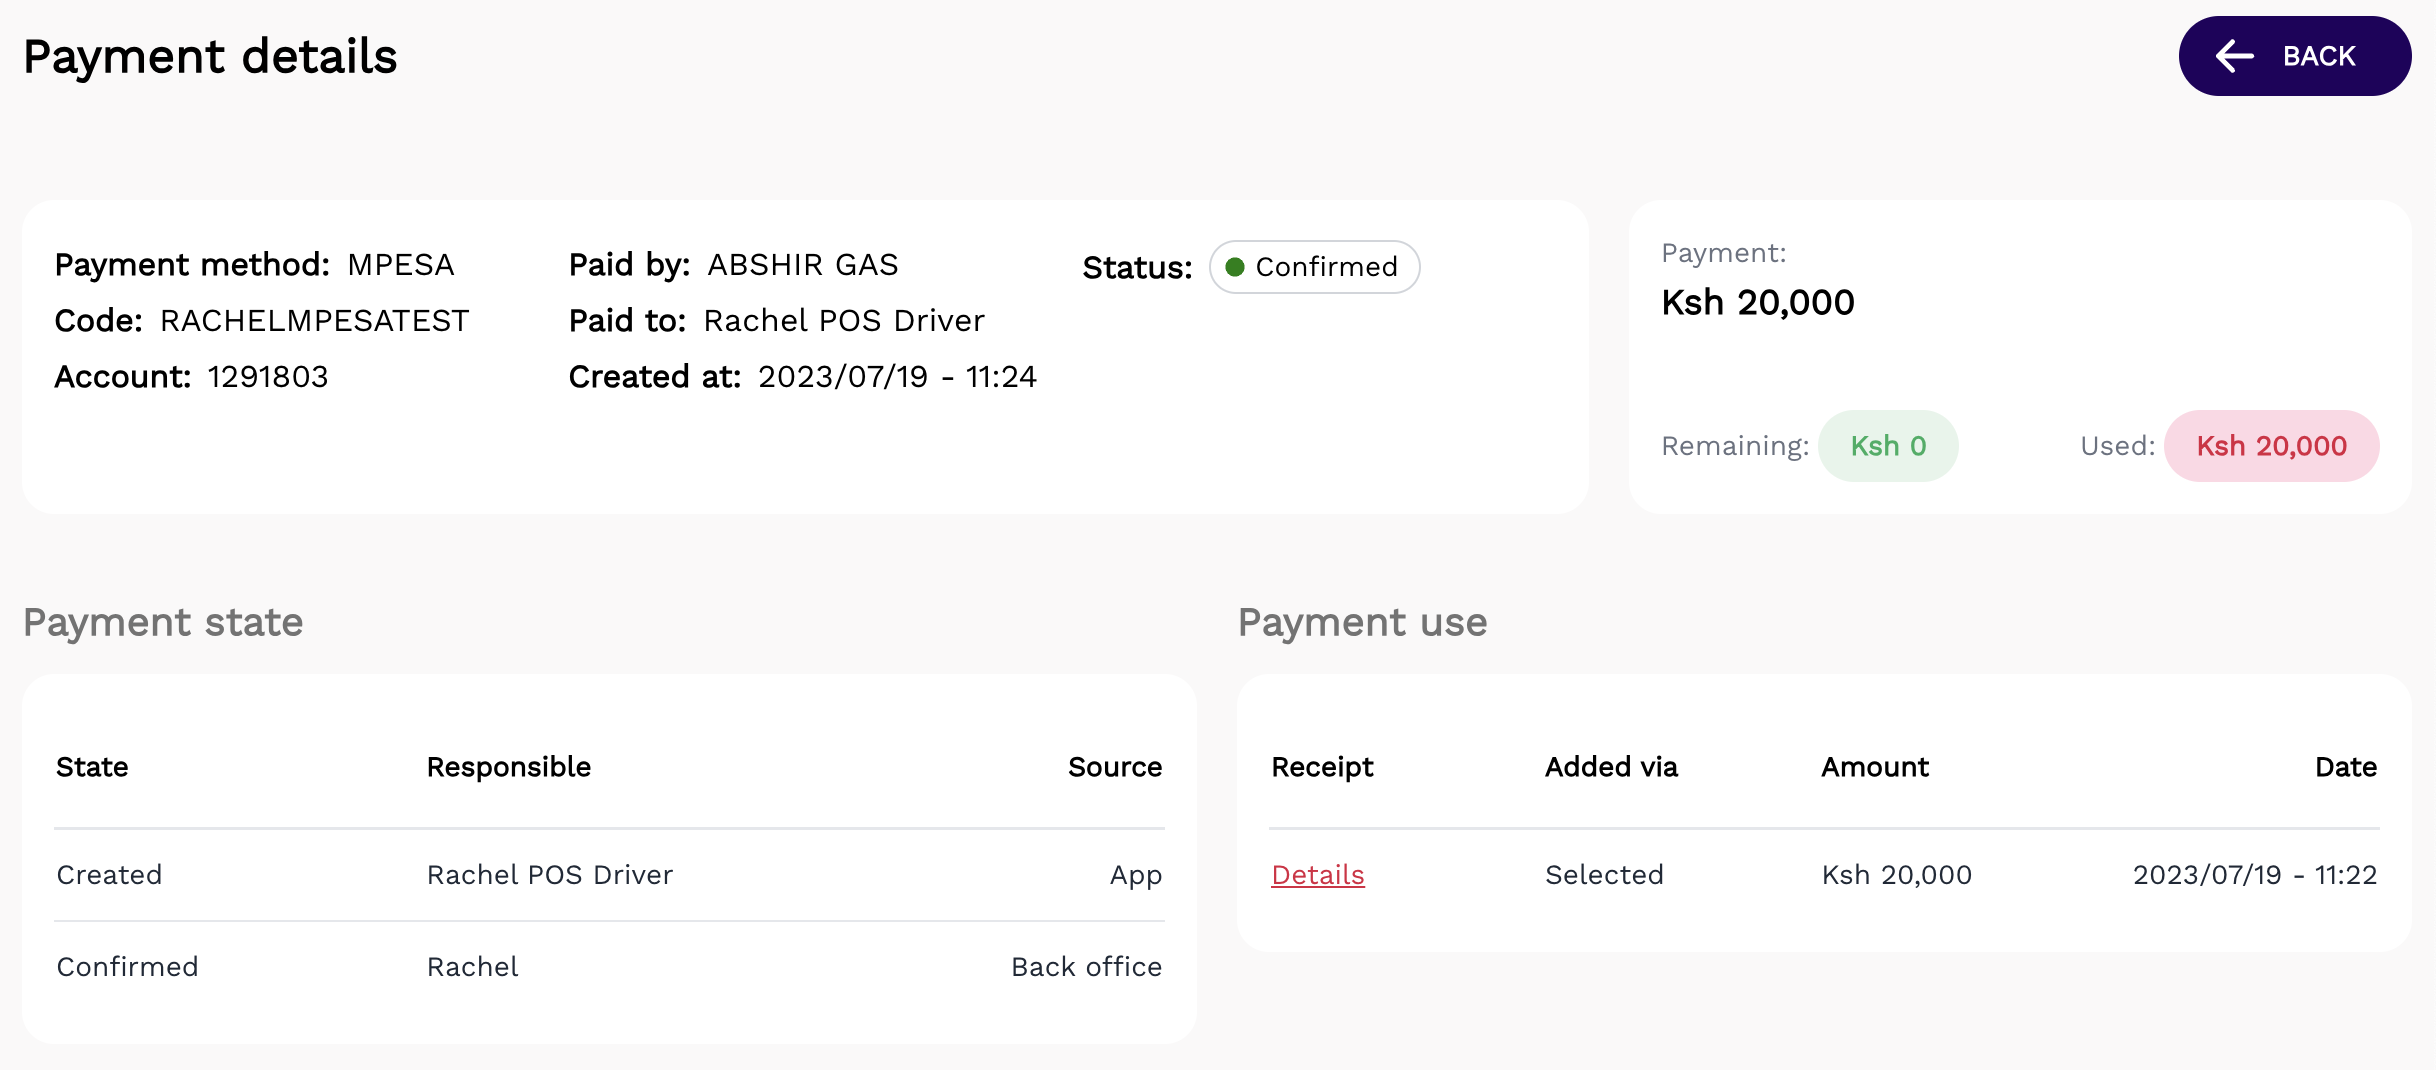
Payment details are now accessible on the MPESA page. To view more specific information about a particular payment, one needs to click on the 'eye' symbol, which will redirect them to a new page.
The provided details encompass the following:
- Payment method
- Payment Code
- The account number
- The customer who is paying (paid by)
- The employee who taking the payment (paid to)
- The date and time when the payment was created (created at)
- The status of the payment
- The payment amount as well as how much was used and how much the driver has remaining
On this page, a user can also view the payment state which indicates who the payment was created by and who it was confirmed by as well as the source where this action took place (APP or backoffice).
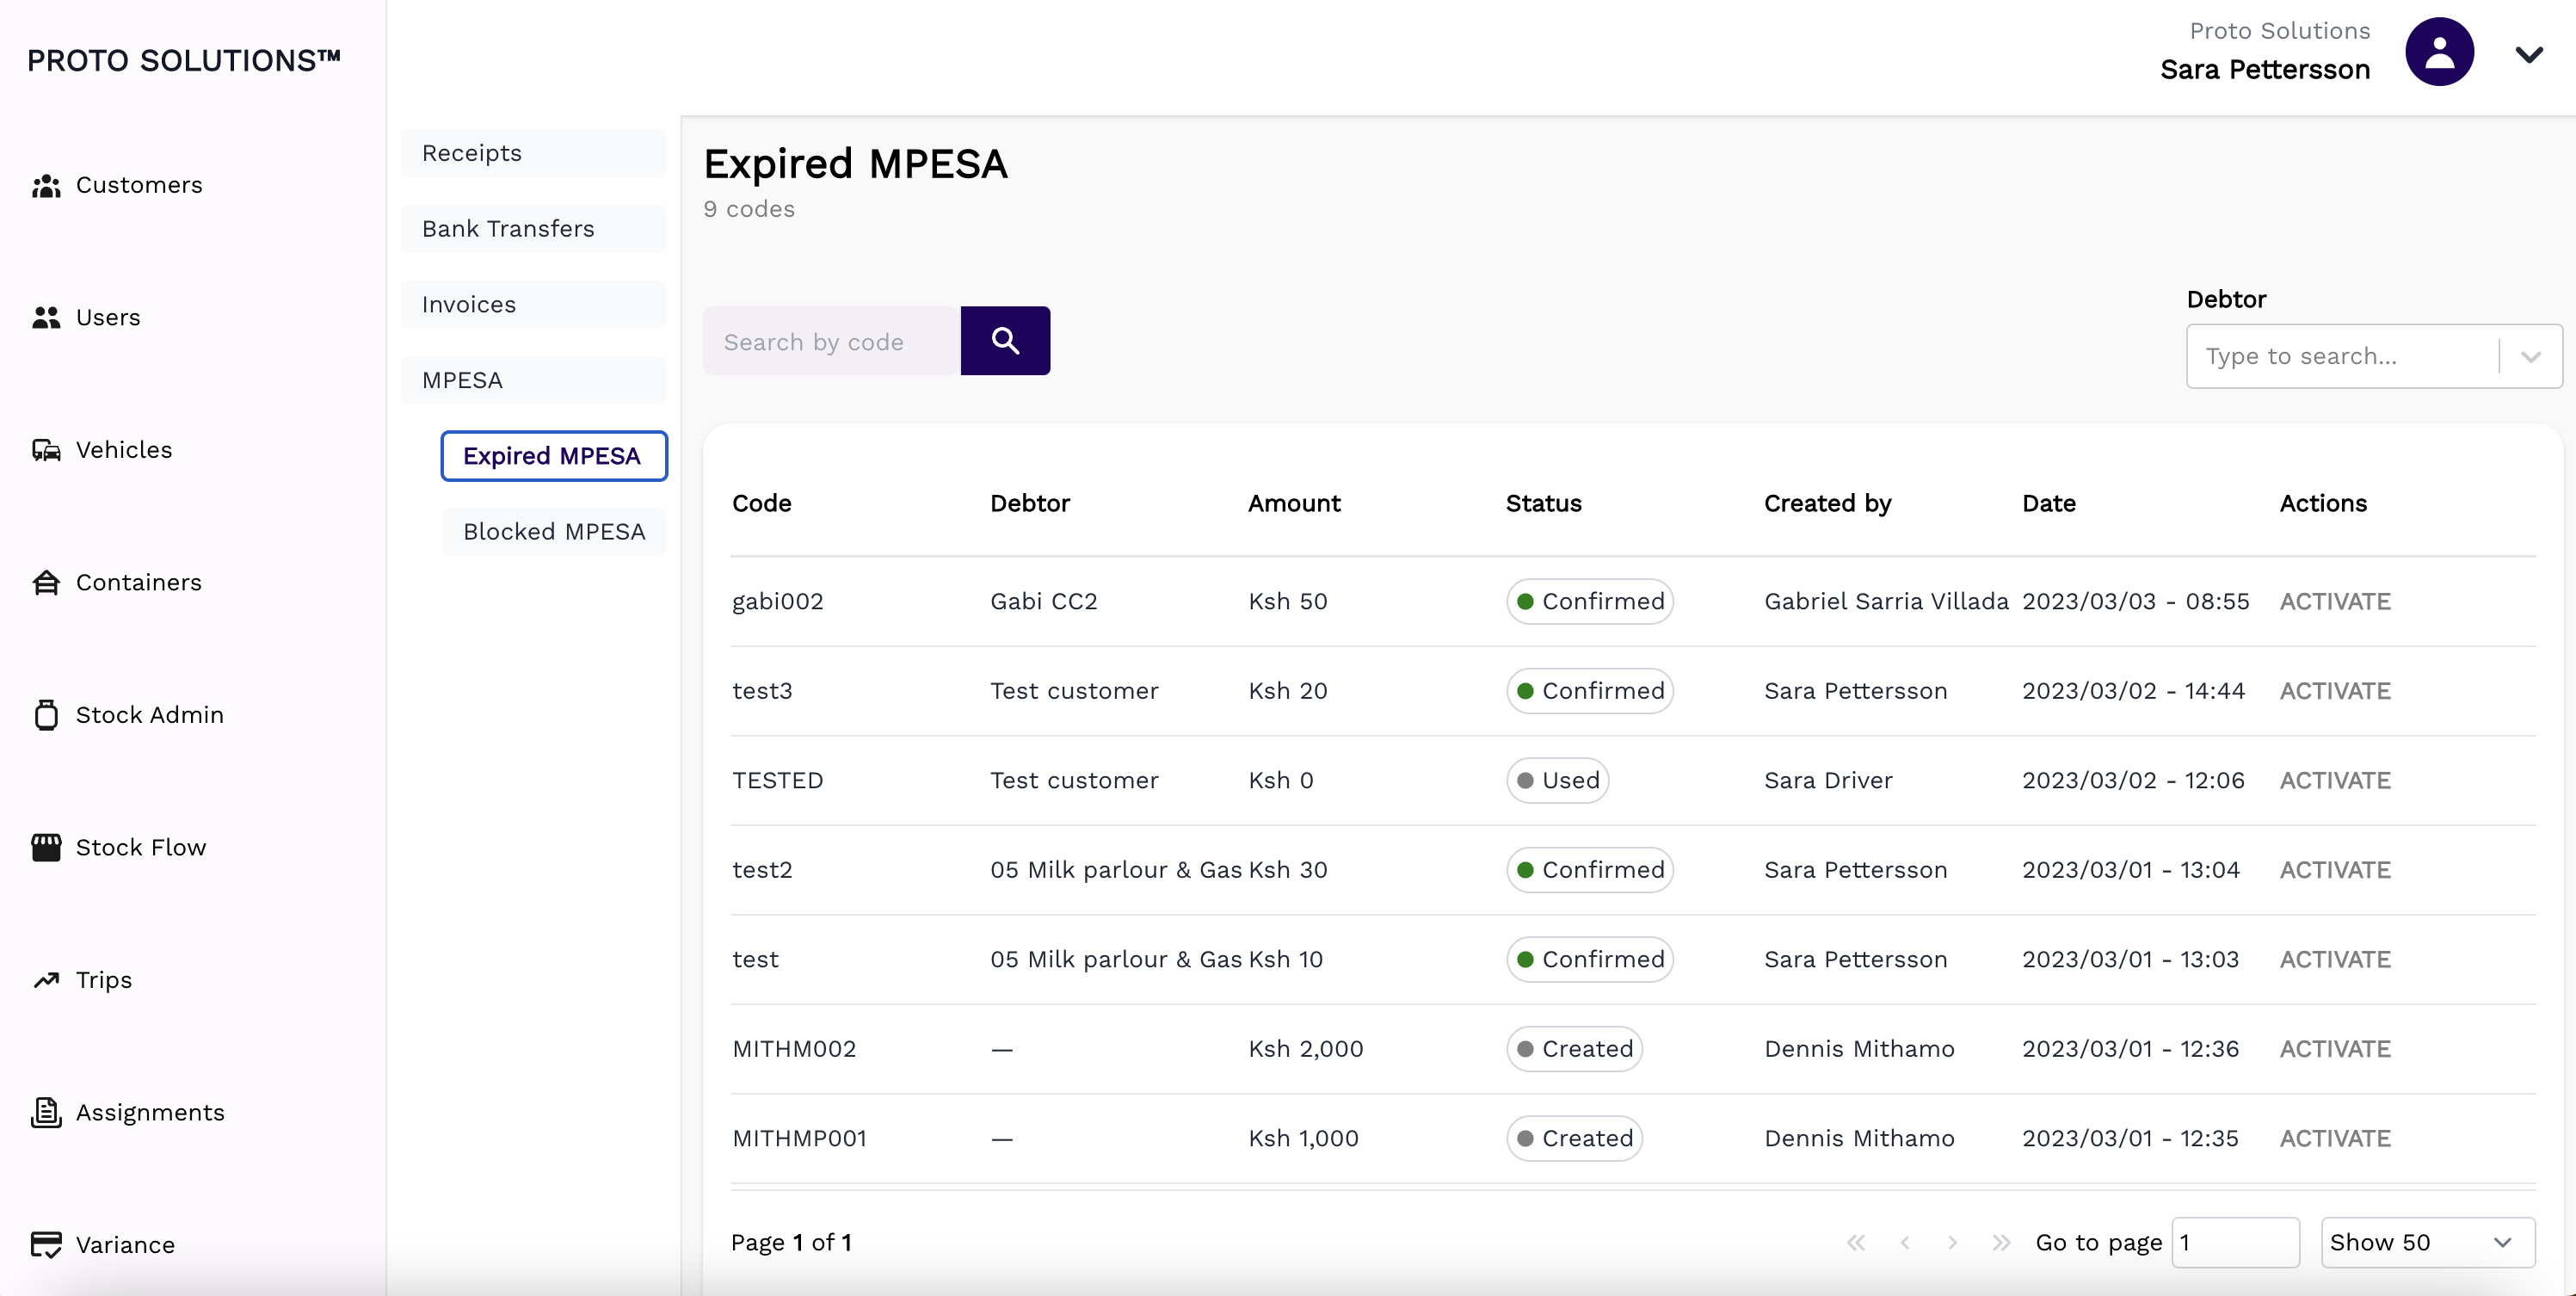
Expired MPESA
You will see a list of all expired MPESA codes here:
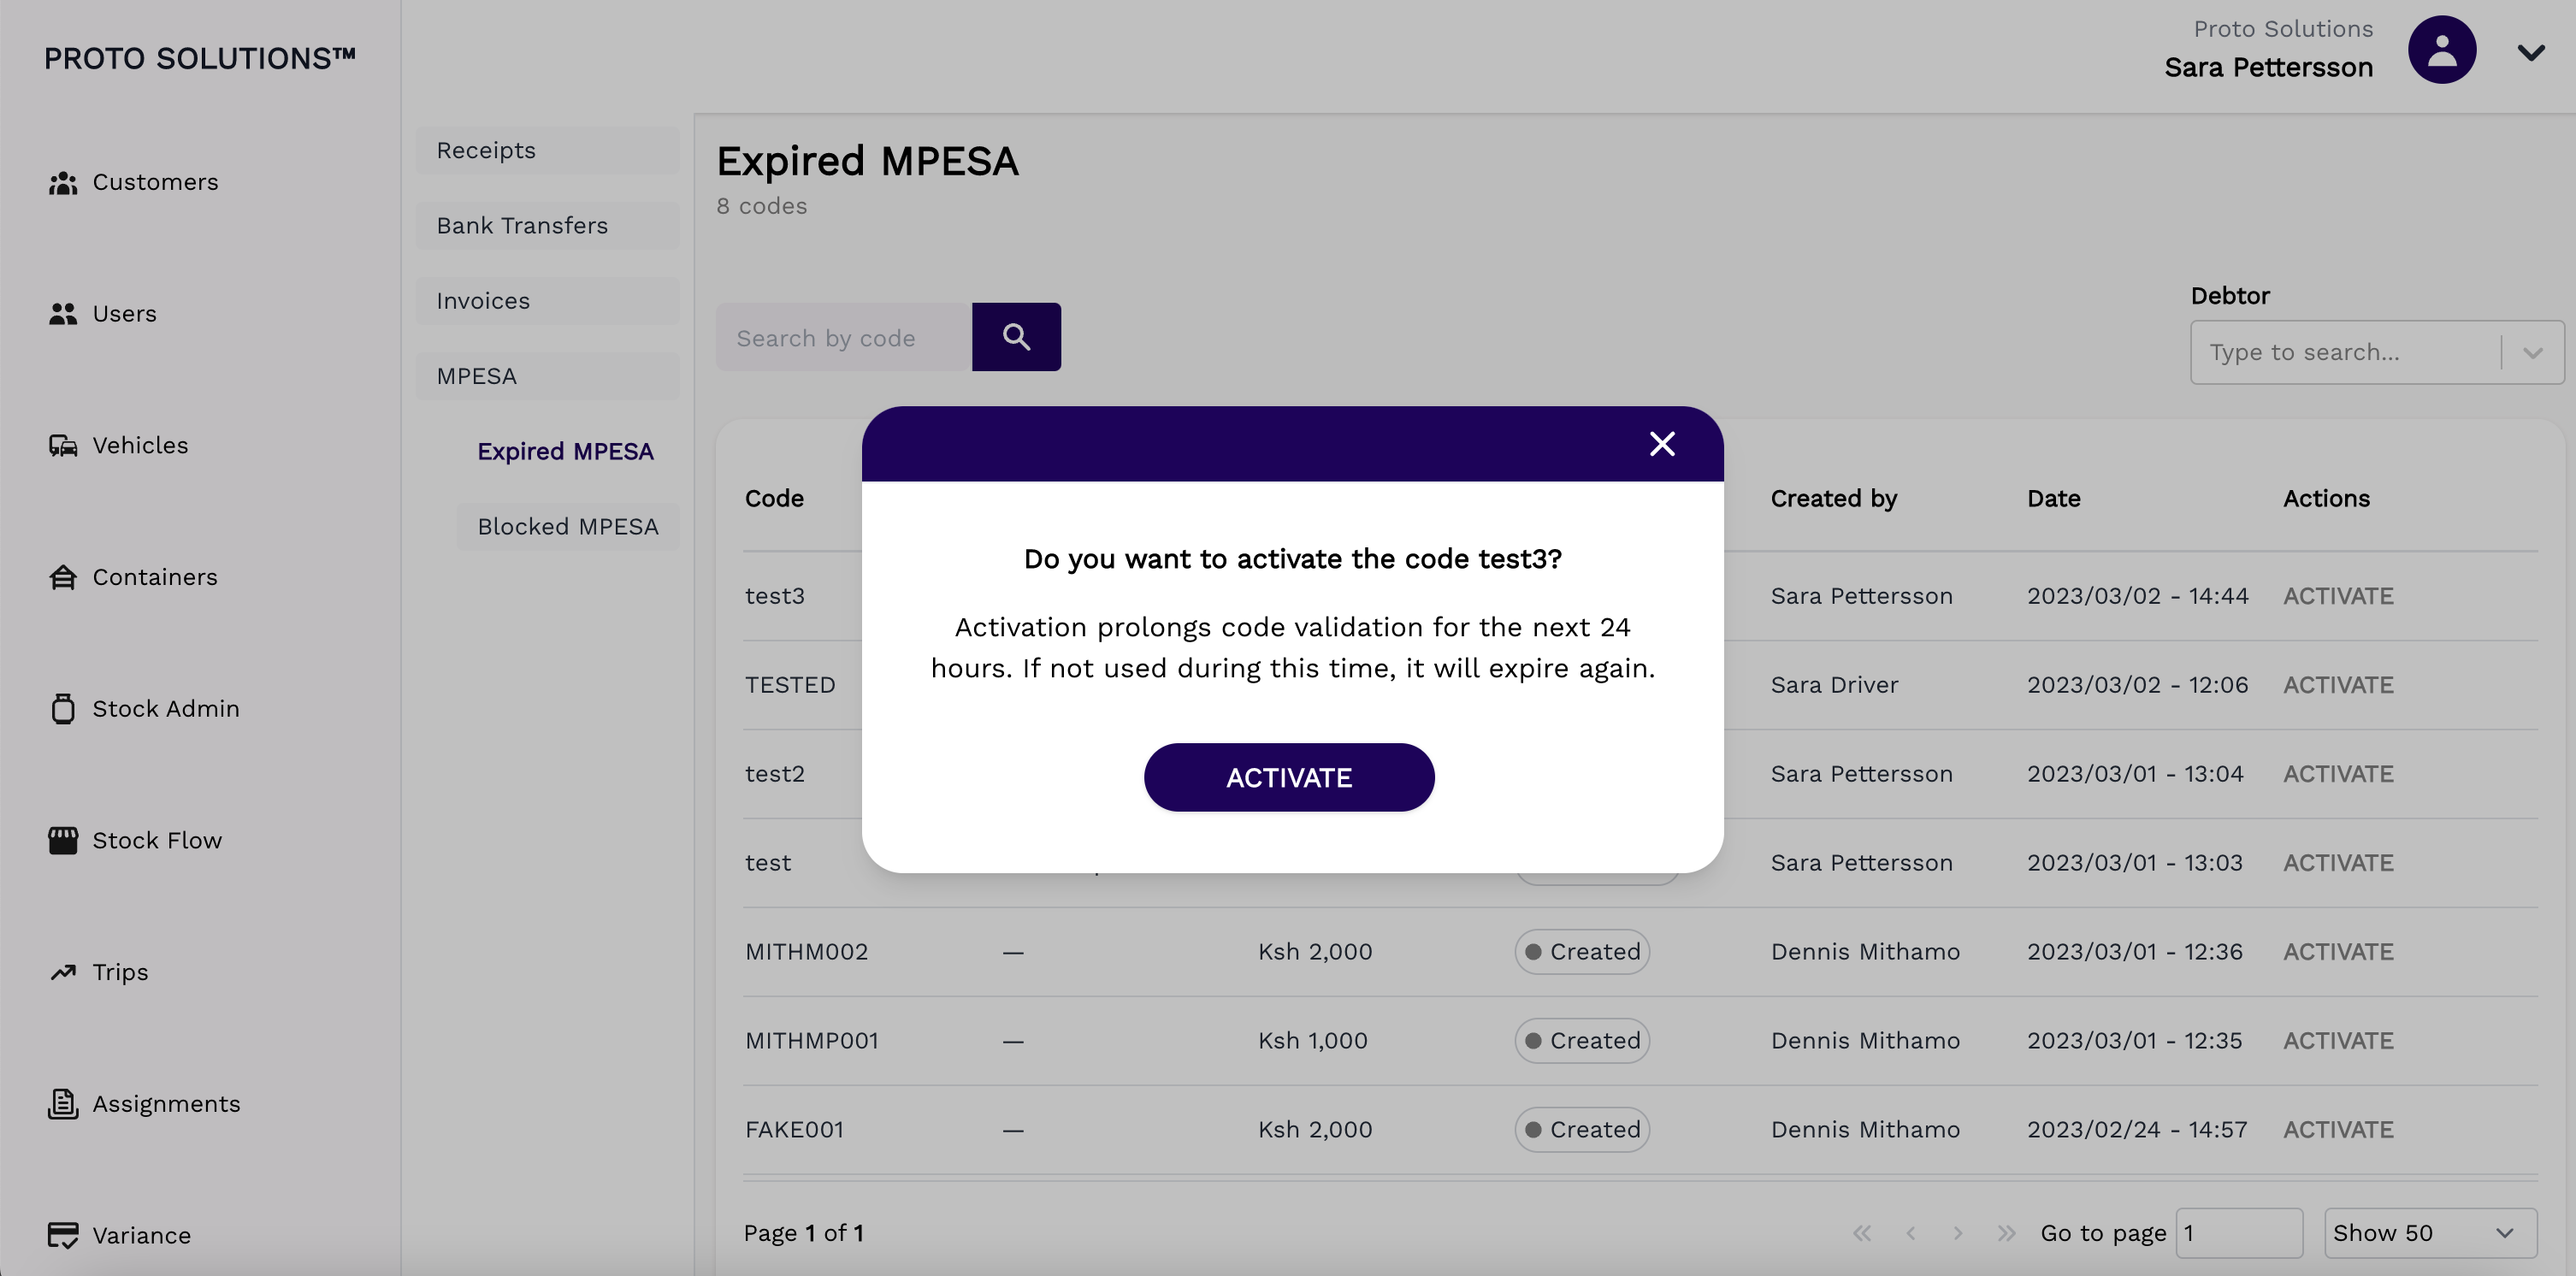
You can activate a code from the list view, by clicking on ACTIVATE:
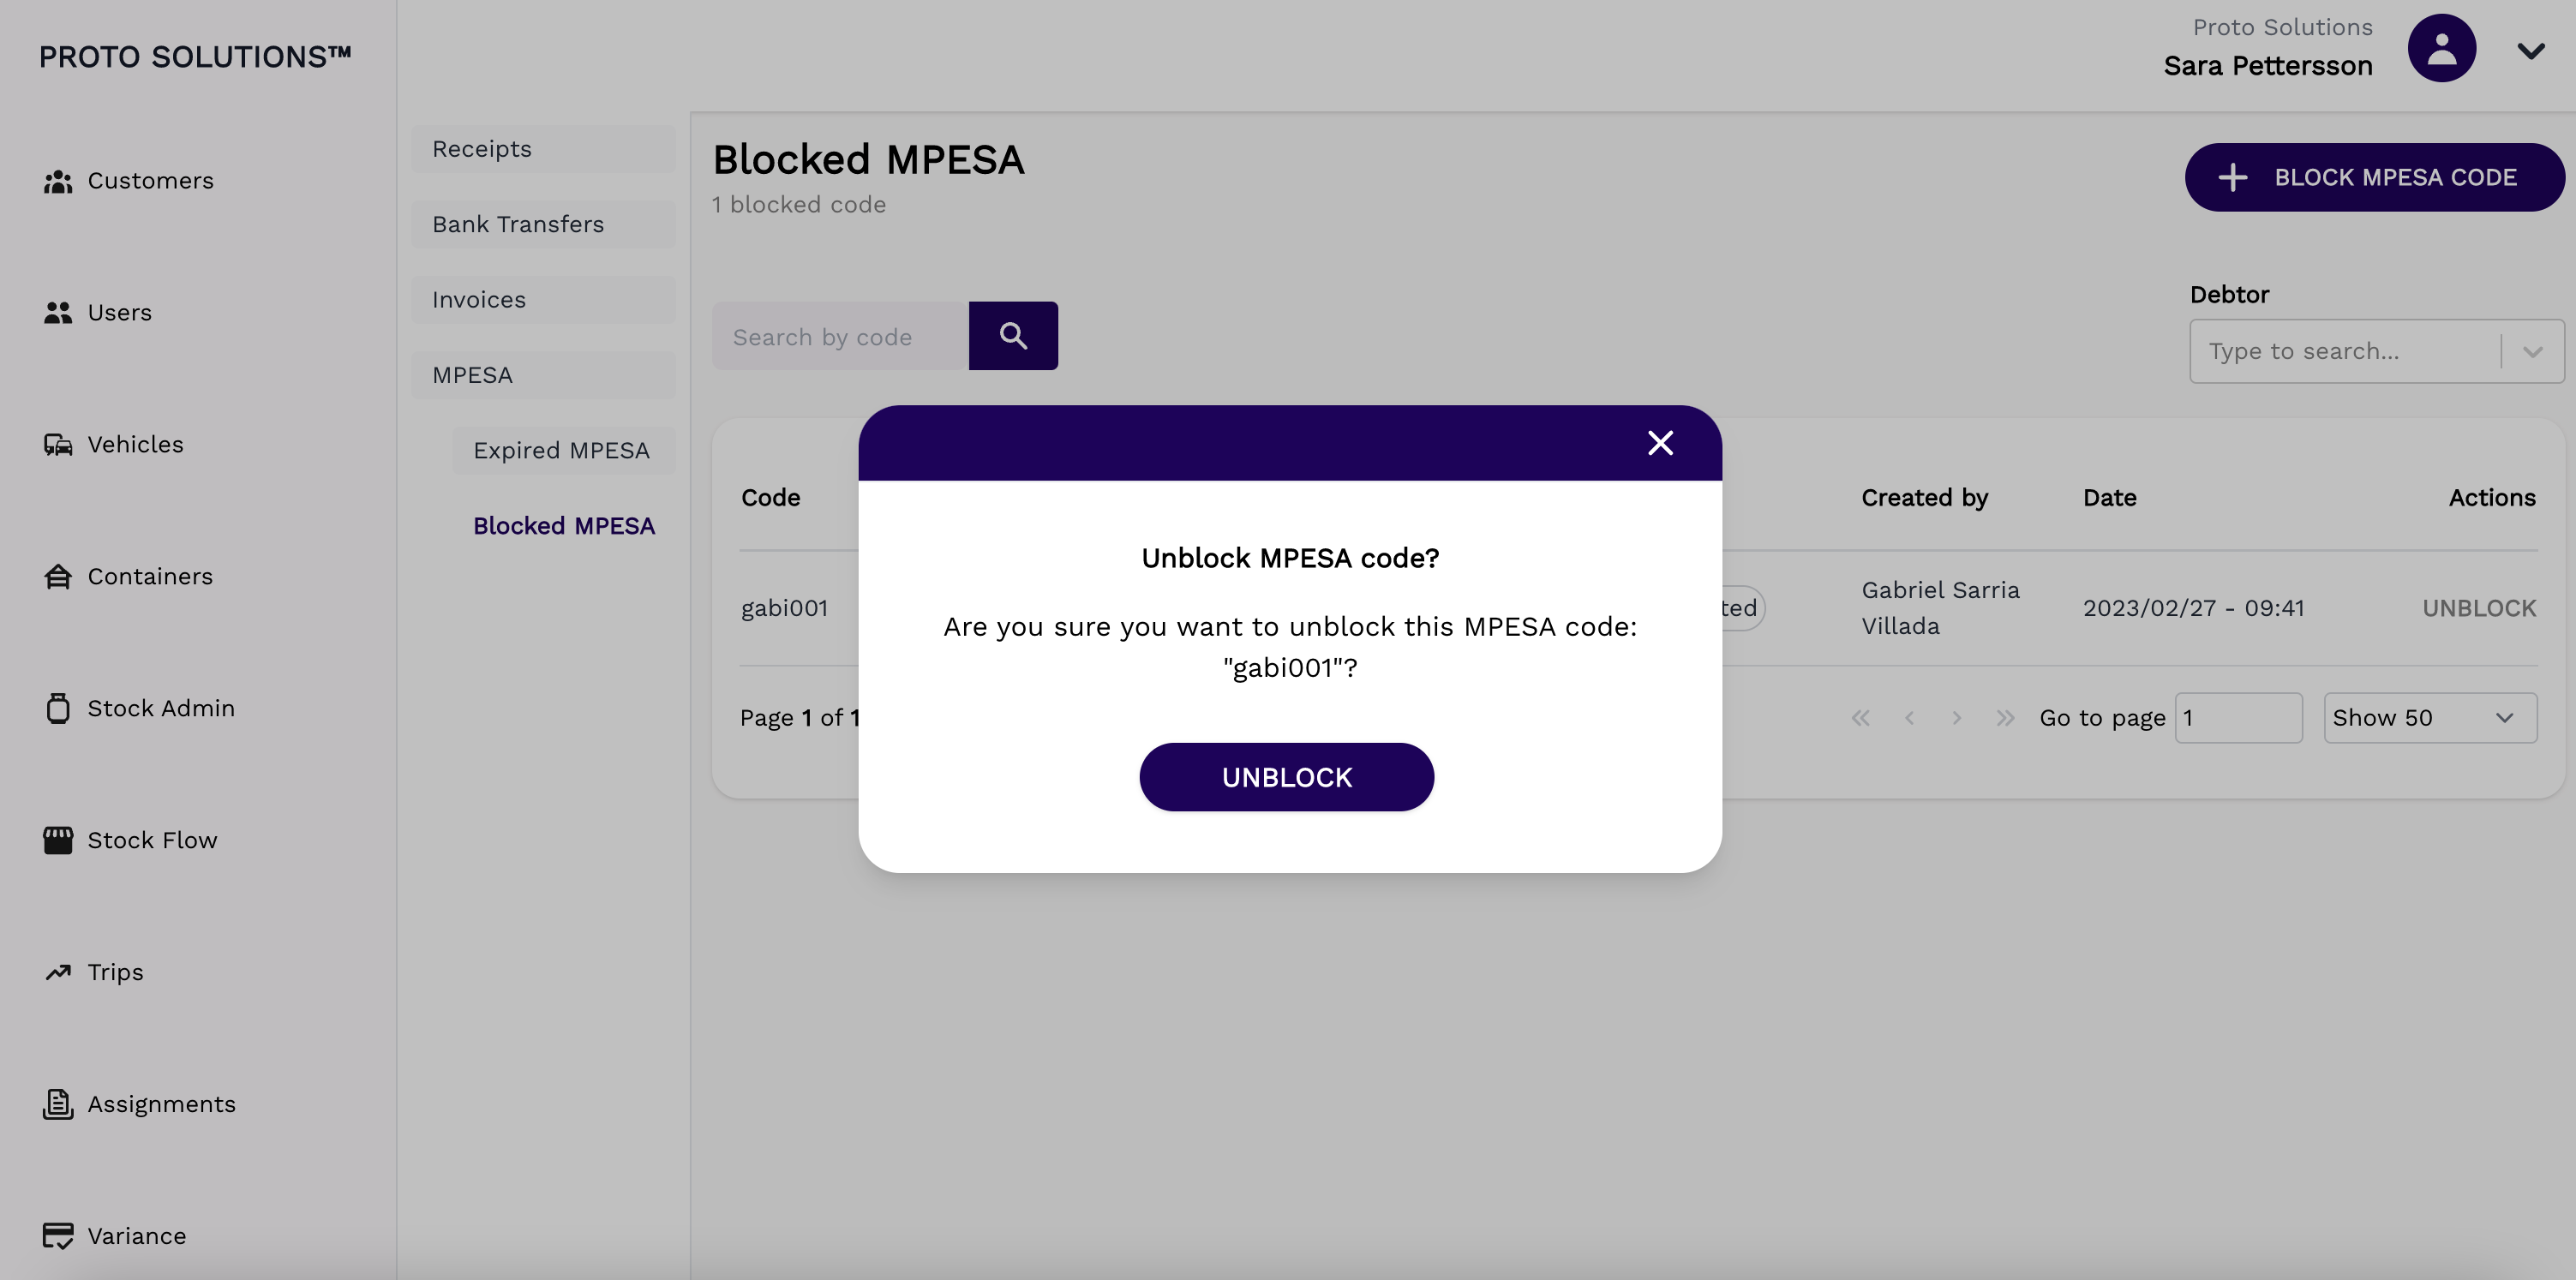
Blocked MPESA
In order to block any mpesa code, you can go to the blocked mpesa page and you will see a list of all blocked mpesa codes here:

You can unblock a code from the list view, by clicking on unblock:
In order to block a code you need to click on +block mpesa code and enter the code in the screen below:
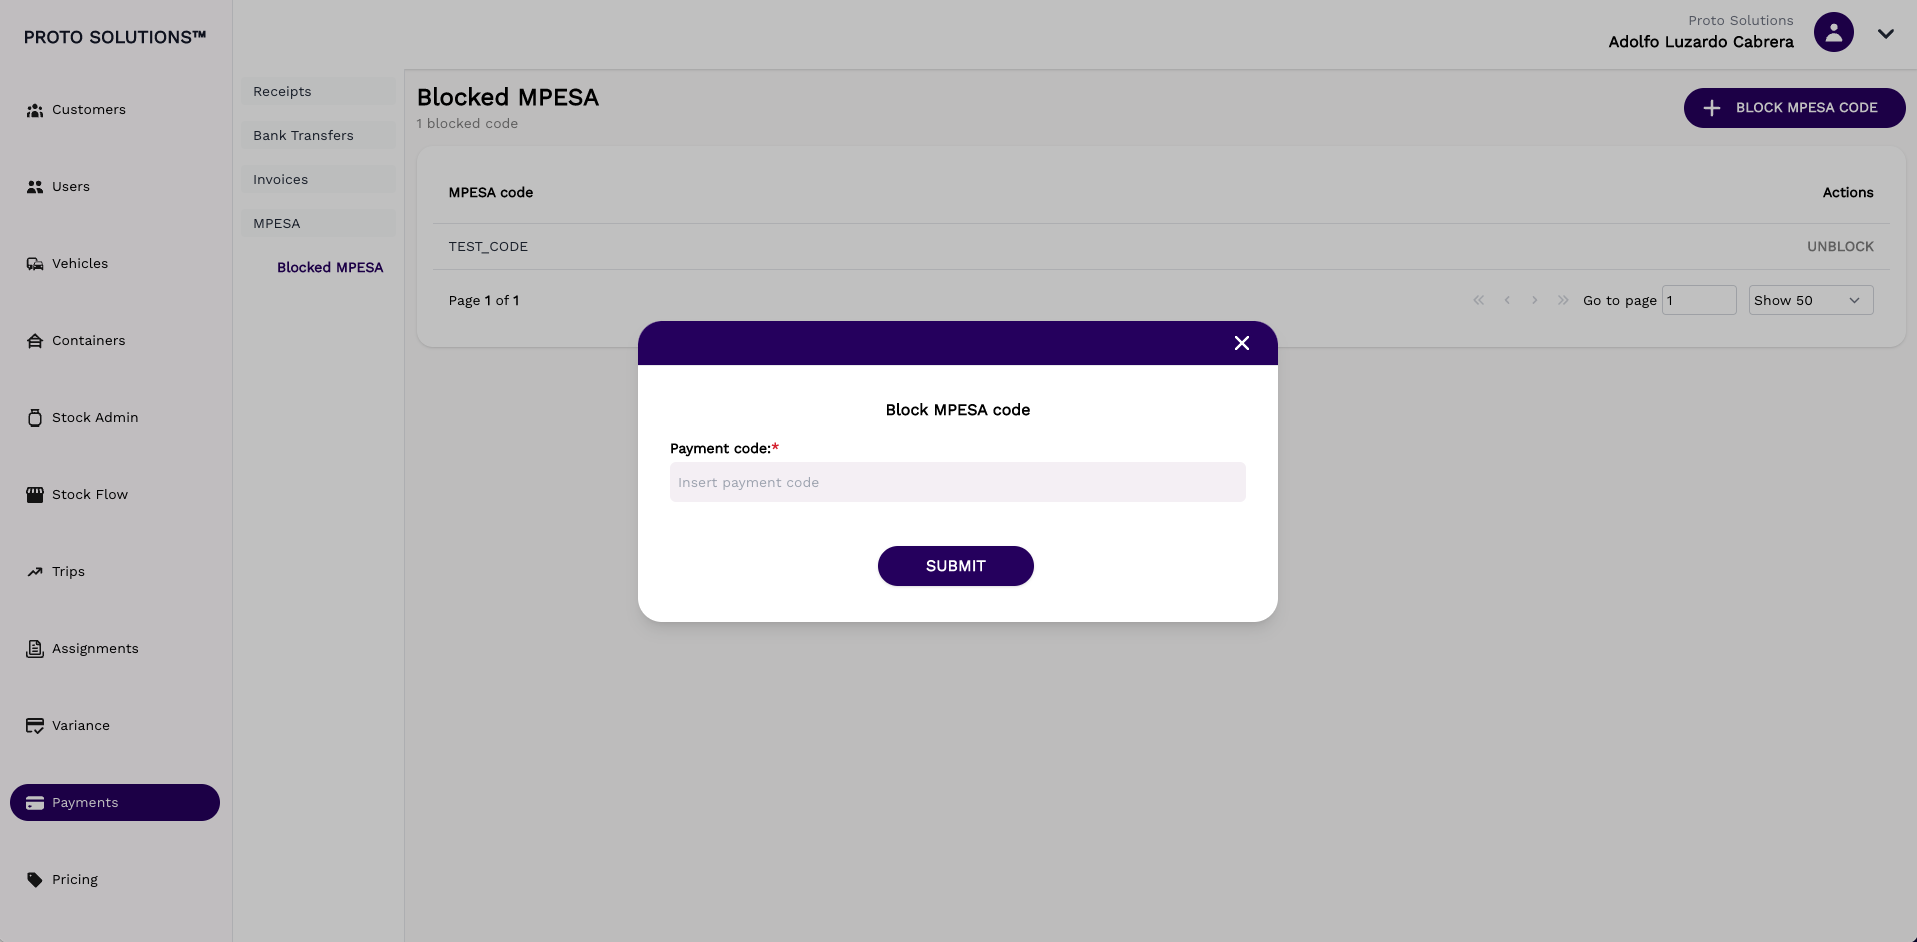
Once you click on submit the mpesa block is active.