Container Coordinators
In this page, we cover how a container manager can use the ProDistribution App when: 1. Opening Stock - to make the products available for the drivers. 2. Creating trips - and associating them with the available drivers.
- 1. Opening Stock
- 2. Creating Trips (+Scanning)
- 3. Confirming and Signing Loading (+Scanning)
- 4. Confirming and Signing OffLoading (+Scanning)
- 5. Closing stock
1. Opening Stock
Open Stock
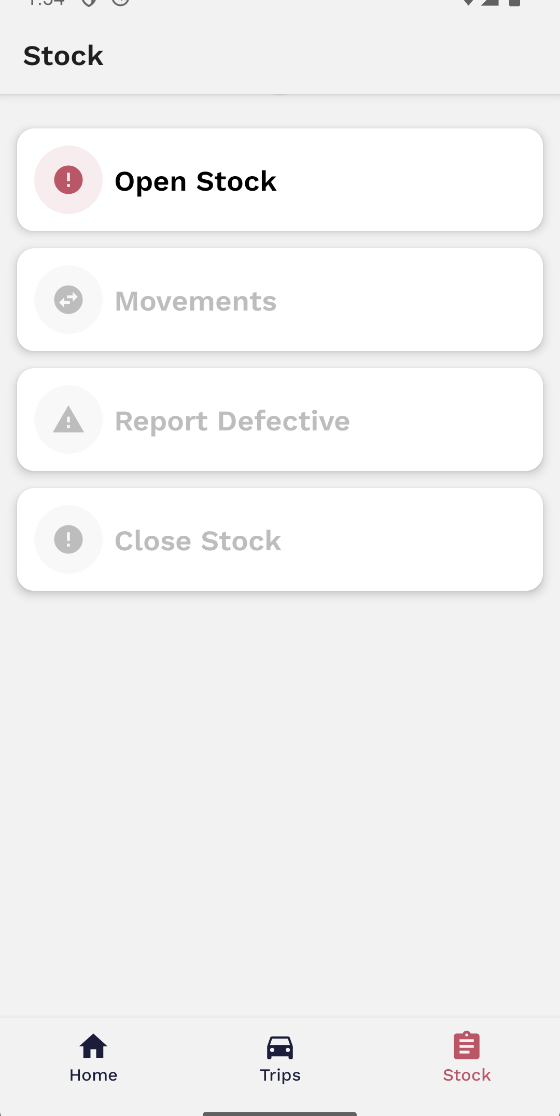
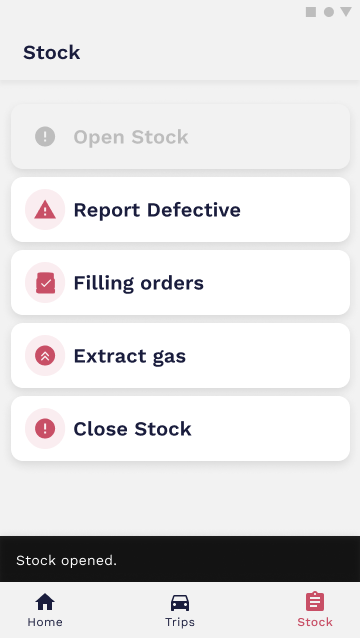
Each warehouse has its own stock of various products. The container coordinator has to open the stock in order to make the products available for the drivers. On the app, you can access the Stock tab and manage the container’s stock levels, as well as fill orders, report defectives, and close stock.
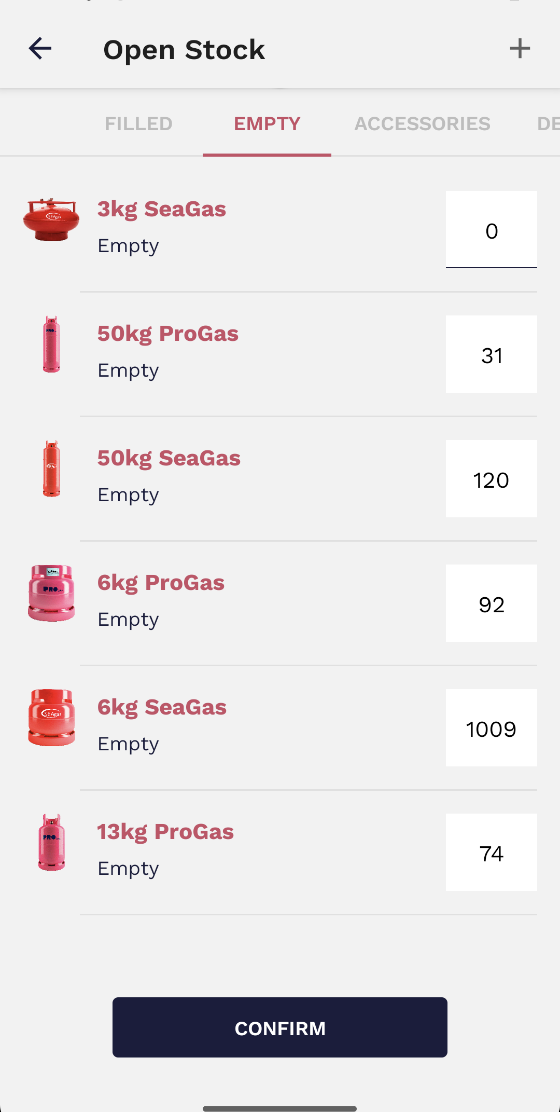
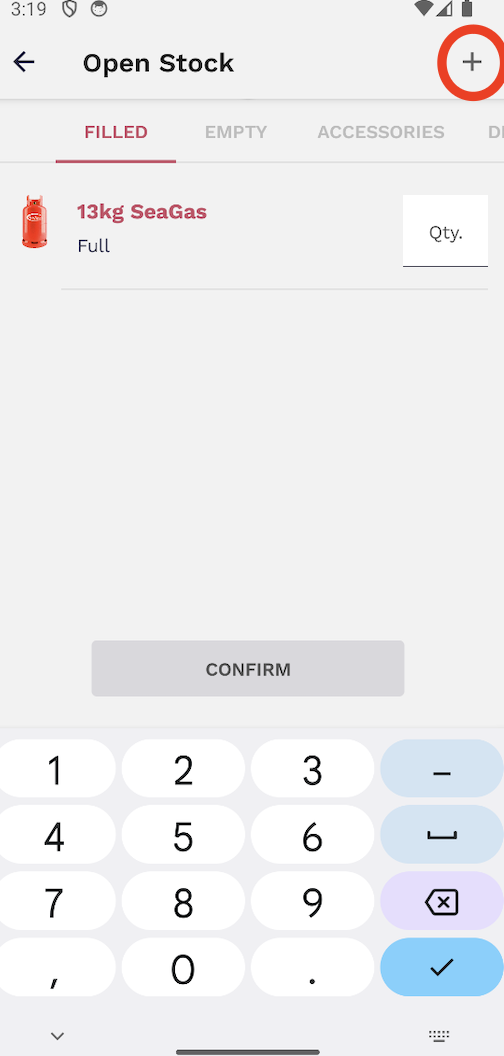
To select the available products, you will have access to a product catalog and be able to choose the amount for each one of them. All inputs should be filled even if the amount is 0.
If you would like to add products that are not visible in the provided list, you can click on the plus symbol (+) at the top right and add any products from that selection.
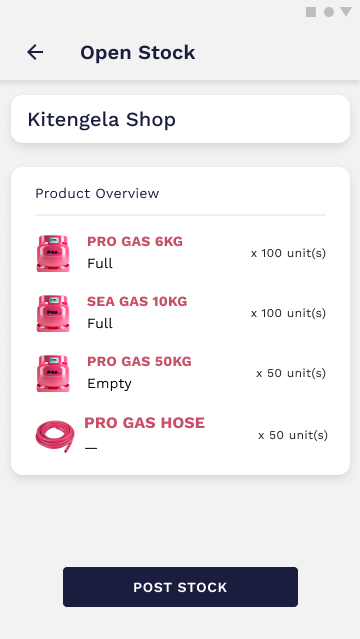
After selecting the products, you will be able to access to the stock summary with the Container name and all the listed products. If everything is correct, confirm and open stock.
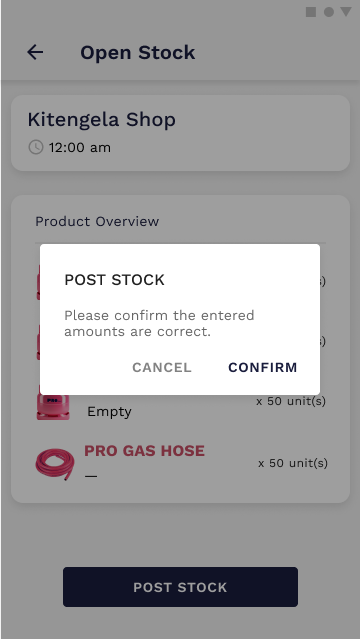
When the stock is opened, you are able to perform other actions, until you close the stock.
Video tutorial
Report defective
When you find a defective canister, it should be reported to the system. In order to do that, you should select the Product Type, current state (Empty/Full) and enter the quantity.
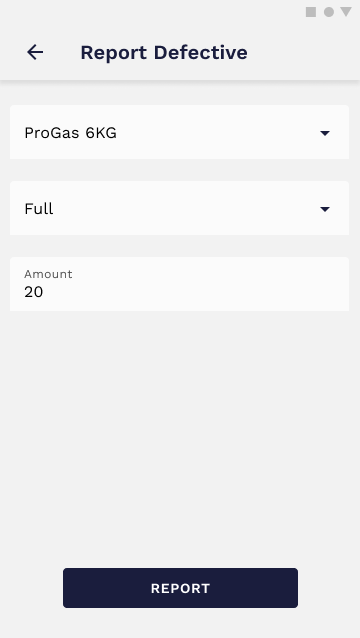
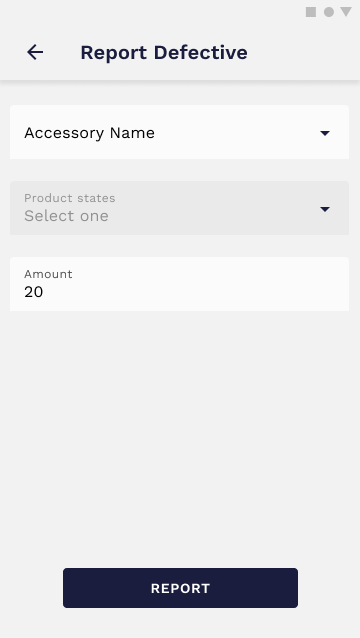
The reported products are marked as Suspected Defective until the Auditor marks them as Defective.
Video tutorial
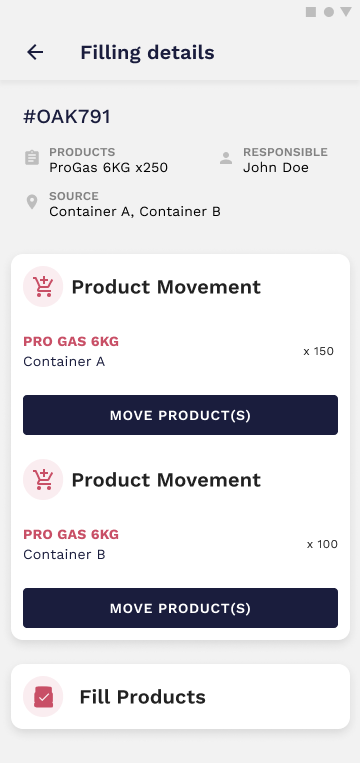
Filling orders
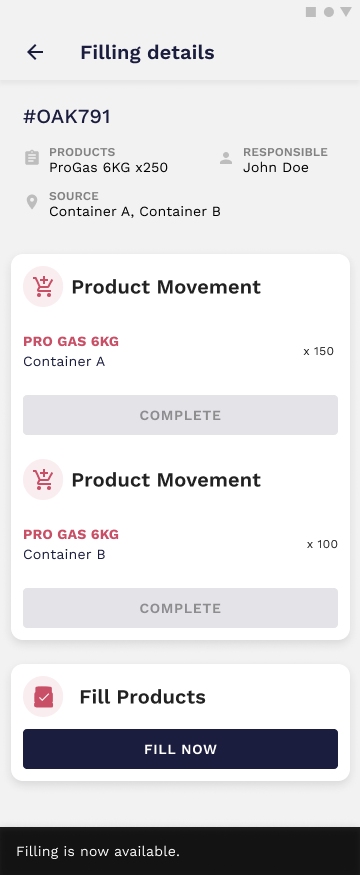
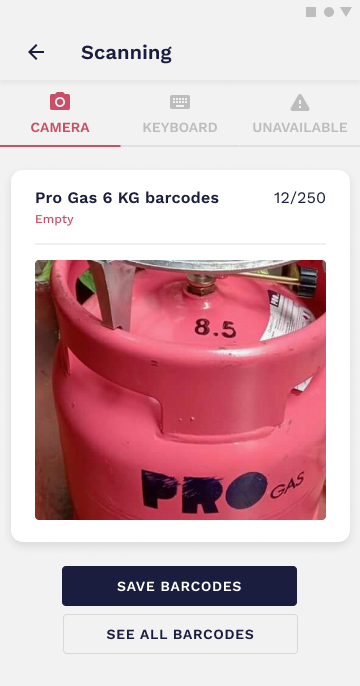
Filling orders are managed in the Back Office and displayed as cards on the App. To fill an order, you have to select one of the orders, analyze the details and move the required products first. After that, it becomes possible to fill the canisters. Scan all the products' barcodes and finally confirm filling.

Video tutorial
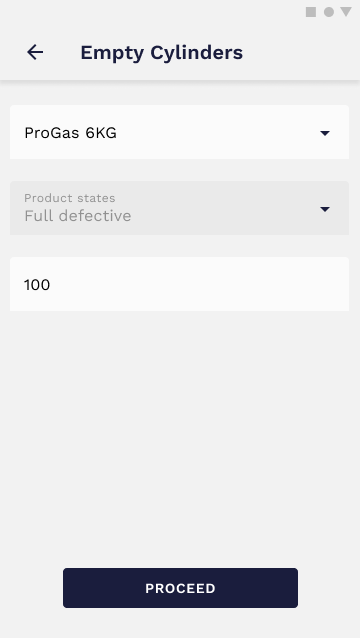
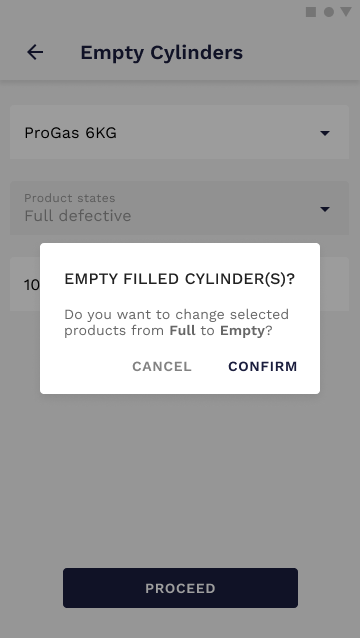
Extract gas
When a canister is marked as defective, it should be extracted. To do that, you'll have access to the Empty Cylinders tab. Select product type, quantity and confirm the action.
Video tutorial
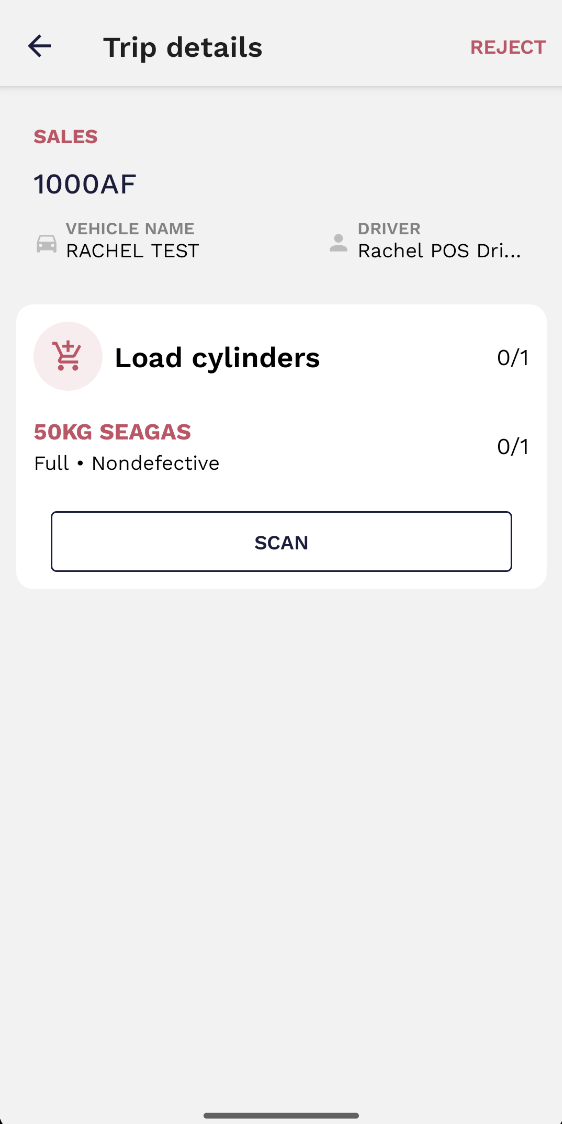
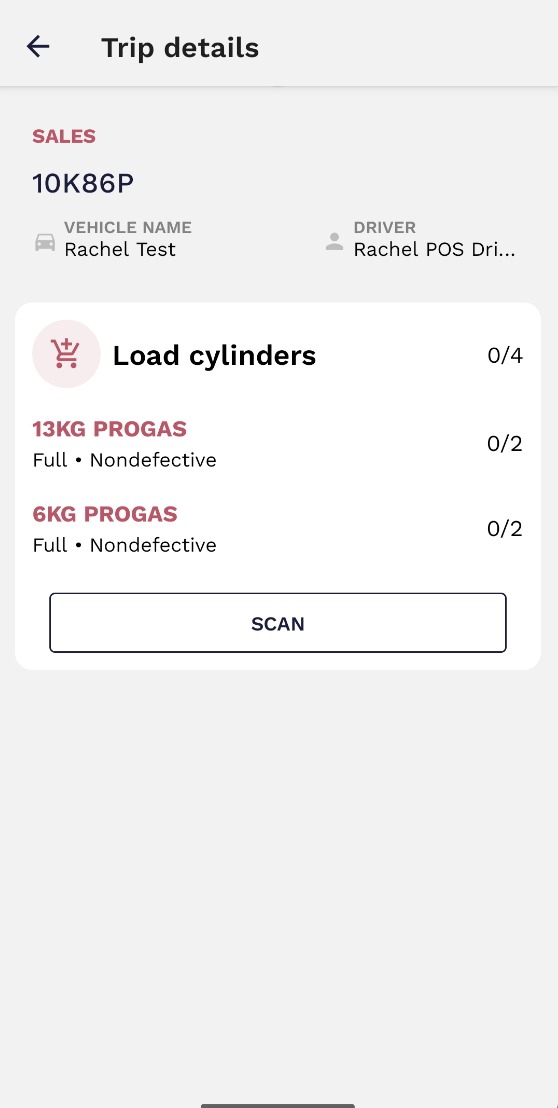
2. Creating Trips (+Scanning)
Create a trip
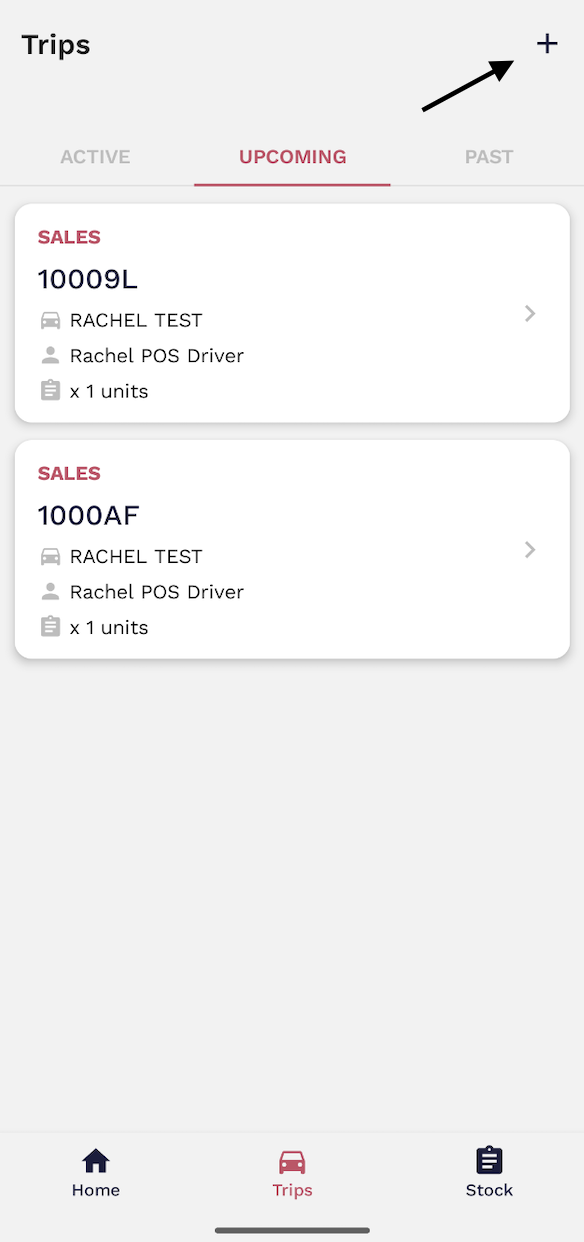
Container Coordinators have the possibility of creating trips and associating them with the available drivers. To create a trip, all you need to do is to fill out a simple form with the relevant information.
Go to the trips tab and select the plus sign located at the top right.
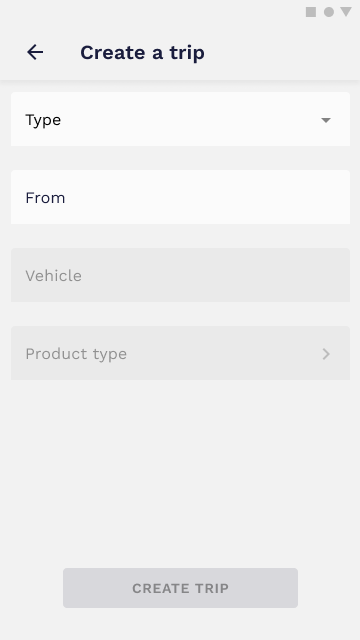

To select the products you want to be loaded on this trip, you will access a product catalog and be able to select the amount of each available product. All inputs should be filled even if the amount is 0.
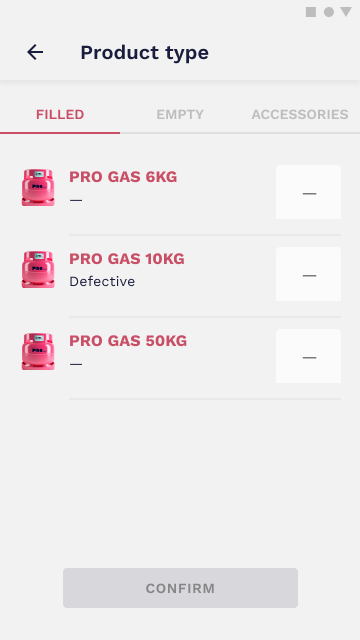
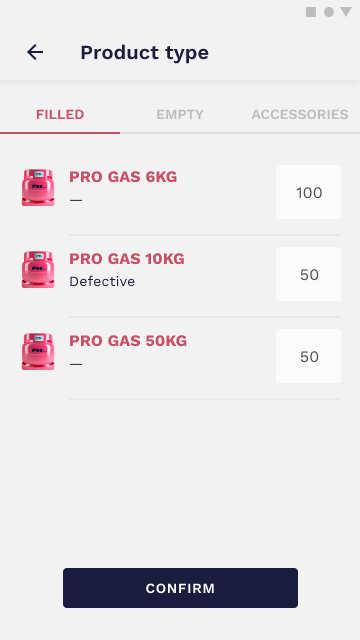
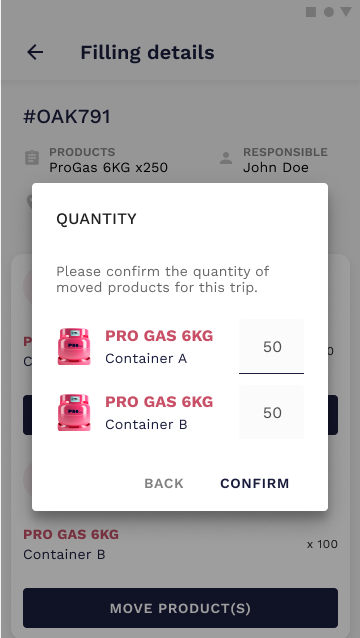
Like any other important action, this one must be confirmed before proceeding. You will be asked to confirm the quantities before moving to the next step.
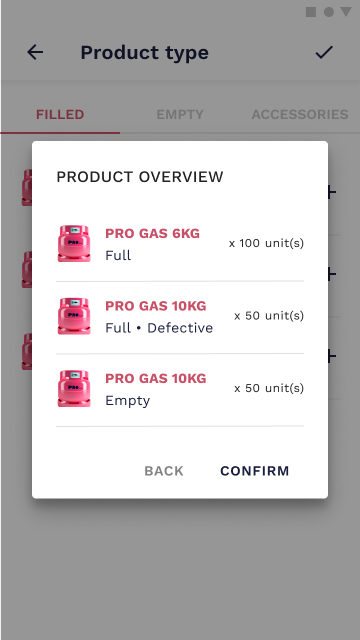
A trip summary is then displayed to help you visualize all the information before creating the trip. If everything is correct, just click on the Create Trip button and you’re done.

Video tutorial
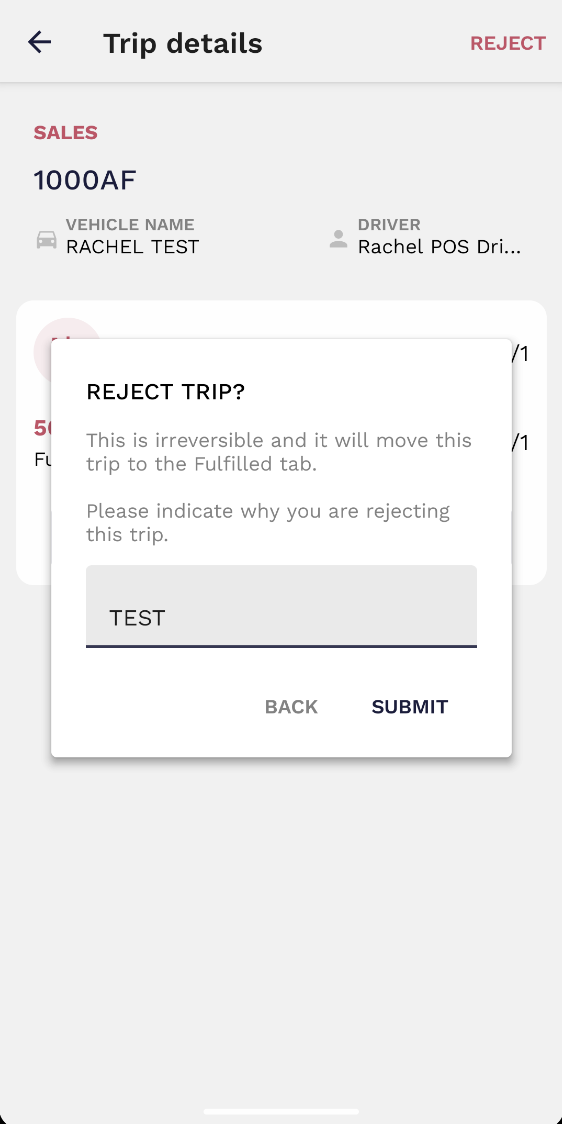
Reject a trip
POS Managers have the ability to reject a trip if there’s a valid reason for that. In order to do that, all you need to do is select a trip and open the details page. A button to reject the trip will be displayed in the upper right corner.
To reject a trip you need to indicate the reason you’re rejecting it. A brief explanation will do.
Video tutorial
3. Confirming and Signing Loading (+Scanning)
When a trip is created, both the container coordinator and the POS driver must confirm and sign loading. However, as the container coordinator, you must scan all gas cylinders during the loading stage (a scanner can participate in this activity and operate alongside you at the same time).
To perform product scanning, you need to follow the subsequent steps.
Loading
During the loading period, the container coordinator is responsible for scanning the cylinders that are about to be loaded. The scanner can also help during this step and work together with the container coordinator. In order to complete the scanning process and to confirm and sign the loading the driver must follow the next steps:
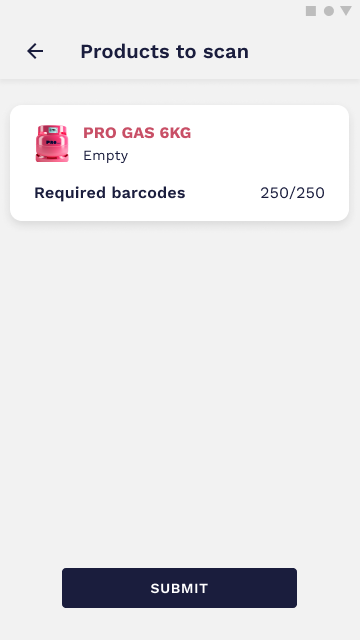
1. Go to the upcoming trip and click on 'scan'.
2. Point the device's camera to the barcode and scan. Should the barcode be unscannable, you can choose the keyboard option and manually insert the serial number.
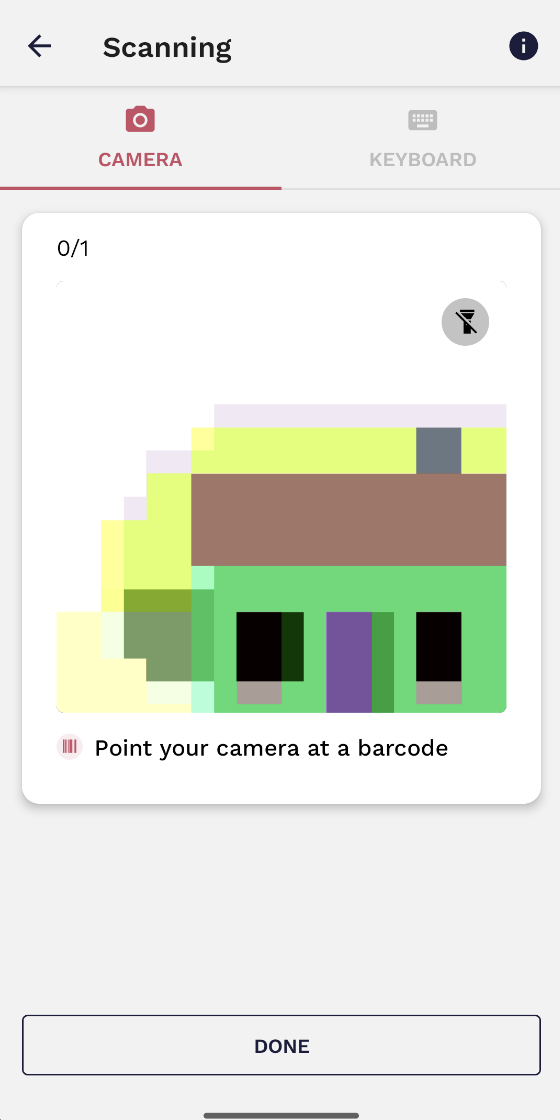
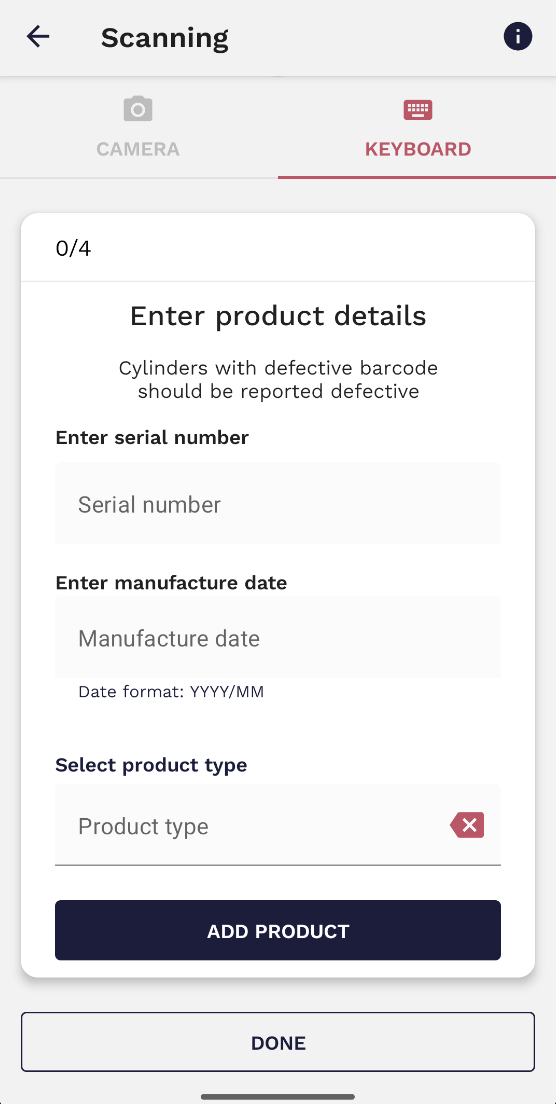
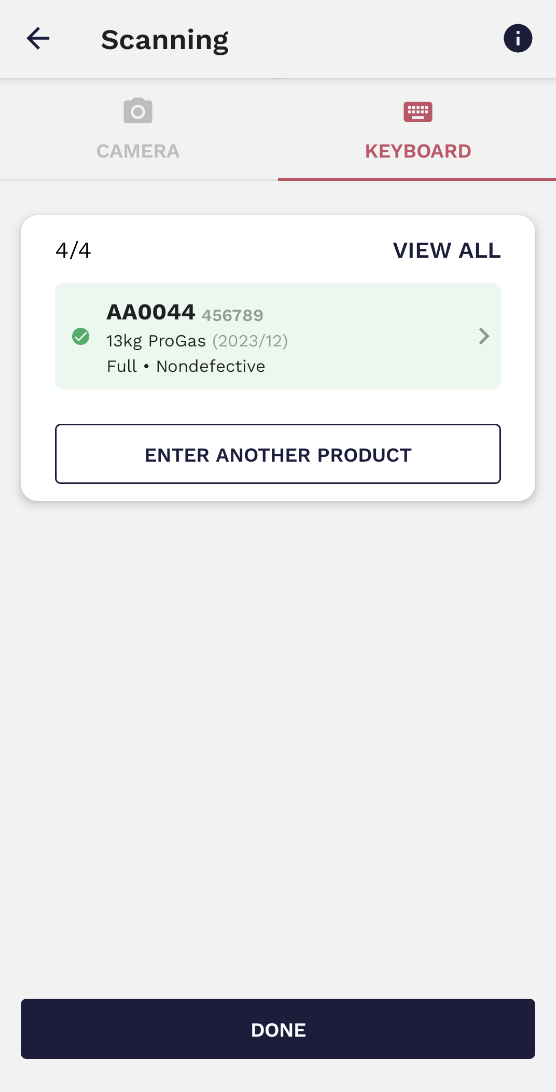
3. Add the product and continue to scan the rest of them until all the cylinders have been scanned (accessories do not have to be scanned).
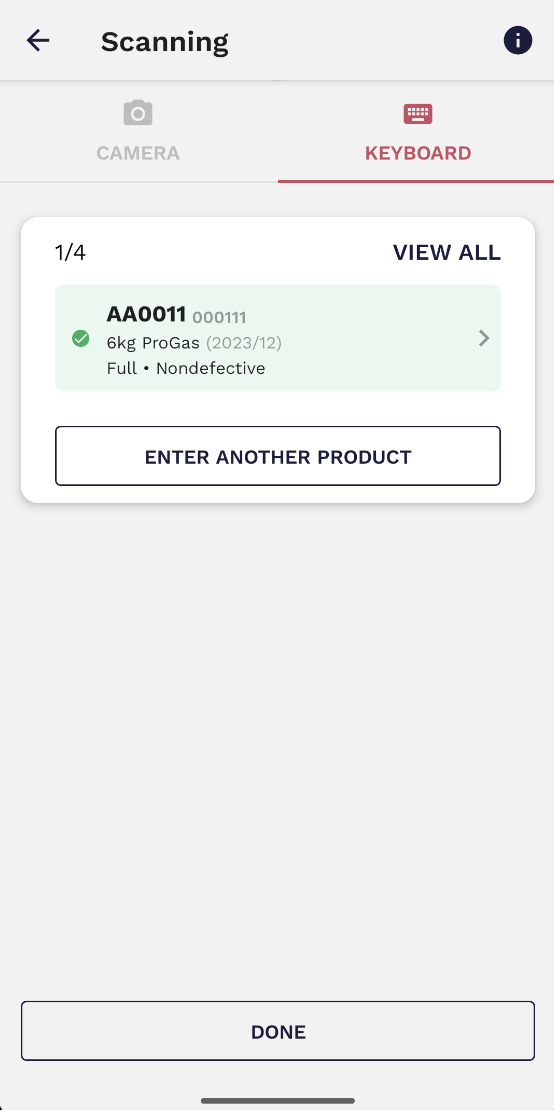
4. When all the products have been scanned, click 'done'.
5. Click on 'confirm and sign loading' to complete the process. A window will then pop up where you must confirm loading.
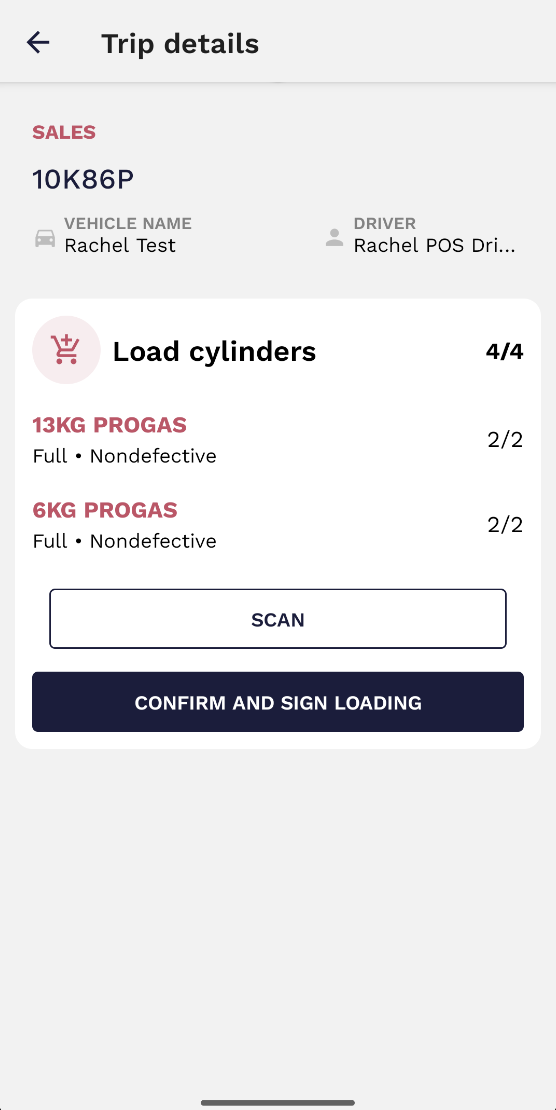
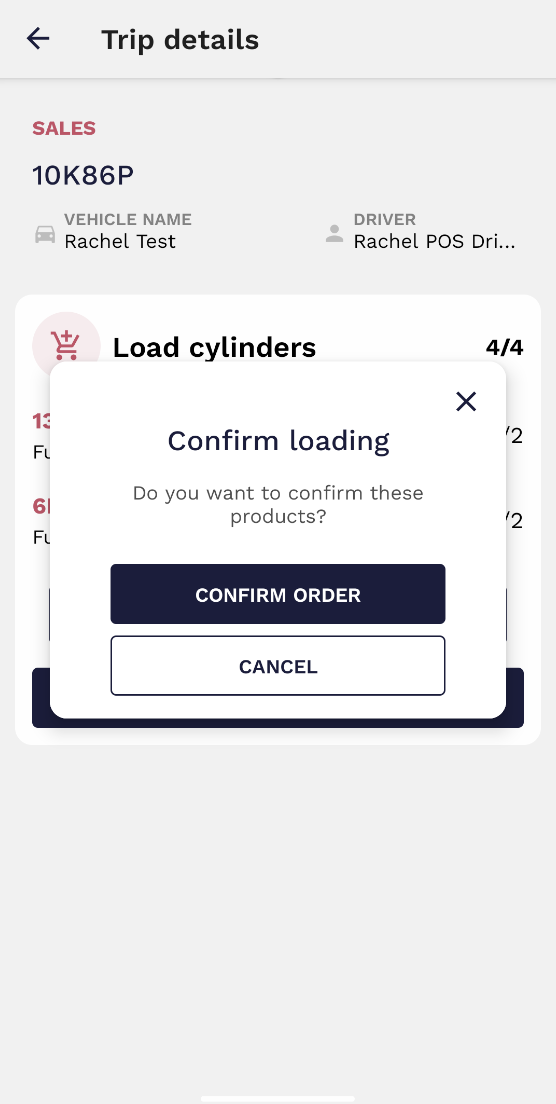
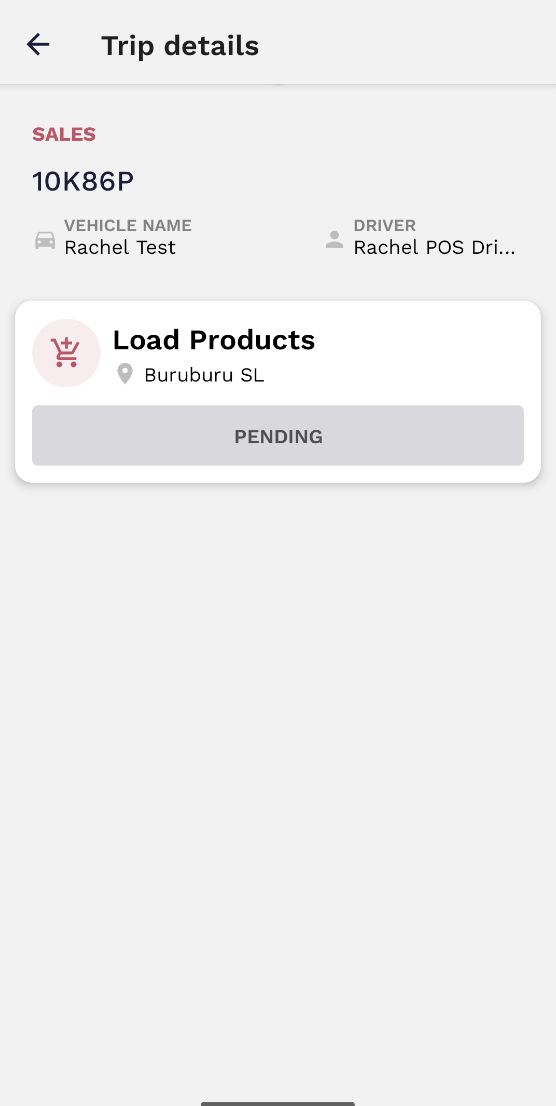
The order will remain in a pending state until the driver confirm and signs the loading from his device.
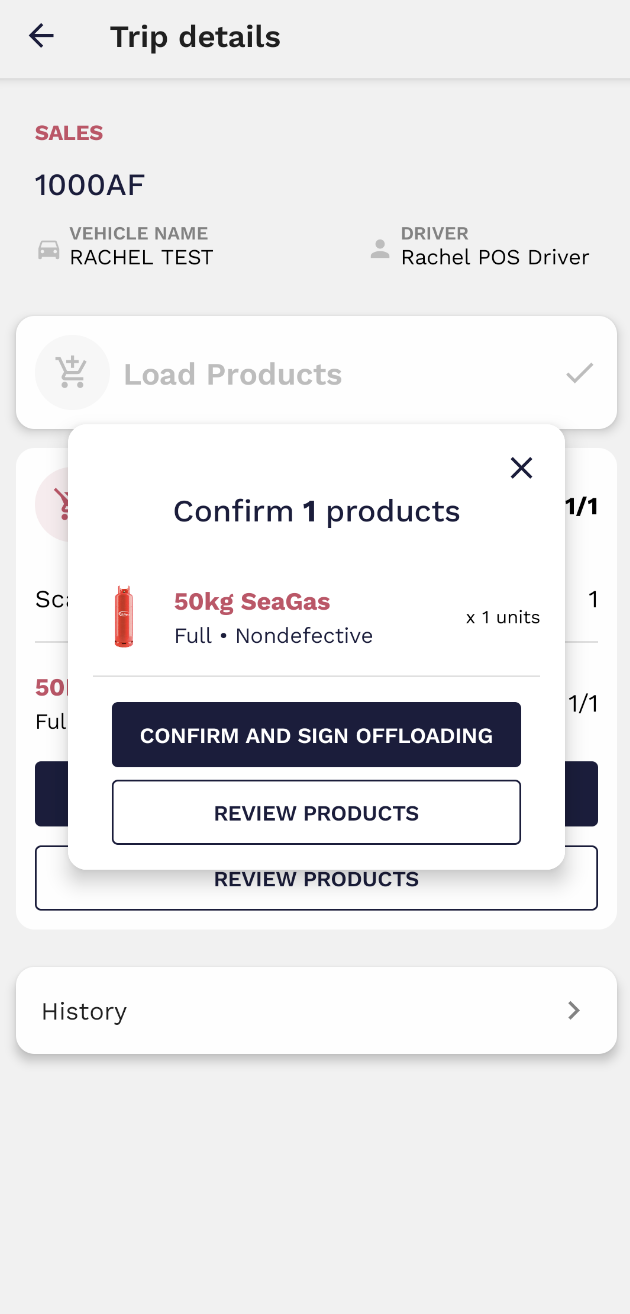
4. Confirming and Signing OffLoading (+Scanning)
During the offloading stage, the container coordinator is not required to scan the cylinders in the vehicle, this is a step that the POS driver must follow. However, the container coordinator must confirm and sign the offload once the POS driver has scanned the products. The container coordinator has the possibility of viewing all barcodes/serial numbers related to the cylinders that are being offloaded.
The trip which is being offloaded will be available in the trips tab under the 'active' section'. This will present two choices: 'confirm and sign offloading' or 'review products'.
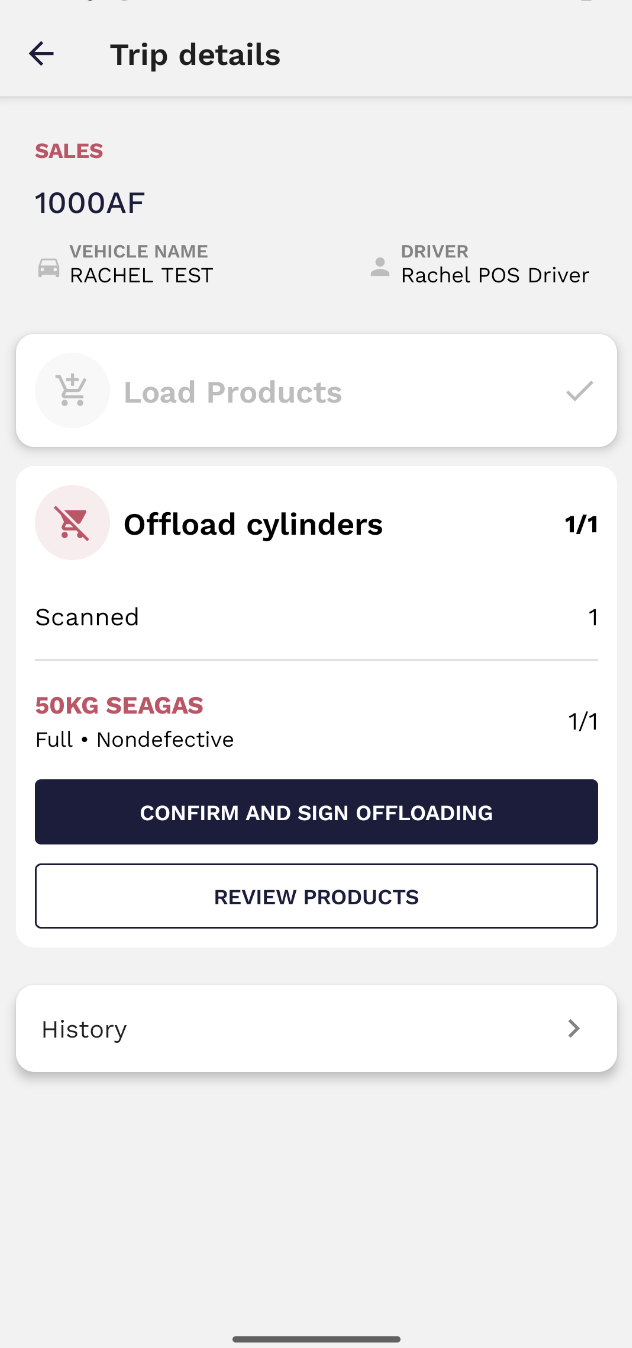
Click on 'review products' to view a list of all scanned products along with the corresponding barcodes and serial numbers.

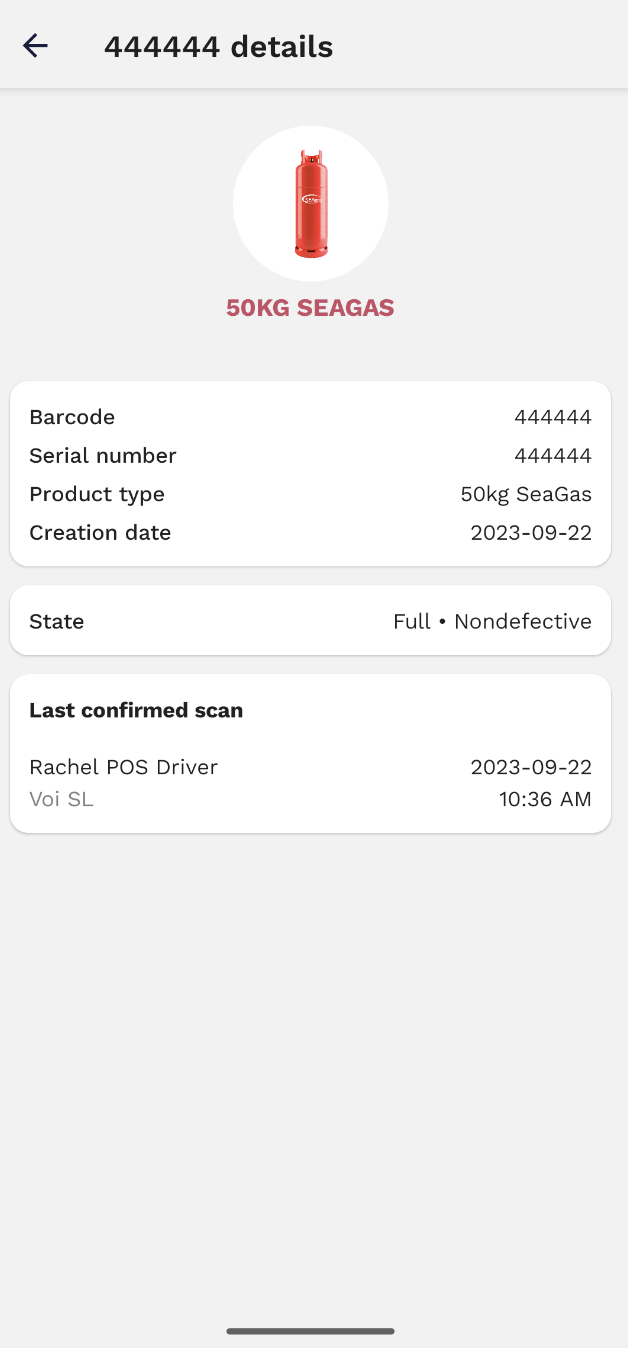
If you would like to view more detailed information of a particular cylinder, select it and a page containing all relevant details will be displayed.
Click 'Confirm and Sign Offloading' to complete the offload procedure. A notification will appear, requiring you to confirm the offloading.
Another notable function is the ability to access all orders associated with the specific trip by selecting 'history'.
5. Closing stock
The container coordinator is also responsible for closing the container's stock. To do so select 'Close Stock' in the stock tab.
To select the available products, you will have access to a product catalog and choose the amount for each one of them. All inputs should be filled even if the amount is 0.
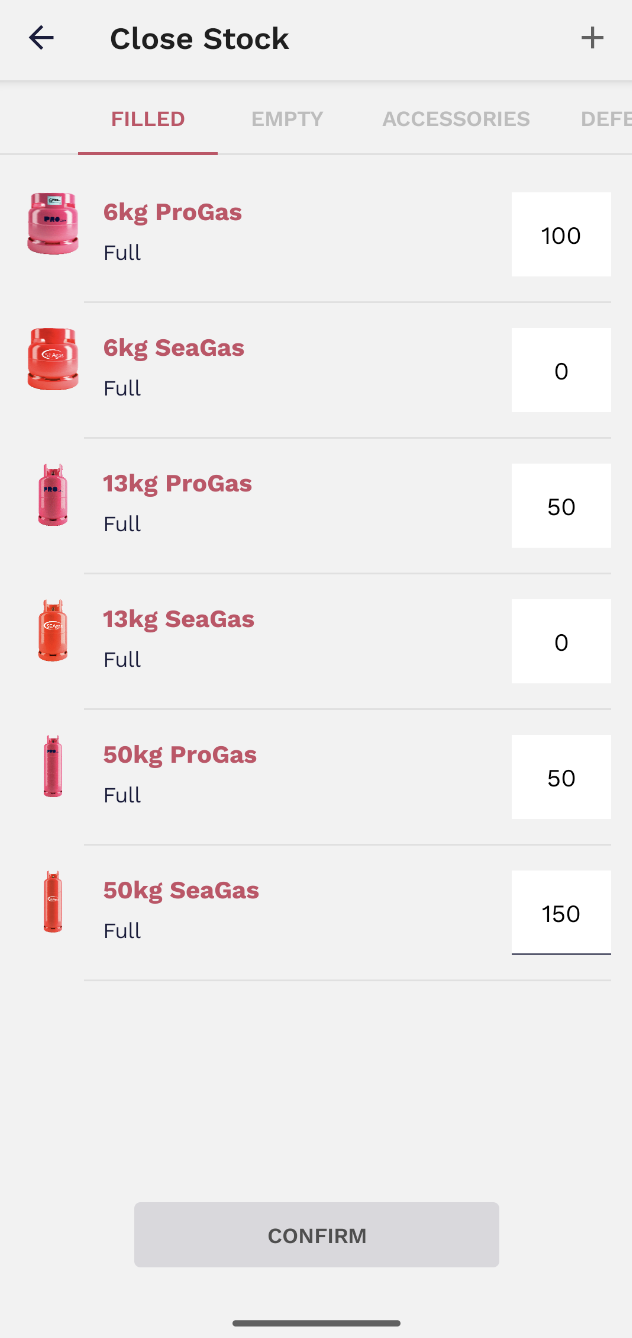
The 'confirm' button will remain greyed out until all the quantities for each state/product (full, empty, accessories, suspected defective and defective) are inputted.
Once confirmed, the remaining actions (report defective and filling orders) will be greyed out. The only available action would be to open the stock.