# Assignments

# Vehicle Assignment

#### Vehicle Assignment

<div class="pointer-container" id="bkmrk-%C2%A0"><div class="pointer anim is-page-editable"><svg class="svg-icon" data-icon="link" role="presentation" viewbox="0 0 24 24" xmlns="http://www.w3.org/2000/svg"></svg><div class="input-group inline block"> <button class="button outline icon" data-clipboard-target="#pointer-url" title="Copy Link" type="button"><svg class="svg-icon" data-icon="copy" role="presentation" viewbox="0 0 24 24" xmlns="http://www.w3.org/2000/svg"></svg></button></div><svg class="svg-icon" data-icon="edit" role="presentation" viewbox="0 0 24 24" xmlns="http://www.w3.org/2000/svg"></svg></div></div>
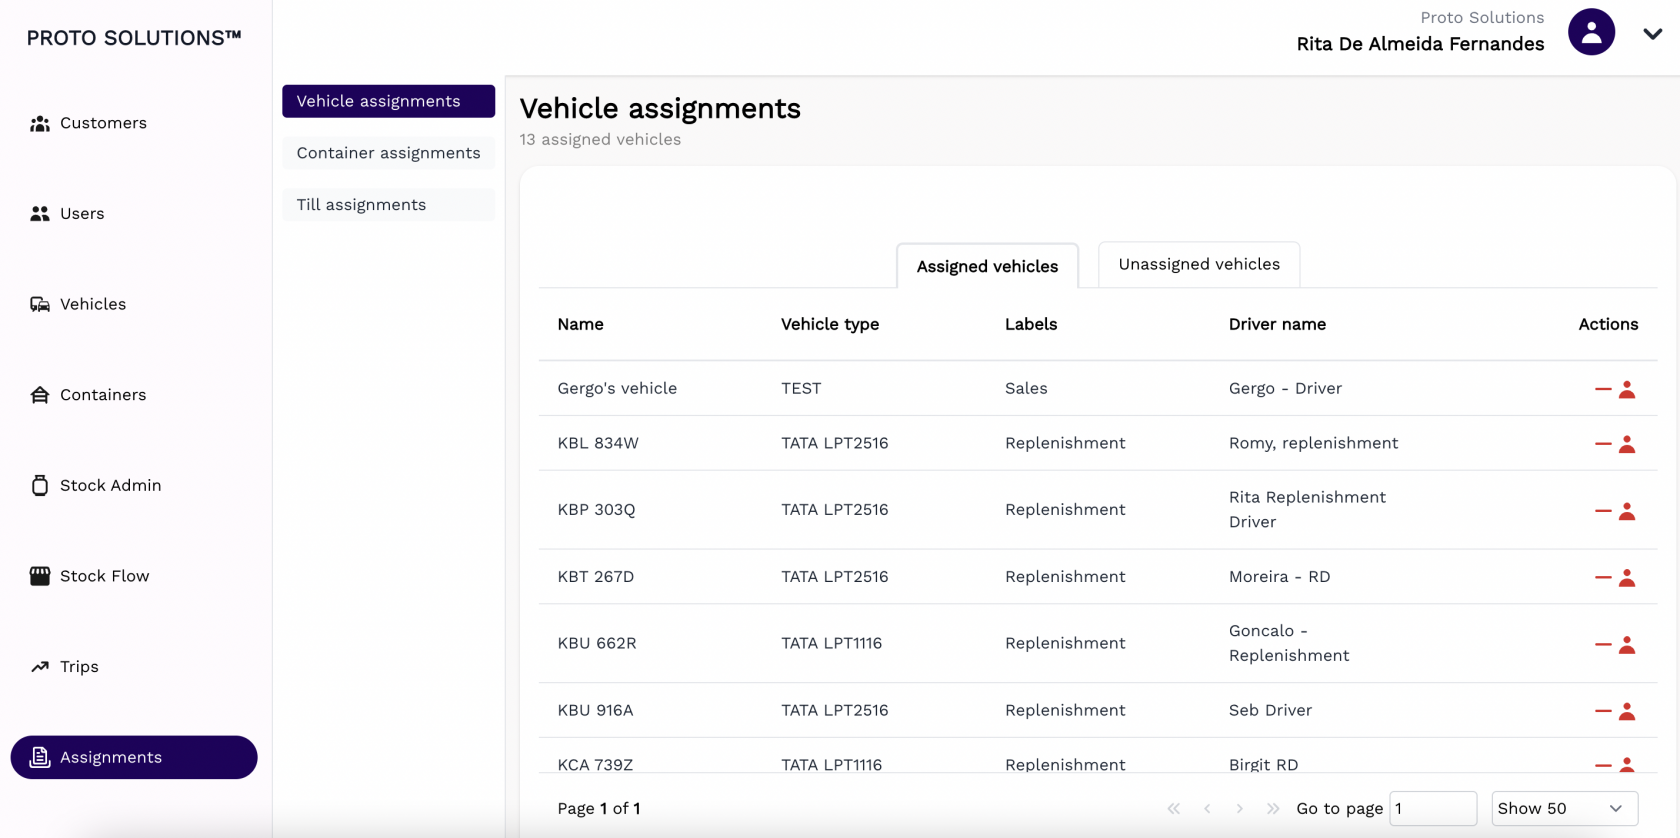
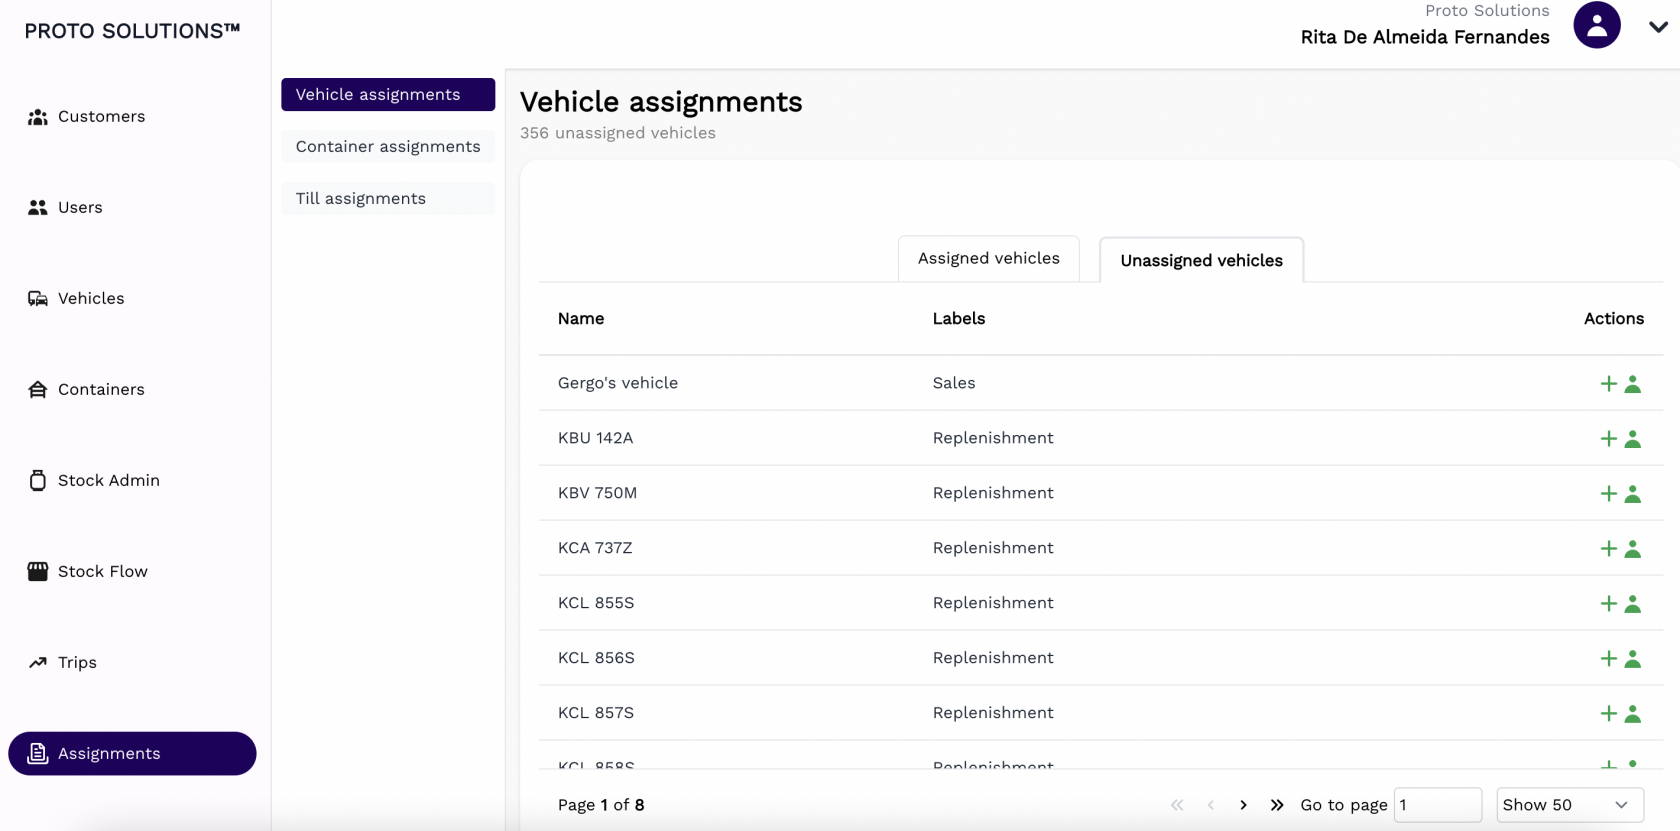
You can click on **Vehicle assignments** to be able to assign or unassign vehicles to drivers. In this tab, you are also able to see the vehicles that are already assigned to a driver in the **Assigned vehicle** tab and all the vehicles that are available to be assigned to available drivers in the **Unassigned vehicles** tab.

[![image.png](https://wiki.circl.services/uploads/images/gallery/2022-09/scaled-1680-/rHeimage.png)](https://wiki.circl.services/uploads/images/gallery/2022-09/rHeimage.png)

[![image.png](https://wiki.circl.services/uploads/images/gallery/2022-09/scaled-1680-/PKIimage.png)](https://wiki.circl.services/uploads/images/gallery/2022-09/PKIimage.png)

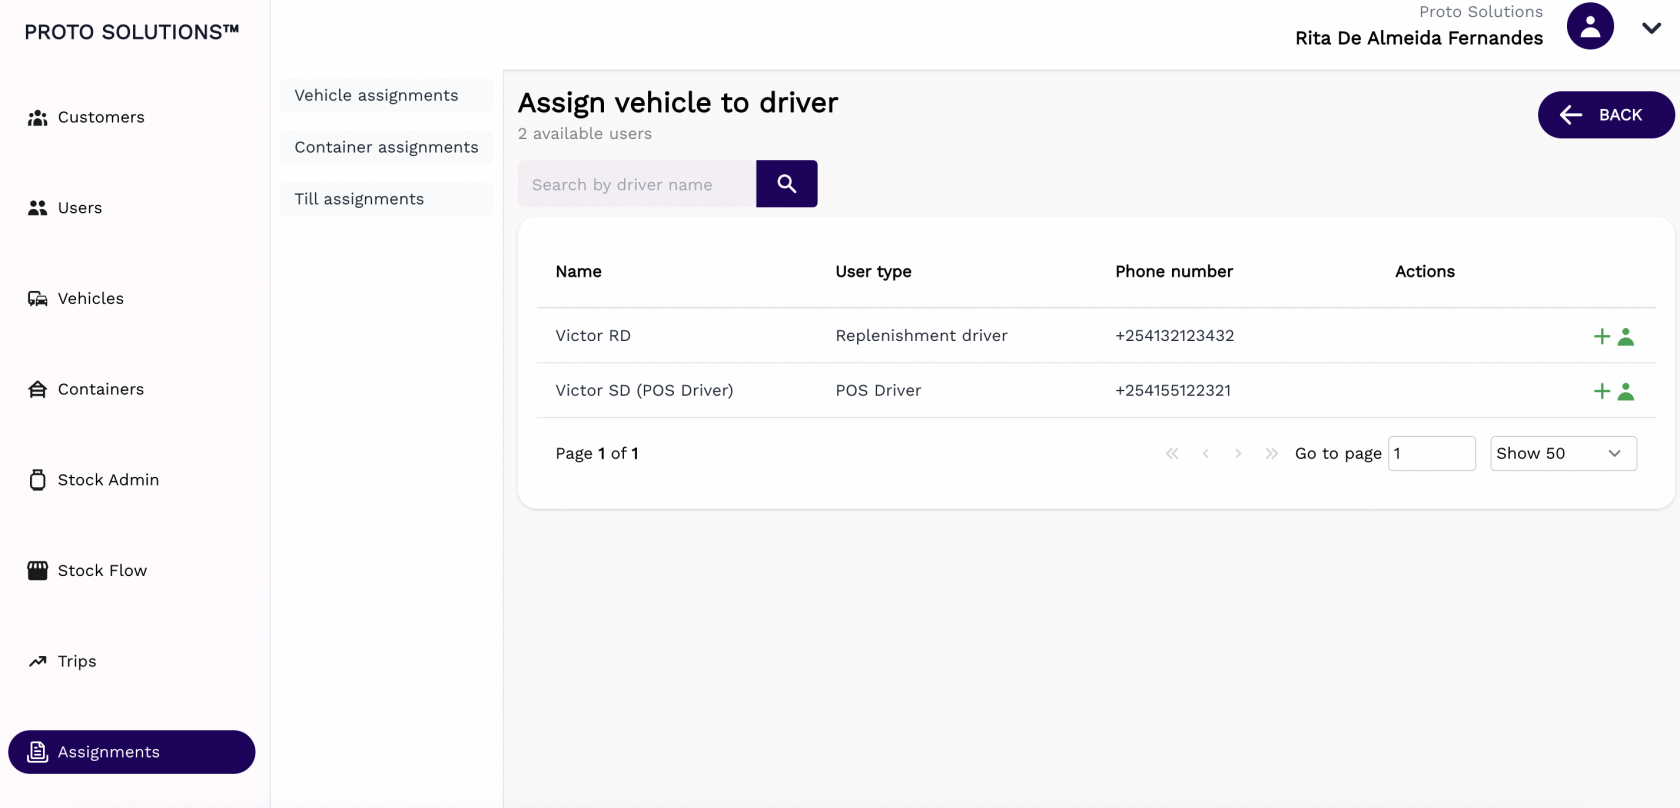
To unassign a driver to a vehicle you just need to click on the red button on the **Actions**. To assign one driver to a vehicle just click on the green button on the **Actions** and a list of available drivers will appear, after selecting one, click on the green button on the **Actions,** and the assignment is completed. After this, you will be redirected to the **Assigned vehicles** tab again.

[![image.png](https://wiki.circl.services/uploads/images/gallery/2022-09/scaled-1680-/RGmimage.png)](https://wiki.circl.services/uploads/images/gallery/2022-09/RGmimage.png)

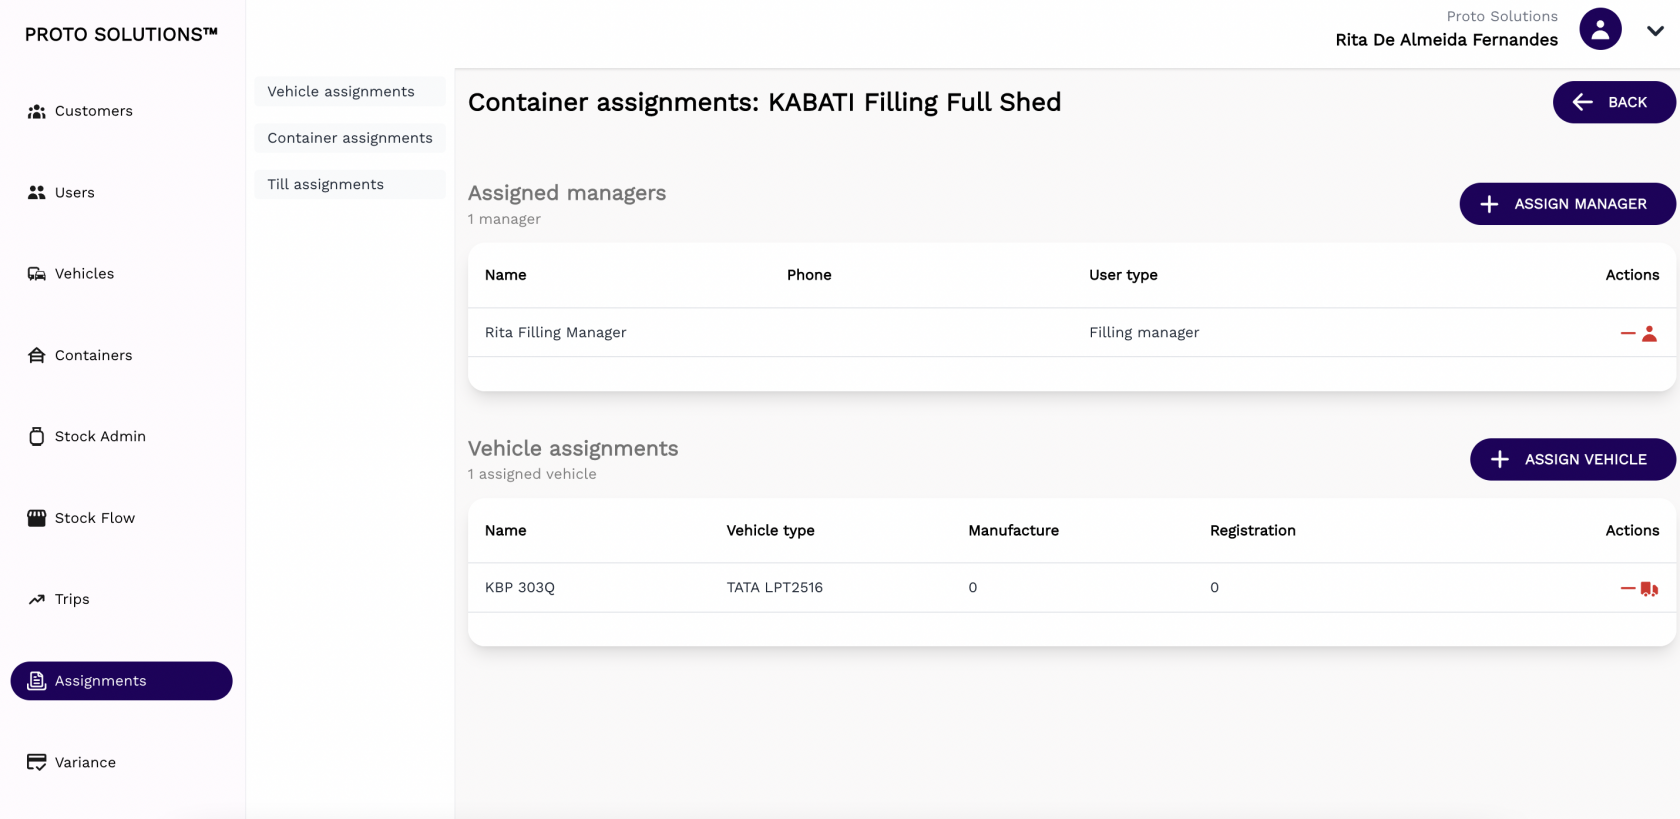
# Container Assignments

#### Container Assignment

<div class="pointer-container" id="bkmrk-%C2%A0"><div class="pointer anim is-page-editable"><svg class="svg-icon" data-icon="link" role="presentation" viewbox="0 0 24 24" xmlns="http://www.w3.org/2000/svg"></svg><div class="input-group inline block"> <button class="button outline icon" data-clipboard-target="#pointer-url" title="Copy Link" type="button"><svg class="svg-icon" data-icon="copy" role="presentation" viewbox="0 0 24 24" xmlns="http://www.w3.org/2000/svg"></svg></button></div><svg class="svg-icon" data-icon="edit" role="presentation" viewbox="0 0 24 24" xmlns="http://www.w3.org/2000/svg"></svg></div></div>
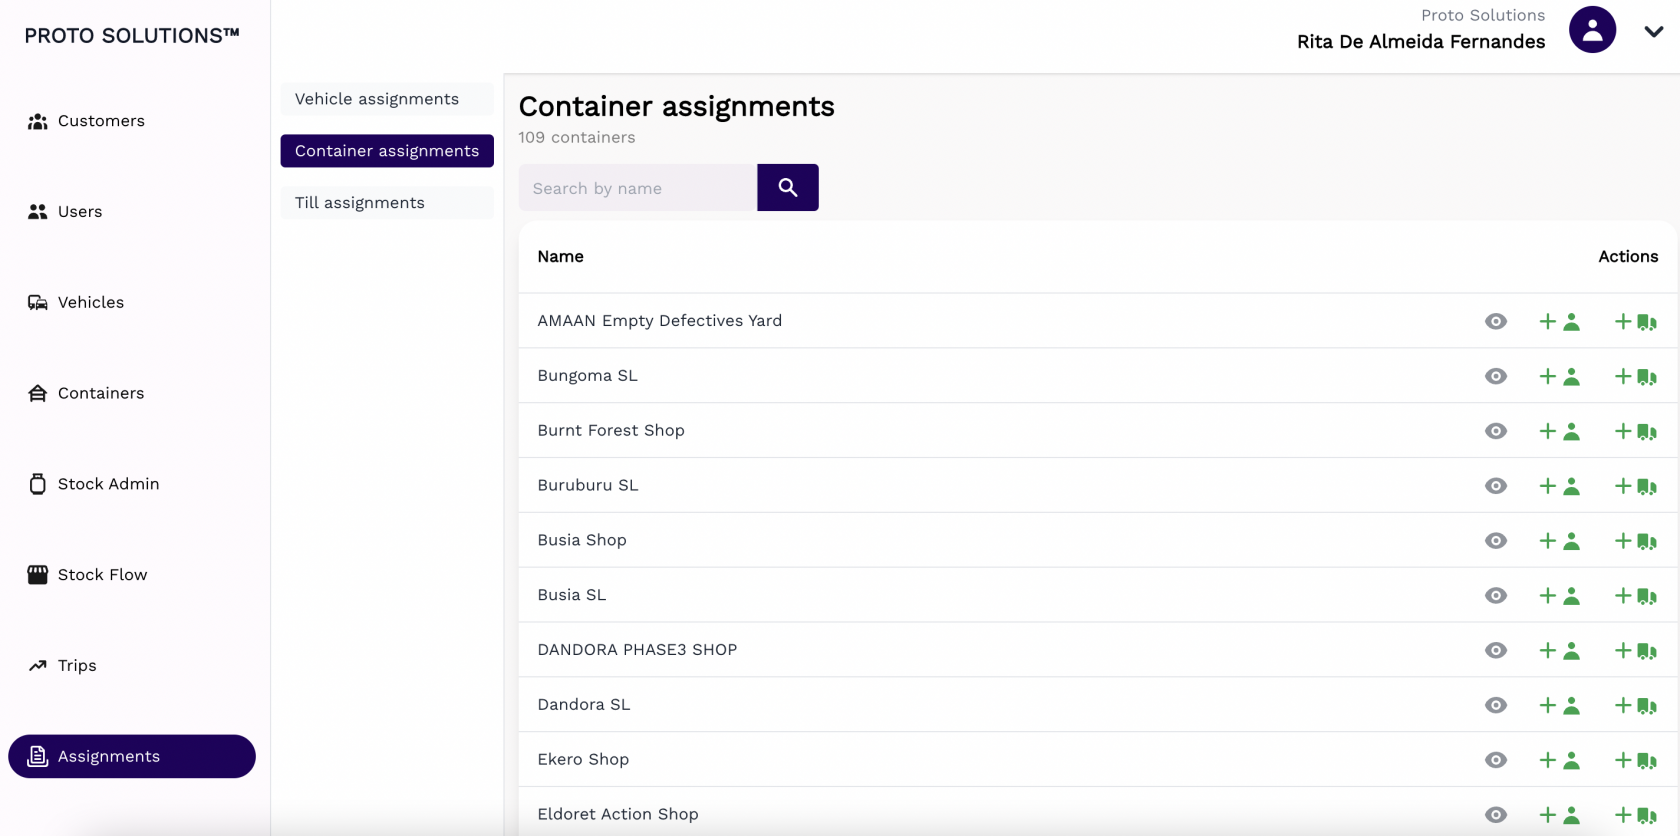
You can click on the **Container assignments** to be able to assign any container in the system to users (Container, Filling and Defective Yard Managers and Loaders) and vehicles and respective drivers. In this **Actions** buttons can also choose the display view or assigned users and vehicles to the container.

[![image.png](https://wiki.circl.services/uploads/images/gallery/2022-09/scaled-1680-/V62image.png)](https://wiki.circl.services/uploads/images/gallery/2022-09/V62image.png)

If you click in the **Display** actions button for one container you can see if that container has assignments made, unassigned them if needed and reassigned them again. A container can only have one manager assigned but it can have multiple vehicles assigned.

[![image.png](https://wiki.circl.services/uploads/images/gallery/2022-09/scaled-1680-/pxtimage.png)](https://wiki.circl.services/uploads/images/gallery/2022-09/pxtimage.png)
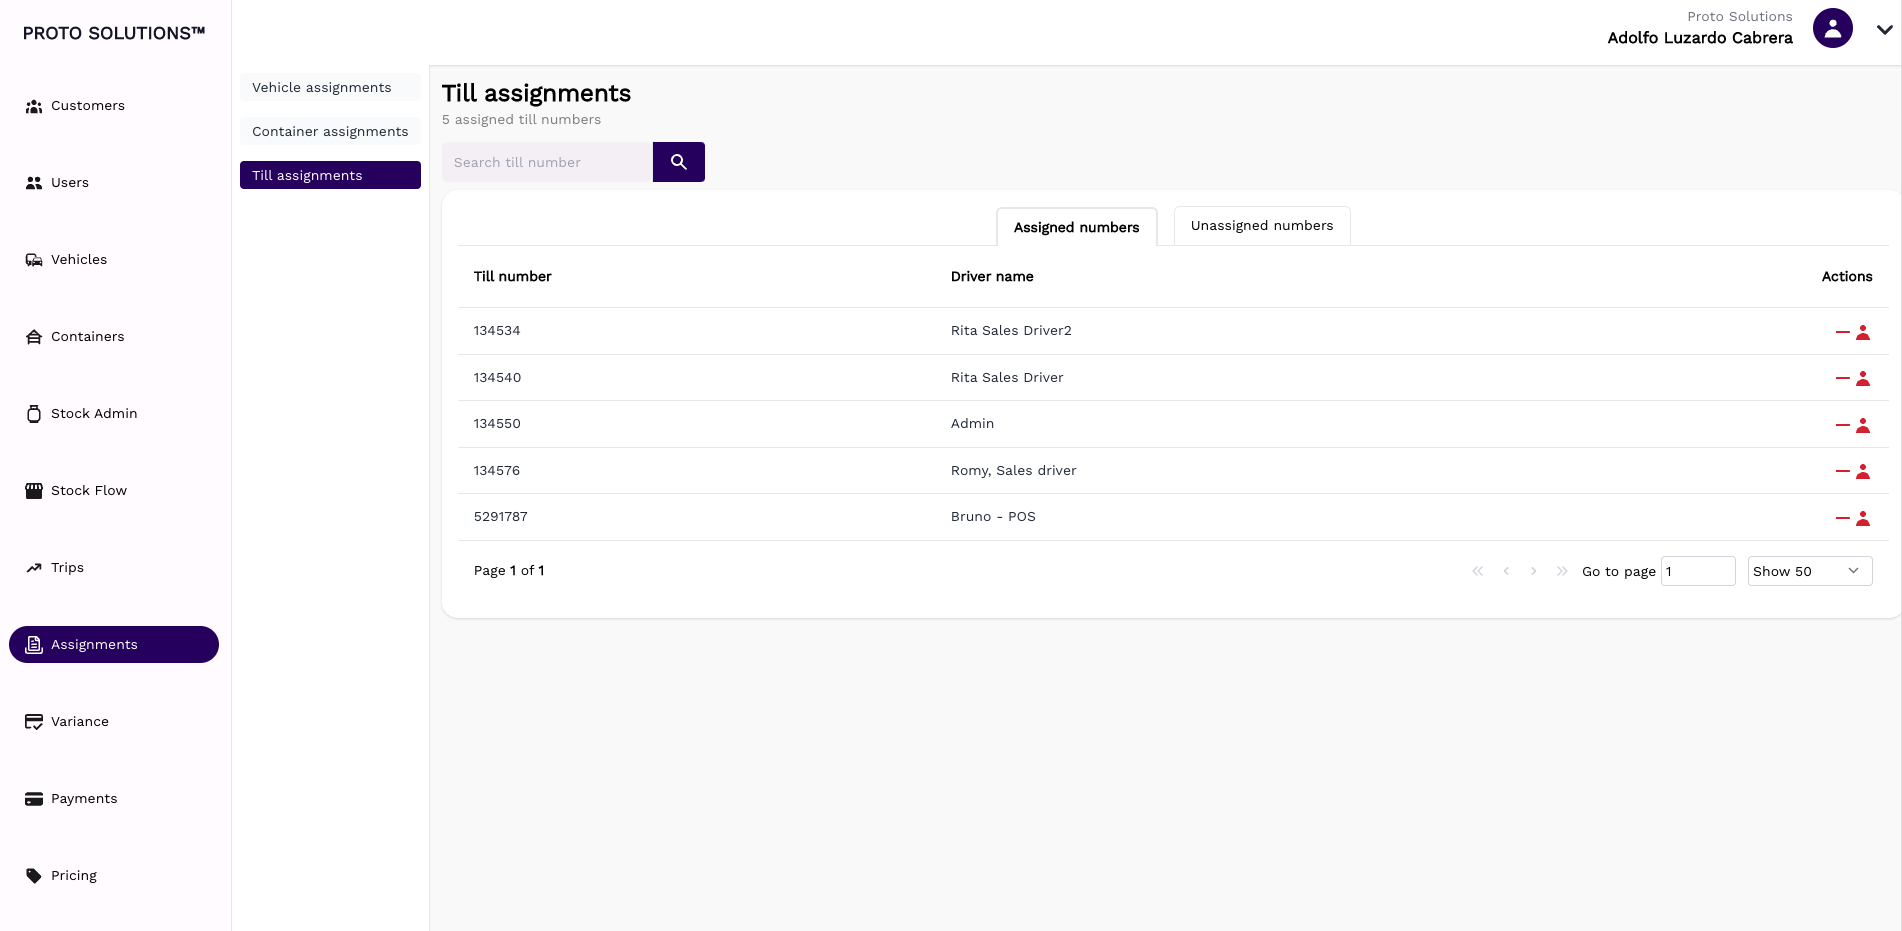
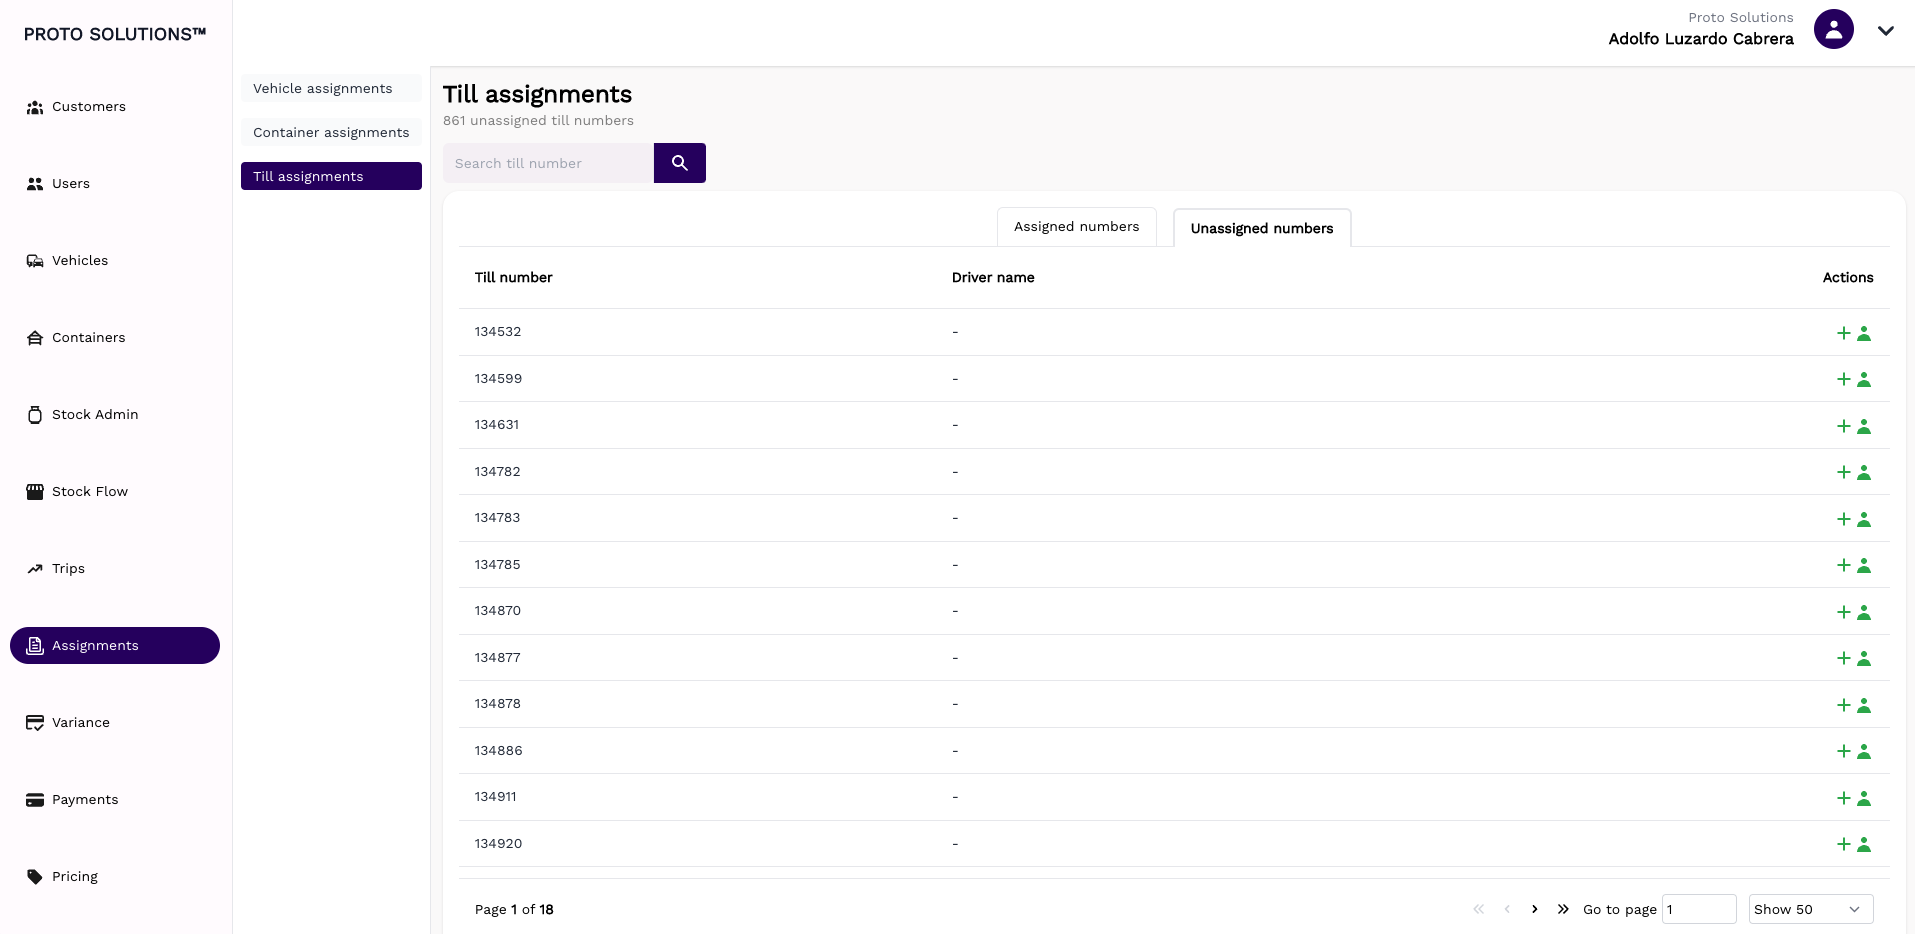
# Till assignments

#### Till Assignment

<div class="pointer-container" id="bkmrk-%C2%A0"><div class="pointer anim is-page-editable"><svg class="svg-icon" data-icon="link" role="presentation" viewbox="0 0 24 24" xmlns="http://www.w3.org/2000/svg"></svg><div class="input-group inline block"> <button class="button outline icon" data-clipboard-target="#pointer-url" title="Copy Link" type="button"><svg class="svg-icon" data-icon="copy" role="presentation" viewbox="0 0 24 24" xmlns="http://www.w3.org/2000/svg"></svg></button></div><svg class="svg-icon" data-icon="edit" role="presentation" viewbox="0 0 24 24" xmlns="http://www.w3.org/2000/svg"></svg></div></div>You can click on **Till assignments** to be able to assign or unassign tills to users. In this tab, you are also able to see the tills that are already assigned to a user in the **Assigned till** tab and all the tills that are available to be assigned to available users in the **Unassigned tills** tab.

[![Screenshot 2022-12-29 at 14.02.24.png](https://wiki.circl.services/uploads/images/gallery/2022-12/scaled-1680-/screenshot-2022-12-29-at-14-02-24.png)](https://wiki.circl.services/uploads/images/gallery/2022-12/screenshot-2022-12-29-at-14-02-24.png)

[![Screenshot 2022-12-29 at 14.07.04.png](https://wiki.circl.services/uploads/images/gallery/2022-12/scaled-1680-/screenshot-2022-12-29-at-14-07-04.png)](https://wiki.circl.services/uploads/images/gallery/2022-12/screenshot-2022-12-29-at-14-07-04.png)

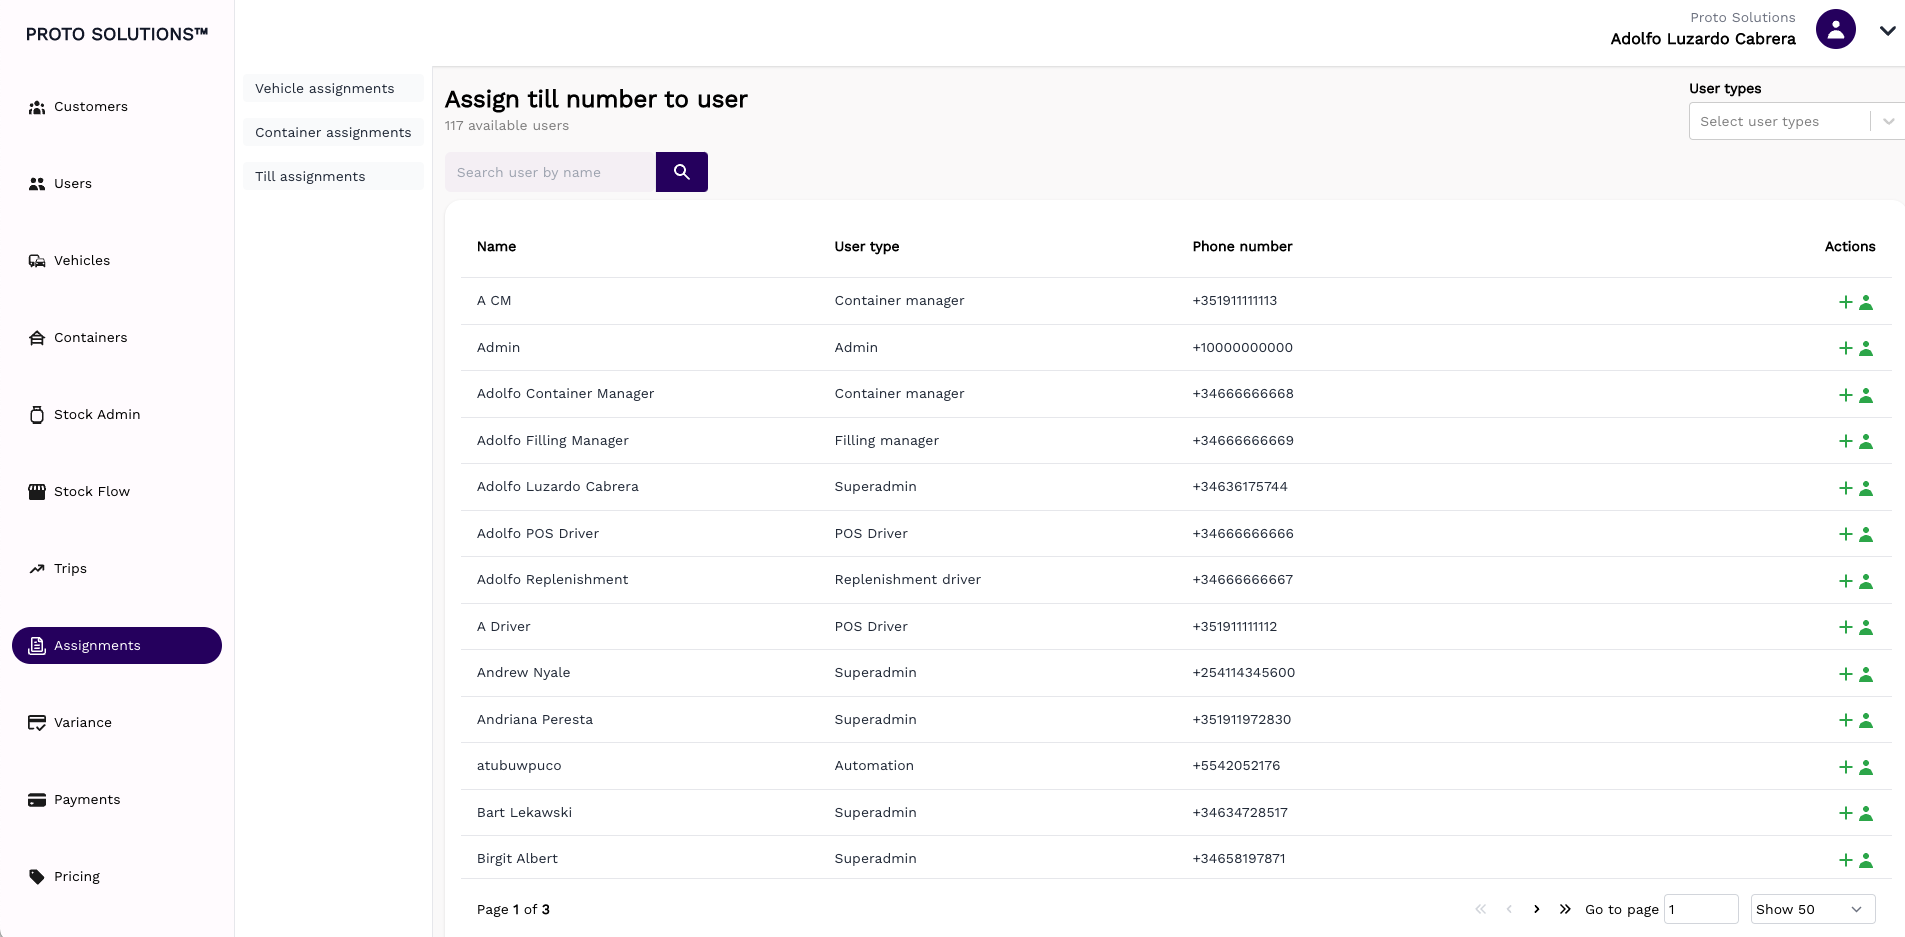
To unassign a till to a user you just need to click on the red button on the **Actions**. To assign one user to a till just click on the green button on the **Actions** and a list of available users will appear, after selecting one, click on the green button on the **Actions,** and the assignment is completed. After this, you will be redirected to the **Assigned tills** tab again.

[![Screenshot 2022-12-29 at 14.09.03.png](https://wiki.circl.services/uploads/images/gallery/2022-12/scaled-1680-/screenshot-2022-12-29-at-14-09-03.png)](https://wiki.circl.services/uploads/images/gallery/2022-12/screenshot-2022-12-29-at-14-09-03.png)